
The bright orange of pumpkin spice and the deep, dark chocolate of spooky treats signal that Halloween is on its way. When Halloween rolls around, the fun isn’t just in the costumes and decorations; it’s also about the spooky, creepy, and downright delicious food we create. This year, I wanted to put together a collection of 28 delicious Halloween food ideas that are not only festive and fun for kids and adults alike but also straightforward to make, even for a busy schedule. From easy finger foods to more elaborate themed desserts, there’s something here to spook up your party. We’re focusing on things that look great, taste amazing, and are perfect for sharing. These recipes bring a touch of magic and a whole lot of fun to your Halloween celebration, making it a memorable occasion for everyone. Get ready to impress your guests with these creative and tasty Halloween food ideas.
Spooky Spiderweb Brownies
These brownies are a classic for a reason, and the spiderweb decoration adds that perfect Halloween touch. They are rich, fudgy, and surprisingly simple to whip up. The contrast between the dark brownie and the white frosting web is visually striking, and the texture is dense and satisfying. They’re the kind of treat that disappears quickly at any gathering, making them a reliable hit for your Halloween food spread.
Making the Brownie Base
Preheat your oven to 350°F (175°C). Grease and flour an 8×8 inch baking pan, or line it with parchment paper for easy removal. In a medium bowl, melt 1/2 cup (1 stick) of unsalted butter. Once melted, stir in 1 cup of granulated sugar and 2 large eggs, one at a time, beating well after each addition. Mix in 1 teaspoon of vanilla extract. In a separate bowl, whisk together 2/3 cup of all-purpose flour, 1/3 cup of unsweetened cocoa powder, 1/2 teaspoon of baking soda, and 1/4 teaspoon of salt. Gradually add the dry ingredients to the wet ingredients, mixing until just combined. Do not overmix, as this can lead to tough brownies. Pour the batter into the prepared baking pan and spread evenly.
Baking the Brownies
Bake for 25-30 minutes, or until a toothpick inserted into the center comes out with moist crumbs attached. Be careful not to overbake, or your brownies will be dry. Let the brownies cool completely in the pan on a wire rack. This cooling step is important for achieving a fudgy texture and for making the frosting easier to apply.
Creating the Spiderweb Frosting
While the brownies cool, prepare the spiderweb frosting. In a small bowl, beat 4 ounces of softened cream cheese with 1/4 cup of softened unsalted butter until smooth and creamy. Gradually beat in 1 cup of powdered sugar until fully incorporated. Add 1-2 tablespoons of milk, if needed, to reach a spreadable consistency. Divide the frosting into two portions: one larger portion for the base, and a much smaller portion (about 1-2 tablespoons) that you will color grey or black for the spiderweb. Mix a tiny amount of black or cocoa powder into the smaller portion until you achieve a dark grey or black color. Once the brownies are completely cool, spread the larger portion of white frosting evenly over the top. Then, spoon the dark frosting into a piping bag or a small zip-top bag with a tiny corner snipped off. Pipe concentric circles onto the white frosting, starting from the center and working outwards. Use a toothpick or a skewer to drag lines from the center outwards through the dark circles, creating the spiderweb effect. It’s a simple technique that looks quite impressive.
28 Delicious 🤤 Halloween Food Ideas for Your Celebration
When Halloween rolls around, the fun isn’t just in the costumes and decorations; it’s also about the spooky, creepy, and downright delicious food we create. This year, I wanted to put together a collection of recipes that are not only festive and fun for kids and adults alike but also straightforward to make, even for a busy schedule. From easy finger foods to more elaborate themed desserts, there’s something here to spook up your party. We’re focusing on things that look great, taste amazing, and are perfect for sharing.
Ingredients:
- All-purpose flour
- Granulated sugar
- Brown sugar
- Unsalted butter
- Eggs
- Vanilla extract
- Baking soda
- Salt
- Cocoa powder
- Cream cheese
- Powdered sugar
- Milk
- Candy eyeballs
- Black licorice laces
- Green food coloring
- Orange food coloring
- Red food coloring
- Chocolate chips
- Pretzels
- Popcorn kernels
- Cooking oil
- Marshmallows
- Graham crackers
- Bananas
- Grapes
- Hot dogs
- Hot dog buns
- Mustard
- Ketchup
- Puff pastry
- Pumpkin puree
- Spices (cinnamon, nutmeg, ginger)
- Heavy cream
- Shredded cheese
- Olives
- Red bell pepper
- Celery
- Peanut butter
- Chocolate syrup
- White chocolate chips
- Nuts (optional, for garnish)
Spooky Spiderweb Brownies
These brownies are a classic for a reason, and the spiderweb decoration adds that perfect Halloween touch. They are rich, fudgy, and surprisingly simple to whip up.
Making the Brownie Base
- Preheat your oven to 350°F (175°C). Grease and flour an 8×8 inch baking pan, or line it with parchment paper for easy removal. This step is important to prevent sticking and ensure your brownies come out cleanly.
- In a medium bowl, whisk together 1 cup of all-purpose flour, 1/2 cup of granulated sugar, 1/4 cup of cocoa powder, and 1/4 teaspoon of baking soda. Make sure there are no lumps of cocoa powder.
- In a separate, larger bowl, cream together 1/2 cup of softened unsalted butter with 1 cup of brown sugar until light and fluffy. This creaming process incorporates air, which helps with the texture of the brownies.
- Beat in 2 large eggs, one at a time, mixing well after each addition. Stir in 1 teaspoon of vanilla extract. The eggs bind the ingredients and add richness.
- Gradually add the dry ingredients to the wet ingredients, mixing until just combined. Do not overmix, as this can lead to tough brownies. Fold in 1/2 cup of chocolate chips if you like extra chocolatey goodness.
- Spread the batter evenly into the prepared baking pan. Bake for 25-30 minutes, or until a toothpick inserted into the center comes out with moist crumbs attached. Avoid overbaking, or they will be dry.
Creating the Spiderweb Design
- While the brownies are cooling, prepare the “spiderweb” icing. In a small bowl, mix 4 ounces of softened cream cheese with 1/4 cup of powdered sugar and 1-2 tablespoons of milk until smooth and spreadable. You want a consistency that’s not too thin, or it will run everywhere, but not too thick to pipe.
- Once the brownies are completely cool, spread a thin, even layer of the cream cheese frosting over the entire surface. This is your base for the spiderweb.
- Now for the spooky part: grab some black licorice laces. Melt them gently or finely chop them until they are pliable enough to work with. Alternatively, you can mix a tiny bit of black food coloring into a small portion of the cream cheese frosting. For this specific design, we’ll use the licorice.
- Place thin strands of the licorice in concentric circles on top of the cream cheese frosting, starting from the center and working outwards. You’ll want about 4-5 rings of licorice.
- Use a toothpick or a skewer to gently drag lines from the center outwards through the licorice rings. This creates the classic spiderweb pattern. Dragging from the outside in will also create a similar effect. Let the frosting set slightly before slicing.
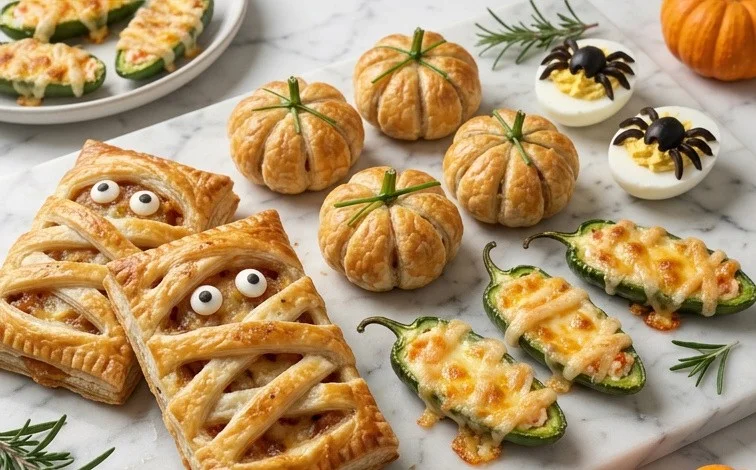
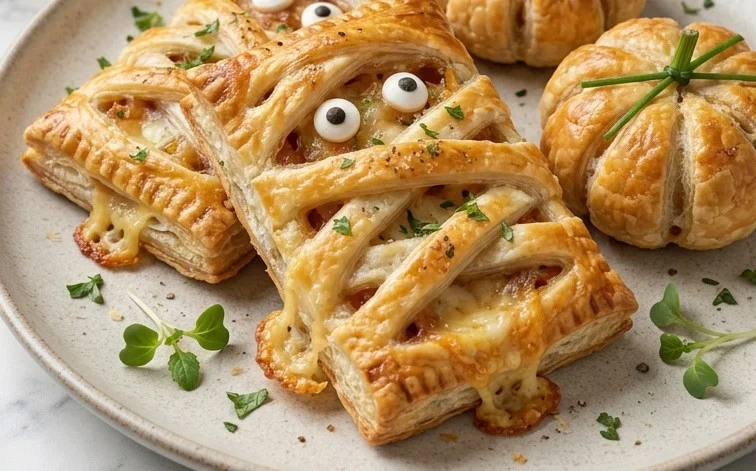
Mummy Hot Dogs
These are always a huge hit with kids and are incredibly easy to make. They look so cute peeking out of their pastry bandages.
Preparing the Mummy Dogs
- Start with about 10-12 good quality hot dogs and a package of puff pastry. Make sure your puff pastry is thawed according to package directions.
- Cut each sheet of puff pastry into thin strips, about 1/4 inch wide. These will be your mummy bandages. You’ll need enough strips to wrap around each hot dog.
- Take a hot dog and begin wrapping it with a puff pastry strip, leaving a small gap at the top for the “face.” Overlap the strips slightly to ensure full coverage, mimicking bandages. You can crisscross the strips or wrap them in a spiral pattern.
- Place the wrapped hot dogs on a baking sheet lined with parchment paper. Brush the tops lightly with a bit of milk or an egg wash for a golden-brown finish.
- Bake in a preheated oven at 400°F (200°C) for 15-20 minutes, or until the puff pastry is puffed up and golden brown.
- Once they are out of the oven and slightly cooled, use small dabs of mustard or ketchup to create eyes. Tiny dots are all you need to bring your mummies to life. Serve warm.
Spooky Ghost Pizzas
Transforming mini pizzas into ghosts is a fun and tasty activity that everyone can participate in.
Assembling Ghost Pizzas
- Gather your supplies: mini pizza crusts or English muffins split in half, pizza sauce, shredded mozzarella cheese, and some black olives for the eyes.
- Spread a thin layer of pizza sauce over each mini crust or muffin half, leaving a small border at the top.
- Generously sprinkle shredded mozzarella cheese over the sauce. The cheese will be the “body” of your ghost.
- Now, get creative with the cheese placement. You want to shape the cheese to resemble a ghost’s outline. You can gently push and pull the melted cheese towards the top of the crust to create a head shape.
- Once baked (follow the instructions on your pizza crust package for baking temperature and time, usually around 375-400°F or 190-200°C for 10-15 minutes), the cheese will melt and form your ghostly shapes.
- After baking, use small pieces of black olives to create eyes for your ghosts. Place two olive pieces near the top of the cheese “face.” Serve immediately for a warm and spooky treat.
Pumpkin Patch Pudding Cups
These are a refreshing and adorable dessert that’s as simple as they are charming.
Creating the Pudding Cups
- You’ll need vanilla pudding (store-bought or homemade), orange food coloring, whipped topping, and some green candy melts or frosting. For the “pumpkins,” you can also use small circus peanuts or candy corn in a pinch.
- Prepare your vanilla pudding according to package directions. Once it’s made, stir in orange food coloring until you achieve a vibrant pumpkin color. Let it chill until set.
- Spoon the orange pudding into clear cups or small mason jars. Fill them about two-thirds of the way full.
- Top the pudding with a generous swirl of whipped topping. This creates the fluffy cloud effect.
- Now, for the pumpkin detail: If using candy melts, melt a small amount of green candy melts according to package directions. Dip the end of a toothpick into the melted candy and draw a small stem on top of the whipped topping. Alternatively, you can use green frosting.
- If you want a more pronounced pumpkin shape, you can add a small piece of orange candy like a circus peanut or arrange candy corn to look like a mini pumpkin on top of the whipped cream. These are incredibly forgiving, so have fun with the presentation.
Conclusion:
These 28 delicious Halloween food ideas, starting with the wonderfully fudgy Spiderweb Brownies, offer something for every party guest. They are designed to be fun, festive, and manageable, even for those with packed schedules. The spiderweb brownies are a fantastic example of how simple ingredients and a little creativity can produce a showstopper. You can easily adapt the frosting color for different themes, or even add some chopped nuts for extra crunch. Serving these brownies alongside other spooky treats like “Ghostly Meringues” or “Monster Rice Krispie Treats” creates a full dessert table that’s sure to delight everyone. Don’t be afraid to get the kids involved in the decorating – they’ll love making the spiderwebs!
For variations, consider adding a touch of espresso powder to the brownie batter to deepen the chocolate flavor. You could also experiment with different extract flavors like almond or peppermint, though vanilla is classic. If you don’t have cream cheese, a simple buttercream frosting colored black and white can work, but the cream cheese frosting adds a pleasant tang that complements the rich chocolate.
This collection of Halloween food ideas ensures your celebration will be memorable, spooky, and most importantly, delicious. So gather your ingredients, put on some festive music, and enjoy the process of creating these hauntingly good treats. We hope these ideas inspire you to make this Halloween your most delicious one yet!
Frequently Asked Questions
Can I make the Spiderweb Brownies ahead of time?
Yes, you can bake the brownies a day in advance. Once cooled, store them in an airtight container at room temperature. It’s best to add the frosting and spiderweb design on the day you plan to serve them for the freshest appearance and taste, as the frosting can sometimes harden slightly if left out too long.
What can I use if I don’t have cocoa powder for the brownies?
If you don’t have cocoa powder, you can substitute it with an equal amount of all-purpose flour and increase the granulated sugar by about 2 tablespoons. The texture will be more cake-like and less intensely chocolatey, but it will still be a tasty brownie. You might also need to add a little more melted butter to achieve the right consistency.
Are there any nut-free options in the 28 Halloween Food Ideas?
Absolutely! Most of the 28 Halloween food ideas can be made nut-free. For the Spiderweb Brownies, simply omit the optional nuts for garnish. Always double-check the ingredients of any store-bought components, like candies or chocolate chips, to ensure they are processed in a nut-free facility if needed for severe allergies.
28 Delicious Halloween Food Ideas for Your Celebration
A collection of spooktacularly easy and fun Halloween food ideas perfect for any party or gathering, featuring a variety of sweet and savory treats.
Ingredients
-
1 cup all-purpose flour
-
1/2 cup granulated sugar
-
1/4 cup unsalted butter, softened
-
1 large egg
-
1 teaspoon vanilla extract
-
1/2 teaspoon baking powder
-
Pinch of salt
-
Food coloring (orange, black, green)
-
Chocolate chips
-
Candy corn
Instructions
-
Step 1
Preheat oven to 350°F (175°C). Line baking sheets with parchment paper. -
Step 2
In a large bowl, cream together the softened butter and sugar until light and fluffy. -
Step 3
Beat in the egg and vanilla extract until well combined. -
Step 4
In a separate bowl, whisk together the flour, baking powder, and salt. -
Step 5
Gradually add the dry ingredients to the wet ingredients, mixing until just combined. Divide the dough into portions and color each with desired Halloween colors. -
Step 6
Roll out the dough and cut into Halloween shapes using cookie cutters, or roll into balls and flatten. Decorate with chocolate chips and candy corn before baking. -
Step 7
Bake for 8-10 minutes, or until edges are lightly golden. Let cool on the baking sheets for a few minutes before transferring to a wire rack to cool completely.
Important Information
Nutrition Facts (Per Serving)
It is important to consider this information as approximate and not to use it as definitive health advice.
Allergy Information
Please check ingredients for potential allergens and consult a health professional if in doubt.



Leave a Comment