
Sugar wafer pencil cookies are such a fun and easy project, perfect for back-to-school treats or just a whimsical afternoon bake. They look so much like little pencils, you might even get a chuckle out of your coworkers or classmates! The beauty of this recipe is its simplicity. We’re using readily available sugar wafer cookies as our base, transforming them with just a few simple additions. The crisp, sweet wafer is the perfect canvas for creating these edible art supplies. They don’t require any complicated baking, just a bit of melting and decorating.
Ingredients:
- 20 sugar wafer cookies
- 10-ounce bag white chocolate melting wafers
- Red gel food coloring
- 20 mini chocolate chips
Preparing the Workspace and Melting the Chocolate
Before you start melting your chocolate, it’s a good idea to get your decorating station ready. You’ll want a parchment paper-lined baking sheet or a large piece of parchment paper laid out on your counter. This will give you a clean surface to place your finished pencil cookies on as they set. Now, let’s talk about melting the white chocolate. You have a couple of options here, and both are pretty straightforward. You can use a microwave or a double boiler. If you’re using the microwave, pour the white chocolate melting wafers into a microwave-safe bowl. Heat them in 30-second intervals, stirring well after each interval. Be patient; white chocolate can seize up if overheated, so it’s better to go slow and steady. You’re aiming for smooth, pourable chocolate. If you opt for a double boiler, fill the bottom pot with about an inch of water and bring it to a gentle simmer. Place the white chocolate in the top bowl, ensuring the bottom of the bowl doesn’t touch the water. Stir constantly until melted and smooth. Whichever method you choose, once the white chocolate is melted and smooth, let it cool slightly for a minute or two so it doesn’t melt the wafer too much.
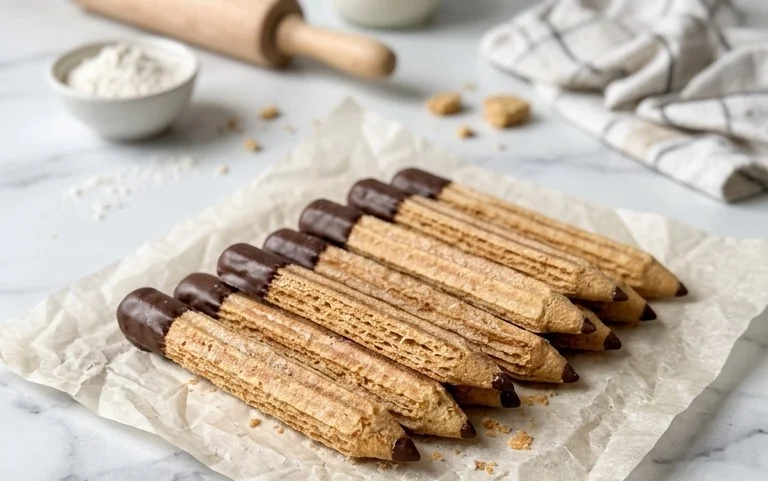
Sugar Wafer Pencil Cookies
These sugar wafer pencil cookies are such a fun and easy project, perfect for back-to-school treats or just a whimsical afternoon bake. They look so much like little pencils, you might even get a chuckle out of your coworkers or classmates! The beauty of this recipe is its simplicity. We’re using readily available sugar wafer cookies as our base, transforming them with just a few simple additions. The crisp, sweet wafer is the perfect canvas for creating these edible art supplies. They don’t require any complicated baking, just a bit of melting and decorating.
Ingredients:
- 20 sugar wafer cookies
- 10-ounce bag white chocolate melting wafers
- Red gel food coloring
- 20 mini chocolate chips
Preparing the Workspace and Melting the Chocolate
Before you start melting your chocolate, it’s a good idea to get your decorating station ready. You’ll want a parchment paper-lined baking sheet or a large piece of parchment paper laid out on your counter. This will give you a clean surface to place your finished pencil cookies on as they set.
Now, let’s talk about melting the white chocolate. You have a couple of options here, and both are pretty straightforward. You can use a microwave or a double boiler. If you’re using the microwave, pour the white chocolate melting wafers into a microwave-safe bowl. Heat them in 30-second intervals, stirring well after each interval. Be patient; white chocolate can seize up if overheated, so it’s better to go slow and steady. You’re looking for a smooth, pourable consistency. If you’re using a double boiler, place the melting wafers in a heatproof bowl set over a saucepan of barely simmering water. Make sure the bottom of the bowl doesn’t touch the water. Stir constantly until the wafers are completely melted and smooth.
Coloring the “Lead” and “Eraser”
Once your white chocolate is melted and smooth, it’s time to get creative with the colors. You’ll need to divide the melted white chocolate into two portions. One portion will be for the “lead” tip of the pencil, and the other will be for the “eraser” end.
For the “lead” portion, take about a quarter of your melted white chocolate and place it in a small, separate bowl. Add just a tiny drop of red gel food coloring. Gel food coloring is best here because it won’t add excess liquid that can make your chocolate seize. Stir the coloring in very thoroughly until you achieve a nice, distinct pink or red color. You want it to look like the lead of a pencil, so don’t be afraid to go a little darker if you prefer. If you want a more subtle pink, use even less coloring.
For the “eraser” portion, you can either leave the remaining white chocolate as is for a classic pink eraser look, or you can add a touch of yellow or even a hint of orange to create a different colored eraser. For this recipe, we’ll stick to the classic look. You can add a tiny bit of yellow food coloring to a very small portion of the white chocolate if you want to create a slightly different colored eraser, but typically the white chocolate itself provides a nice creamy tone. For the most part, the remaining melted white chocolate will serve as the base for our decorating.
Assembling the Pencil Cookies
Now for the fun part – assembling these little pencils! You’ll be working with one sugar wafer cookie at a time.
Creating the “Lead” Tip
Take one sugar wafer cookie. Dip one of the shorter ends into the red-colored melted white chocolate, making sure to coat about an inch of the cookie. You want to create a neat, pointed tip, just like a sharpened pencil. You can use a small spoon or a toothpick to help shape the chocolate if needed, ensuring it tapers to a point. Once coated, hold the cookie over the bowl for a few seconds to let any excess chocolate drip off. Gently place the cookie, red-dipped end up, onto your prepared parchment paper-lined baking sheet. Repeat this process for all 20 sugar wafer cookies.
Adding the “Eraser” and “Ferrule”
Once you have all your “lead” tips done and they’re just starting to set (they don’t need to be fully hardened), it’s time to add the “eraser” and the “ferrule,” which is the metal band that holds the eraser onto the pencil. Take your remaining melted white chocolate. Dip the opposite short end of each sugar wafer cookie into the plain white chocolate, coating about half an inch. This will represent the “eraser” end of the pencil. Again, let any excess chocolate drip off, and place the cookie back onto the parchment paper. Immediately after dipping in the white chocolate, you can optionally dip the very edge of the white chocolate into some pink sanding sugar for a more textured eraser effect, or you can leave it as is.
Now, for the “ferrule.” You’ll want to work quickly while the white chocolate is still wet. Using a toothpick or a very small brush, carefully paint a thin band of the plain melted white chocolate in between the red “lead” tip and the white “eraser” end. This band should be about a quarter of an inch wide and will act as the metallic ferrule. If the chocolate has started to set too much, you can briefly re-melt it to get it back to a smooth, dippable consistency.
Finishing Touches and Setting
Finally, to complete the look of our pencils, we need to add the “graphite” to the lead. Take your mini chocolate chips. While the red chocolate tip is still slightly tacky, gently press one mini chocolate chip onto the very tip of the red chocolate. This mini chocolate chip will look like the actual graphite tip of the pencil. Ensure it’s pressed in securely so it doesn’t fall off.
After you’ve finished decorating all 20 cookies, let them sit undisturbed on the parchment paper. They need time for the chocolate to fully harden. Depending on the temperature of your room, this can take anywhere from 30 minutes to an hour. You can speed up the process by placing the baking sheet in the refrigerator for about 15-20 minutes, but be aware that very cold chocolate can sometimes develop a slight bloom, which is a white haze. Room temperature setting usually yields the best results. Once completely hardened, they are ready to be enjoyed or packaged. You can store them in an airtight container at room temperature for up to a week.
Conclusion:
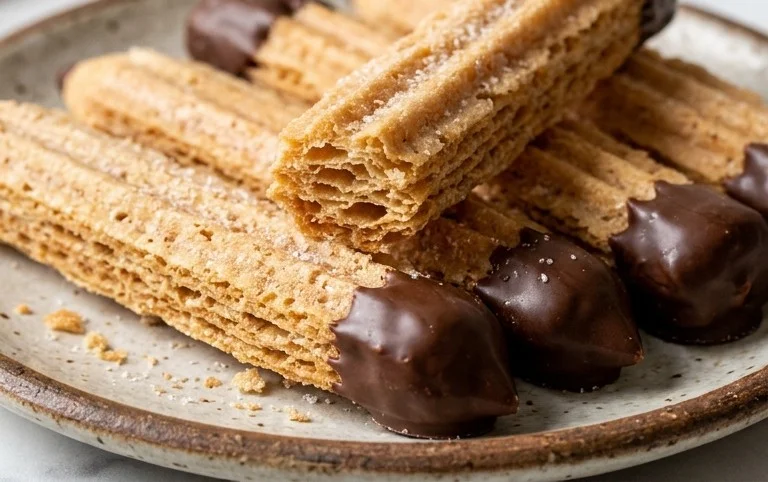
Making these sugar wafer pencil cookies is a rewarding way to add a touch of fun to any occasion. They’re remarkably simple, meaning even novice decorators can achieve impressive results. The satisfying crunch of the wafer combined with the sweet coating makes them a hit with both kids and adults. They look fantastic as part of a back-to-school lunchbox surprise, a classroom party treat, or even just an office pick-me-up. Don’t be afraid to get creative with colors; other food gel colors can create a whole crayon box of edible art supplies. You could also try different types of cookies for a different shape or flavor base.
Frequently Asked Questions
Can I use regular chocolate chips instead of melting wafers?
You can, but melting wafers are formulated to melt smoothly and set firmly, making them ideal for decorating. If you use regular chocolate chips, you might need to add a teaspoon of vegetable shortening or coconut oil to help them achieve a smoother consistency when melted. They may also not set as hard as melting wafers.
How should I store these pencil cookies?
Store your sugar wafer pencil cookies in an airtight container at room temperature. They should stay fresh for about 5-7 days. It’s best to place parchment paper between layers if you stack them to prevent sticking, especially in warmer conditions.
What’s the best way to get the pencil ‘lead’ effect?
For the pencil lead, I use a small dab of melted milk or dark chocolate to attach the mini chocolate chip to the end of the wafer. For the eraser, I use the colored white chocolate. If you want a sharper point for the ‘lead’, you could carefully trim the end of the wafer into a slight point before dipping, but this can be tricky and isn’t necessary for the overall effect.
Sugar Wafer Pencil Cookies
Create fun and edible pencil-shaped cookies using sugar wafers and white chocolate. Perfect for back-to-school or themed parties.
Ingredients
-
20 sugar wafer cookies
-
10-ounce bag white chocolate melting wafers
-
red gel food coloring
-
20 mini chocolate chips
-
1 tablespoon vegetable shortening (for thinning chocolate, if needed)
Instructions
-
Step 1
Line a baking sheet with parchment paper. -
Step 2
Melt the white chocolate melting wafers according to package directions. If the chocolate is too thick, stir in 1 tablespoon of vegetable shortening to thin it. -
Step 3
Dip one end of each sugar wafer cookie into the melted white chocolate, about halfway up the cookie, to create the “eraser” end of the pencil. Let excess chocolate drip off. -
Step 4
Place the dipped cookies onto the prepared baking sheet. While the chocolate is still wet, gently press a mini chocolate chip onto the dipped end to resemble the ferrule of a pencil. -
Step 5
Using a toothpick or a small brush, carefully paint a thin line of red gel food coloring onto the un-dipped end of the sugar wafer, representing the pencil lead. You may need to tint a small portion of the melted white chocolate with red food coloring if you want a more opaque “lead” effect. -
Step 6
Allow the chocolate to set completely before serving or storing. This can take about 10-15 minutes at room temperature, or you can speed it up in the refrigerator for 5 minutes.
Important Information
Nutrition Facts (Per Serving)
It is important to consider this information as approximate and not to use it as definitive health advice.
Allergy Information
Please check ingredients for potential allergens and consult a health professional if in doubt.



Leave a Comment