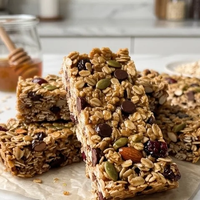
These cereal bars are my go-to for a quick breakfast or an afternoon pick-me-up. They’re incredibly simple to make, and the best part is you can use pretty much any cereal you have on hand. Think crispy rice, puffed wheat, bran flakes, even your favorite sweetened kids’ cereals. The binding ingredients are straightforward, creating a chewy, satisfying bar that holds its shape. Preparing Your Pan Before you start mixing anything, get your pan ready. You’ll want an 8×8 inch baking pan. Line it with parchment paper, making sure to leave some overhang on the sides. This overhang acts as handles, making it much easier to lift the whole slab of bars out of the pan once they’re set. Smooth out the parchment paper so there are no major creases in the bottom of the pan. If you don’t have parchment paper, you can lightly grease the pan with butter or cooking spray, but the parchment really makes cleanup a breeze and ensures the bars don’t stick. Mixing the Base In a medium saucepan, combine your sticky binder: the agave, honey, or brown rice syrup. If you’re using it, add the salt at this stage too. Heat this mixture over low to medium heat. You don’t want it to boil, just to warm up enough so that it becomes more liquid and easier to stir. Stir it occasionally until it’s smooth and pourable.
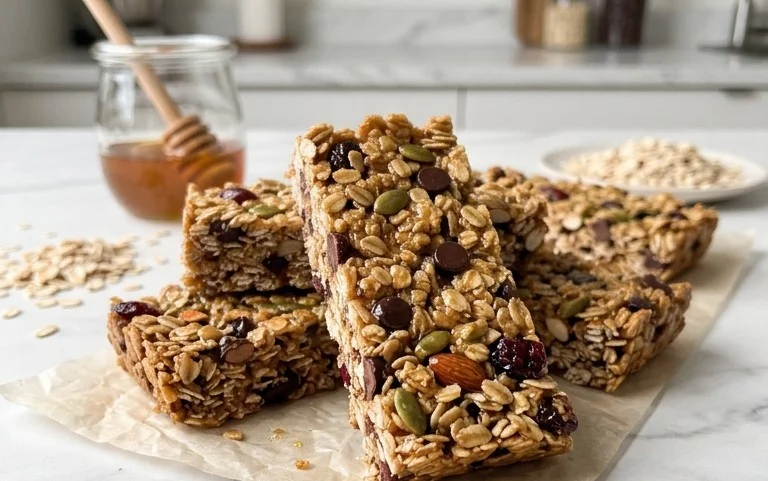
Ingredients:
- 3 cups cereal of choice
- 2/3 cup peanut butter or nut butter of choice
- 1/2 cup agave, honey, or brown rice syrup
- optional 1/2 tsp salt
- optional 3 tbsp protein powder
Making Cereal Bars
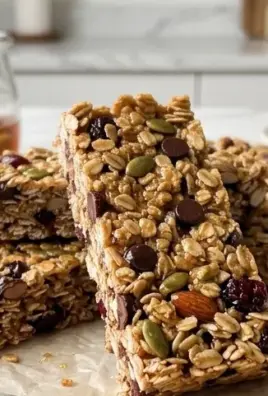
These cereal bars are my go-to for a quick breakfast or an afternoon pick-me-up. They’re incredibly simple to make, and the best part is you can use pretty much any cereal you have on hand. Think crispy rice, puffed wheat, bran flakes, even your favorite sweetened kids’ cereals. The binding ingredients are straightforward, creating a chewy, satisfying bar that holds its shape.
Preparing Your Pan
Before you start mixing anything, get your pan ready. You’ll want an 8×8 inch baking pan. Line it with parchment paper, making sure to leave some overhang on the sides. This overhang acts as handles, making it much easier to lift the whole slab of bars out of the pan once they’re set. Smooth out the parchment paper so there are no major creases in the bottom of the pan. If you don’t have parchment paper, you can lightly grease the pan with butter or cooking spray, but the parchment really makes cleanup a breeze and ensures the bars don’t stick.
Mixing the Base
In a medium saucepan, combine your sticky binder: the agave, honey, or brown rice syrup. If you’re using it, add the salt at this stage too. Heat this mixture over low to medium heat. You don’t want it to boil, just to warm up enough so that it becomes more liquid and easier to stir. Stir it occasionally until it’s smooth and pourable. This usually takes about 3 to 5 minutes. The syrup acts as the glue that holds everything together. If you choose honey, be aware it has a distinct flavor that will come through in the bars. Agave and brown rice syrup are a bit more neutral.
Once the syrup is warm, remove the saucepan from the heat. Now, stir in your peanut butter or your nut butter of choice. Peanut butter is classic and adds a rich, nutty flavor. Almond butter, cashew butter, or even sunflower seed butter for a nut-free option will work beautifully. Stir it vigorously until it’s completely melted and well combined with the syrup. It should form a smooth, glossy mixture. This is where the fat and protein come from, making the bars more filling.
Adding the Cereal and Optional Boosters
Now for the star ingredient: the cereal. Add your 3 cups of cereal to the saucepan with the peanut butter and syrup mixture. Gently fold everything together until the cereal is evenly coated. It’s important not to crush the cereal too much at this stage; you want to retain some of its crunch. If you’re adding protein powder, this is the time. Sprinkle the 3 tablespoons of protein powder over the mixture and mix it in thoroughly. Make sure there are no clumps of protein powder; you want it to be fully integrated into the sticky binder. This step requires a bit of patience, as the protein powder can try to clump.
Pressing the Bars
Transfer the coated cereal mixture into your prepared 8×8 inch baking pan. This is where those overhanging parchment paper handles come in handy. Use a spatula or the back of a spoon to press the mixture firmly and evenly into the pan. Pressing is key to ensuring your bars don’t crumble apart when you cut them. You want a dense, tightly packed layer. For an extra smooth top, you can lightly wet the bottom of a glass or your fingers and press down again. The firmer you press, the more cohesive your bars will be.
Setting and Cutting
Once the mixture is pressed evenly into the pan, let it sit at room temperature for at least 30 minutes to an hour. This initial setting helps it firm up. For the best results and to ensure they cut cleanly, chill the pan in the refrigerator for at least 1 to 2 hours, or even overnight. The cold helps the binders solidify, making cutting much easier.
After the bars have chilled and are firm to the touch, use the parchment paper overhangs to lift the entire slab out of the pan onto a cutting board. Use a sharp knife to cut them into your desired bar size. You can make them as big or as small as you like. If the mixture is sticking to the knife, you can run the knife under hot water and dry it before each cut, or lightly spray it with cooking spray.
Storage and Variations
Store your finished cereal bars in an airtight container at room temperature for up to a week, or in the refrigerator for longer storage. They’re perfect for packing in lunchboxes, taking on hikes, or just having on hand when a craving strikes.
For variations, you can add mix-ins like chocolate chips, dried fruit, nuts, or seeds after you’ve coated the cereal. Just make sure to fold them in gently so they don’t get crushed. If you’re using a sweeter cereal, you might want to reduce the amount of syrup slightly. Experiment with different cereal textures and flavors to find your perfect bar combination!
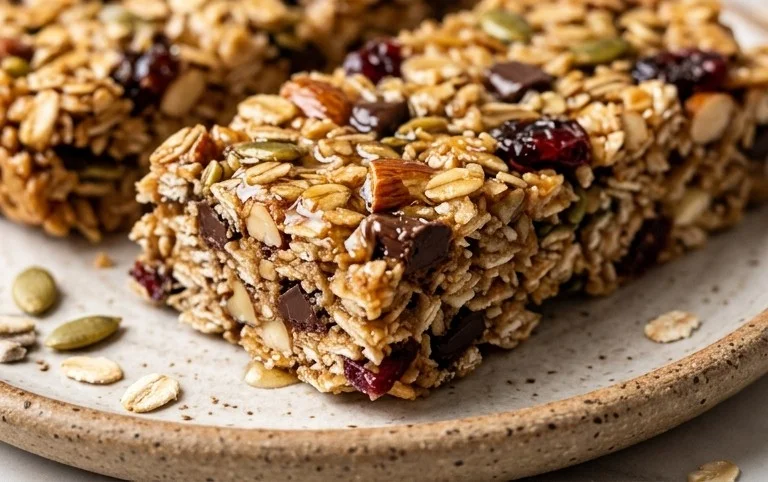
Conclusion:
Making these cereal bars is a straightforward process that yields a wonderfully chewy and satisfying treat. They are perfect for busy mornings when you need something quick to grab, or as a healthier alternative to processed snacks. The flexibility in cereal choice means you can always adapt them to what you have in your pantry, making them a constant go-to. You can also stir in extras like chocolate chips, dried fruit, or chopped nuts into the cereal mixture before pressing it into the pan for added flavor and texture. Once set, these bars store well in an airtight container at room temperature for up to a week, making them great for meal prep. Enjoy them as they are, or even warmed slightly with a dollop of yogurt.
Can I make these cereal bars vegan?
Yes, you can make these cereal bars vegan by using agave or brown rice syrup as your sweetener and ensuring your cereal choice is also vegan. Peanut butter or tahini are good vegan binder options.
How do I store the cereal bars?
Store the cereal bars in an airtight container at room temperature for up to a week. If your kitchen is very warm, you might want to refrigerate them to keep them firm, though they can become quite hard when cold.
What if my mixture is too dry?
If your cereal mixture seems too dry and crumbly to hold together, you can warm the binder mixture (syrup/honey) a little longer to make it more liquid, or add another tablespoon of your chosen liquid sweetener. Ensure the peanut butter is also soft and stirrable.
Cereal Bars
Easy no-bake cereal bars made with your favorite cereal and a sweet binder.
Ingredients
-
3 cups cereal of choice
-
2/3 cup peanut butter or nut butter of choice
-
1/2 cup agave, honey, or brown rice syrup
-
1/2 tsp salt
-
3 tbsp protein powder
Instructions
-
Step 1
Line an 8×8 inch baking pan with parchment paper, leaving an overhang for easy removal. -
Step 2
In a large bowl, combine the cereal of choice. If using protein powder, stir it into the cereal. -
Step 3
In a microwave-safe bowl or saucepan, gently warm the peanut butter or nut butter and the agave, honey, or brown rice syrup until smooth and pourable. Stir in the salt if using. -
Step 4
Pour the warm peanut butter mixture over the cereal and stir until everything is well coated. -
Step 5
Transfer the mixture to the prepared baking pan and press down firmly and evenly. An offset spatula or the bottom of a glass can be helpful here. -
Step 6
Chill in the refrigerator for at least 30 minutes, or until firm. -
Step 7
Lift the bars out of the pan using the parchment paper overhang and cut into 12 bars.
Important Information
Nutrition Facts (Per Serving)
It is important to consider this information as approximate and not to use it as definitive health advice.
Allergy Information
Please check ingredients for potential allergens and consult a health professional if in doubt.

Leave a Comment