The smell of warm, buttery scones fresh from the oven is one of life’s simple, profound pleasures. They’re perfect for a leisurely weekend breakfast, an afternoon tea, or even just a comforting snack with a cup of coffee. These classic scones are tender on the inside with a lovely, slightly crisp exterior, and they are surprisingly easy to make. The key to their wonderful texture is cold butter and not overworking the dough. Ingredients: 3 cups (381 grams) all-purpose flour 1/3 cup (66 grams) granulated sugar 1 teaspoon fine sea salt 1 tablespoon baking powder 1/2 teaspoon baking soda 1 1/2 sticks (170 grams) unsalted butter, cold and cubed 1 cup (237 grams) buttermilk 2 large eggs, divided 1 teaspoon vanilla extract Coarse sugar, for topping Instructions: Step 1: Prepare the Dry Ingredients In a large mixing bowl, whisk together the 3 cups of all-purpose flour, 1/3 cup of granulated sugar, 1 teaspoon of fine sea salt, 1 tablespoon of baking powder, and 1/2 teaspoon of baking soda. Whisking thoroughly ensures that the leavening agents and salt are evenly distributed throughout the flour, which is important for an even rise. This step is quick but foundational. Make sure your flour is measured correctly by spooning it into your measuring cup and leveling off the excess with a straight edge, rather than scooping directly from the bag, which can compact the flour and lead to dry scones. Step 2: Cut in the Cold Butter Add the 1 1/2 sticks of cold, cubed unsalted butter to the dry ingredients. Use a pastry blender, two forks, or your fingertips to cut the butter into the flour mixture until it resembles coarse crumbs with some pea-sized pieces of butter remaining. This is where the flakiness comes from. Keeping the butter cold is absolutely essential for creating pockets of steam when the scones bake, which makes them light and airy. Don’t let the butter melt.
Classic Scones
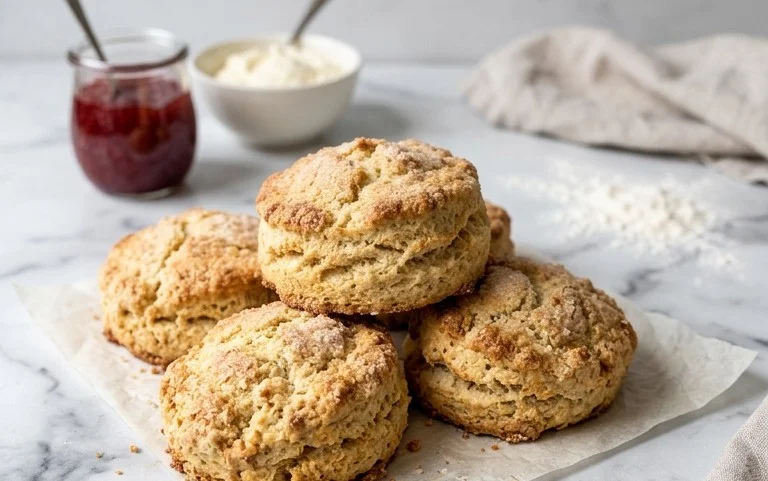
The smell of warm, buttery scones fresh from the oven is one of life’s simple, profound pleasures. They’re perfect for a leisurely weekend breakfast, an afternoon tea, or even just a comforting snack with a cup of coffee. These classic scones are tender on the inside with a lovely, slightly crisp exterior, and they are surprisingly easy to make. The key to their wonderful texture is cold butter and not overworking the dough.
Ingredients:
- 3 cups (381 grams) all-purpose flour
- 1/3 cup (66 grams) granulated sugar
- 1 teaspoon fine sea salt
- 1 tablespoon baking powder
- 1/2 teaspoon baking soda
- 1 1/2 sticks (170 grams) unsalted butter, cold and cubed
- 1 cup (237 grams) buttermilk
- 2 large eggs, divided
- 1 teaspoon vanilla extract
- Coarse sugar, for topping
Instructions:
Step 1: Prepare the Dry Ingredients
In a large mixing bowl, whisk together the 3 cups of all-purpose flour, 1/3 cup of granulated sugar, 1 teaspoon of fine sea salt, 1 tablespoon of baking powder, and 1/2 teaspoon of baking soda. Whisking thoroughly ensures that the leavening agents and salt are evenly distributed throughout the flour, which is important for an even rise. This step is quick but foundational. Make sure your flour is measured correctly by spooning it into your measuring cup and leveling off the excess with a straight edge, rather than scooping directly from the bag, which can compact the flour and lead to dry scones.
Step 2: Cut in the Cold Butter
Add the 1 1/2 sticks of cold, cubed unsalted butter to the dry ingredients. You can use a pastry blender, two forks, or even your fingertips to cut the butter into the flour mixture. The goal is to create a coarse meal with some pea-sized pieces of butter remaining. These butter pieces are what create those lovely flaky layers as they melt in the oven. Work quickly so the butter stays cold; if your hands are warm, you can chill them in cold water before starting. You want the butter to be incorporated, but not completely vanished. It should resemble coarse crumbs with some larger chunks.
Step 3: Mix the Wet Ingredients and Combine
In a separate, smaller bowl, whisk together the 1 cup of buttermilk, one of the large eggs (save the other for the egg wash), and 1 teaspoon of vanilla extract. Make a well in the center of your flour and butter mixture and pour in the wet ingredients. Stir with a fork or a spatula until just combined. The dough will be shaggy and a bit sticky. It’s crucial not to overmix at this stage. Overmixing develops the gluten in the flour too much, which will result in tough scones. A few dry spots are okay; they will be incorporated as you gently bring the dough together.
Step 4: Shape the Dough
Turn the dough out onto a lightly floured surface. Gently knead it a few times, just enough to bring it together into a cohesive ball. Do not knead extensively. Pat the dough into a circle or rectangle about 3/4 to 1 inch thick. You can use a round biscuit cutter (about 2 to 2.5 inches) to cut out your scones. Dip the cutter in flour before each cut to prevent sticking. Alternatively, you can cut the dough into wedges, like a pizza. If you want to make them extra tender, you can gently fold the dough over itself a couple of times before patting it out, which creates more layers. Place the cut scones onto a baking sheet lined with parchment paper. Leave a little space between them so they have room to expand.
Step 5: Brush with Egg Wash and Top with Sugar
In a small bowl, whisk the remaining egg with a tablespoon of water or milk. This is your egg wash. Brush the tops of the scones with this mixture. This will give them a beautiful golden-brown color and a lovely sheen when baked. For an extra touch of sparkle and crunch, generously sprinkle the tops with coarse sugar. Then, pop them into a preheated oven.
Step 6: Baking and Finishing
Bake the scones in a preheated oven at 400 degrees Fahrenheit (200 degrees Celsius) for 15-20 minutes, or until they are golden brown and a toothpick inserted into the center comes out clean. The exact baking time will depend on your oven and the size of your scones. Let the scones cool on the baking sheet for a few minutes before transferring them to a wire rack to cool completely. They are best served warm.
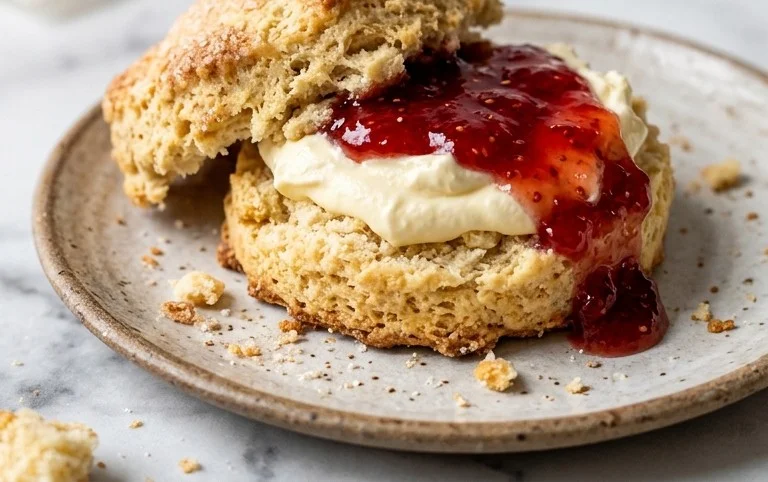
These scones are wonderful served with clotted cream and jam, or simply with a generous smear of butter. You can also add variations like dried cranberries, chocolate chips, or a hint of lemon zest to the dry ingredients before mixing. For best results, enjoy them the day they are made, but leftover scones can be stored in an airtight container at room temperature for a day or two, or frozen for longer storage. To reheat, a few minutes in a warm oven will revive their freshness.
Conclusion:
Making classic scones at home is incredibly rewarding, offering a taste of simple elegance that’s hard to beat. The combination of tender crumb and slightly crisp exterior, all enhanced by that unmistakable buttery flavor, makes them a beloved treat. They’re perfect for elevenses with a cup of tea, or as a delightful addition to any brunch spread. Don’t be afraid to experiment with add-ins like fresh berries or a touch of lemon zest – these scones are wonderfully versatile. The key is to handle the dough gently and keep everything cold, just as we’ve discussed. Give them a try, and you’ll see how satisfying it is to pull a fresh batch from your own oven. You’ll be hooked on homemade classic scones before you know it.
Frequently Asked Questions:
Q1: My scones are too dry or crumbly. What did I do wrong?
This usually happens if you overwork the dough or don’t use enough fat, or if your flour measurement is off. Make sure to cut the cold butter into the flour until it looks like coarse crumbs, and then mix the wet ingredients in just until they come together. Avoid kneading or overmixing. Spoon and level your flour instead of scooping.
Q2: Can I make scones ahead of time?
Yes, you can prepare the dough, wrap it well, and refrigerate it for up to 24 hours before baking. You can also freeze shaped, unbaked scones on a baking sheet until firm, then transfer them to a freezer bag. Bake them directly from frozen, adding a few extra minutes to the baking time.
Q3: What are some other good additions to scone dough?
Fresh or frozen berries (like blueberries or raspberries), chocolate chips, chopped dried fruit (like cranberries or apricots), a tablespoon or two of finely chopped citrus zest (lemon or orange), or even a sprinkle of cinnamon or nutmeg are all wonderful additions. Fold them in gently after combining the wet and dry ingredients.
Classic Scones
A timeless recipe for light, fluffy, and tender scones, perfect for breakfast or afternoon tea.
Ingredients
-
3 cups all-purpose flour
-
1/3 cup granulated sugar
-
1 teaspoon fine sea salt
-
1 tablespoon baking powder
-
1/2 teaspoon baking soda
-
1 1/2 sticks unsalted butter, cold and cubed
-
1 cup buttermilk
-
2 large eggs, divided
-
1 teaspoon vanilla extract
-
Coarse sugar, for topping
Instructions
-
Step 1
Preheat oven to 400°F (200°C). Line a baking sheet with parchment paper. -
Step 2
In a large bowl, whisk together the flour, granulated sugar, salt, baking powder, and baking soda. -
Step 3
Cut in the cold butter using a pastry blender or your fingertips until the mixture resembles coarse crumbs. -
Step 4
In a separate small bowl, whisk together the buttermilk, one large egg, and vanilla extract. -
Step 5
Pour the wet ingredients into the dry ingredients and mix until just combined. Do not overmix. -
Step 6
Turn the dough out onto a lightly floured surface and gently pat it into a 1-inch thick rectangle. -
Step 7
Cut out scones using a 2-inch round cutter. Place them on the prepared baking sheet. -
Step 8
Whisk the remaining egg with a tablespoon of water and brush it over the tops of the scones. Sprinkle with coarse sugar. -
Step 9
Bake for 12-15 minutes, or until golden brown and puffed.
Important Information
Nutrition Facts (Per Serving)
It is important to consider this information as approximate and not to use it as definitive health advice.
Allergy Information
Please check ingredients for potential allergens and consult a health professional if in doubt.


Leave a Comment