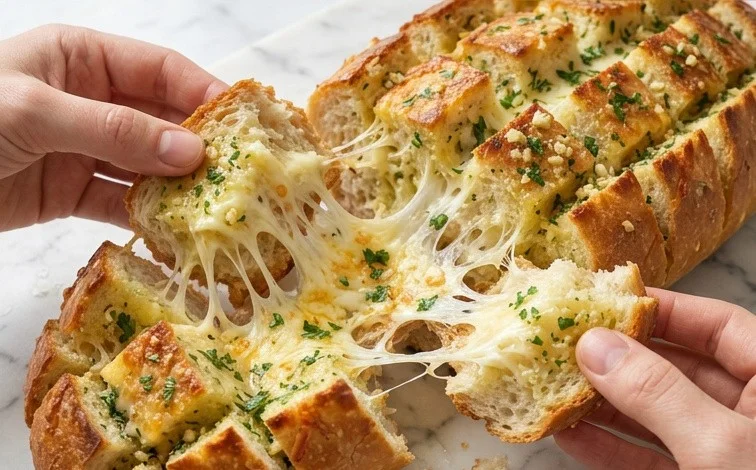
Cheesy Pull-Apart Garlic Bread is a showstopper that comes together with simple ingredients and a bit of slicing. This isn’t just regular garlic bread; it’s a whole experience with gooey cheese oozing out of every crevice. Imagine a warm, crusty loaf, already cut into bite-sized pieces, each one loaded with garlic butter and melted cheese. That’s what this recipe delivers. It’s the kind of dish that disappears fast at parties because everyone loves to tear off a piece. The combination of the crisp bread and the stretchy, savory cheese makes it incredibly addictive. You get that satisfying crunch from the crust and then the soft, flavorful interior. It transforms a simple loaf into something truly special, perfect for sharing or enjoying as a comforting treat on a quiet evening. The preparation is straightforward, making it accessible even for beginners, but the result feels restaurant-worthy.
Preparation and Assembly
The key to making this pull-apart bread truly magical is in how we prepare the bread and infuse it with flavor. We want to make sure every nook and cranny gets coated in that delicious garlic butter and packed with cheese. Prepare the Garlic Butter Mixture: In a small bowl, combine the melted butter, minced garlic, and chopped parsley. Stir them together until well combined. This mixture is the heart of our garlic bread. The fresh garlic will release its potent aroma and flavor into the butter as it bakes, and the parsley adds a lo
Cheesy Pull-Apart Garlic Bread
There’s something incredibly satisfying about tearing off a piece of warm, cheesy bread, especially when it’s loaded with garlic and herbs. This Cheesy Pull-Apart Garlic Bread is exactly that kind of crowd-pleaser. It starts with a rustic loaf that gets transformed into layers of garlicky goodness and melted cheese. It’s perfect for gatherings, cozy nights in, or anytime you need a comforting, delicious side dish that feels a little bit special. The beauty of this recipe is how simple it is to make, yet the result is so impressive. You get that wonderful crisp exterior from the bread and the gooey, stringy cheese pull inside.
Ingredients:
- 1 Boule / Loaf Crusty Rustic Bread
- 1 Stick Salted Butter (melted)
- 6 Cloves Garlic (minced)
- 2 Tablespoons Parsley (chopped)
- 1 Cup Mozzarella Cheese (shredded)
- 1 1/2 Cups Cheddar Cheese (shredded)
- 1/4 Cup Parmesan Cheese (grated)
- 1 Bunch Chives (finely chopped)
Preparation and Assembly
The key to making this pull-apart bread truly magical is in how we prepare the bread and infuse it with flavor. We want to make sure every nook and cranny gets coated in that delicious garlic butter and packed with cheese.
- Prepare the Garlic Butter Mixture: In a small bowl, combine the melted butter, minced garlic, and chopped parsley. Stir them together until well combined. This mixture is the heart of our garlic bread. The fresh garlic will release its potent aroma and flavor into the butter as it bakes, and the parsley adds a lovely touch of freshness and color. Make sure your garlic is finely minced so it distributes evenly and doesn’t leave large chunks. If you’re sensitive to raw garlic, you can lightly sauté the minced garlic in a tablespoon of the butter for about a minute before adding the rest of the butter and parsley, but honestly, the raw garlic gives it a punch that’s hard to beat.
- Score the Bread: Take your crusty rustic bread and place it on a cutting board. Using a sharp serrated knife, cut deep crisscross slits into the top of the loaf, going about three-quarters of the way down. You don’t want to cut all the way through to the bottom, as this will keep the loaf intact. Aim for cuts about 1 to 1.5 inches apart in both directions. This scoring is what allows the garlic butter and cheese to seep down into the bread, making every bite flavorful and cheesy. Think of it as creating little pockets for all that deliciousness.
- Fill the Bread with Garlic Butter: Now, carefully pour and brush the garlic butter mixture over and into all the slits you just made in the bread. Use a spoon or a brush to ensure that the butter gets down into all the nooks and crannies. Don’t be shy with this step; you want the bread to be thoroughly coated. The butter will help to soften the bread slightly while also providing the base for the garlic flavor. If any mixture pools at the bottom of the bowl, try to scoop it up and drizzle it over the top and sides of the loaf.
- Load Up on the Cheese: This is where the “cheesy” part really comes to life. Generously stuff the shredded mozzarella cheese, shredded cheddar cheese, and grated Parmesan cheese into all the slits. You can use your fingers to gently push the cheese down into the cuts. Don’t worry about being too neat; a little cheese spilling over the sides is perfectly fine and will get wonderfully crispy in the oven. The combination of mozzarella for its melty, stringy quality, cheddar for its sharp flavor, and Parmesan for its salty, nutty notes creates a wonderfully complex and delicious cheese blend. Make sure to get a good amount of cheese in every single crevice.
- Add the Chives and Prepare for Baking: Sprinkle the finely chopped chives over the top of the cheese. Chives add a delicate oniony flavor and a beautiful pop of green. While it might seem like a small amount, they really do add a noticeable freshness that balances the richness of the butter and cheese. Once everything is assembled, wrap the entire loaf snugly in aluminum foil. This step is crucial for the first part of baking. It allows the bread to steam and soften slightly, ensuring the cheese melts beautifully and the garlic butter infuses the bread without the exterior burning.
Baking and Serving
The final steps involve baking the bread to golden perfection and then serving it hot so everyone can enjoy the pull.
Baking the Bread
Preheat your oven to 375 degrees Fahrenheit (190 degrees Celsius). Place the foil-wrapped loaf directly on the oven rack or on a baking sheet. Bake for 20 minutes. After 20 minutes, carefully unwrap the foil. The bread should be starting to soften and the cheese should be melting. Leave the foil off and continue to bake for another 10-15 minutes, or until the top of the bread is golden brown and the cheese is bubbly and starting to crisp up in places. Keep an eye on it during this last stage to prevent the top from burning. The aroma that fills your kitchen at this point will be absolutely irresistible.
Serving Your Cheesy Pull-Apart Garlic Bread
Once out of the oven, let the bread rest for a few minutes before serving. This allows the cheese to set slightly and makes it easier to handle. Serve the loaf whole, and let everyone pull off their own pieces. The best way to enjoy this is straight from the oven, when the cheese is still gloriously melty and the bread is warm and fragrant. It’s wonderful served alongside soups, salads, pasta dishes, or simply as a standalone appetizer. You can even serve it with a side of marinara sauce for dipping, though it’s certainly delicious on its own.
Conclusion:
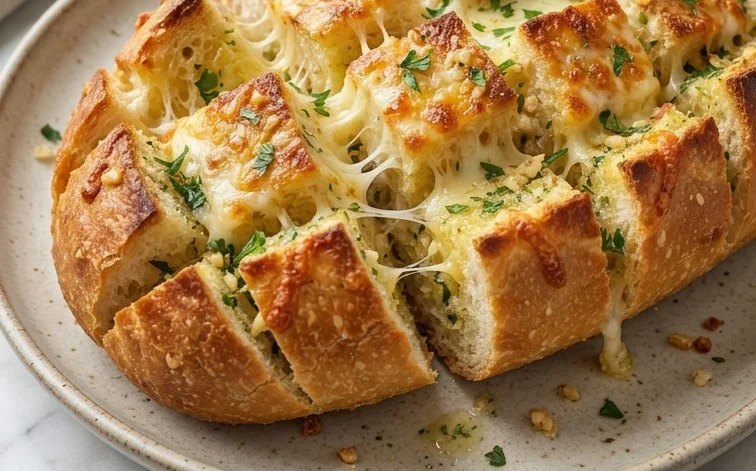
This Cheesy Pull-Apart Garlic Bread is the ultimate comfort food that’s as fun to make as it is to eat. The way the cheese melts and stretches between the garlic-infused bread pieces is incredibly satisfying. It’s a fantastic side dish that always impresses guests and makes any meal feel more festive. Whether you’re hosting a game night, having a casual get-together, or just want a special treat for yourself, this pull-apart bread is a winner. Its simple preparation means less time in the kitchen and more time enjoying that warm, cheesy goodness. Consider adding some red pepper flakes to the butter mixture for a hint of heat, or try using different herb combinations like a bit of rosemary or chives alongside the parsley.
Frequently Asked Questions
Can I make this ahead of time?
You can prepare the garlic butter mixture and cut the bread a few hours ahead. Store the cut bread loosely wrapped in foil at room temperature. Assemble and bake just before serving for the best texture. However, it’s best enjoyed fresh out of the oven when the cheese is perfectly melted and gooey.
What kind of bread is best for this recipe?
A crusty, rustic loaf like a boule, ciabatta, or even a French baguette works wonderfully. The key is a sturdy crust that can hold its shape during baking and a soft interior to soak up the garlic butter and cheese.
How do I get the cheese to melt evenly?
Ensure you pack the shredded cheese into all the cuts you made in the bread. Baking it covered for the first 10-15 minutes helps steam and melt the cheese evenly before uncovering it to crisp up. Make sure your oven temperature is accurate.
Cheesy Pull-Apart Garlic Bread
An irresistible pull-apart garlic bread loaded with melted cheese and fresh herbs, perfect as an appetizer or side dish.
Ingredients
-
1 Boule / Loaf Crusty Rustic Bread
-
1 Stick Salted Butter (melted)
-
6 Cloves Garlic (minced)
-
2 Tablespoons Parsley (chopped)
-
1 Cup Mozzarella Cheese (shredded)
-
1 1/2 Cups Cheddar Cheese (shredded)
-
1/4 Cup Parmesan Cheese (grated)
-
1 Bunch Chives (finely chopped)
Instructions
-
Step 1
Preheat your oven to 375°F (190°C). -
Step 2
Cut the boule into a grid pattern, about 1-inch cubes, without cutting all the way through to the bottom. -
Step 3
In a small bowl, combine the melted butter, minced garlic, chopped parsley, and chopped chives. Mix well. -
Step 4
Drizzle or brush the garlic butter mixture generously over the bread, ensuring it gets into the cuts. -
Step 5
In another bowl, toss together the shredded mozzarella, cheddar, and grated parmesan cheeses. -
Step 6
Stuff the cheese mixture into the cuts of the bread, pushing it down as much as possible. -
Step 7
Wrap the bread tightly in aluminum foil. -
Step 8
Bake for 20-25 minutes, or until the bread is heated through and the cheese is melted and bubbly. -
Step 9
Unwrap the foil for the last 5 minutes of baking to allow the top to crisp up slightly, if desired. -
Step 10
Serve immediately and enjoy the cheesy pull!
Important Information
Nutrition Facts (Per Serving)
It is important to consider this information as approximate and not to use it as definitive health advice.
Allergy Information
Please check ingredients for potential allergens and consult a health professional if in doubt.



Leave a Comment