
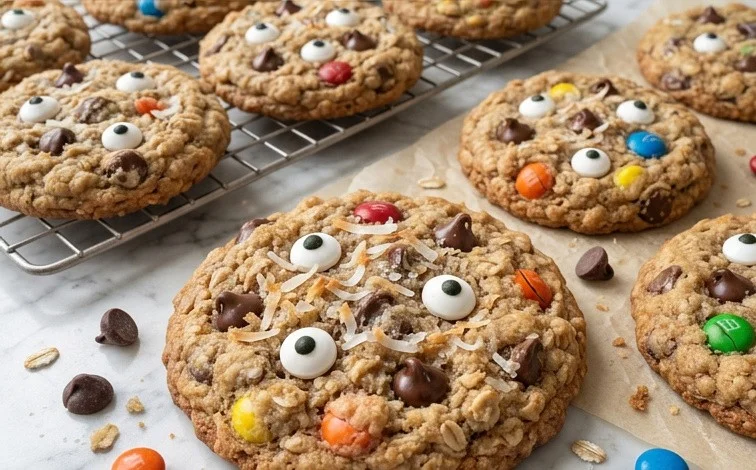
Hairy Monster Cookies are pure fun to make and even more fun to eat. They’re soft, chewy, and loaded with colorful candy, making them a guaranteed hit with kids and adults alike. The ‘hairy’ aspect comes from the generous amount of sprinkles and candy pieces that peek out from the cookie dough, giving them a delightfully monstrous appearance. I love making these for parties or just as a special weekend treat because they bring so much joy and a touch of whimsical chaos to the kitchen. The base cookie is a classic chocolate chip cookie recipe, but we’re jazzing it up with a few extra elements to make them truly special. Here’s how to bring these delightfully monstrous cookies to life:
Ingredients:
- 1 cup (2 sticks or 227g) unsalted butter, softened
- 3/4 cup (150g) granulated sugar
- 3/4 cup (165g) packed light brown sugar
- 2 large eggs
- 1 teaspoon vanilla extract
- 2 1/4 cups (281g) all-purpose flour
- 1 teaspoon baking soda
- 1/2 teaspoon salt
- 1 cup (170g) semi-sweet chocolate chips
- 1 cup (170g) M&M’s (or similar candy-coated chocolate pieces), divided
- 1/2 cup (about 50g) rainbow jimmies sprinkles
- 1/4 cup (about 25g) mini chocolate chips (optional, for extra texture)
Making the Dough
Creaming the Butter and Sugars
The first step to a perfect cookie is properly creaming the butter and sugars. In a large mixing bowl, beat the softened unsalted butter with the granulated sugar and the packed light brown sugar. You want to beat them together until the mixture is light and fluffy. This process incorporates air into the dough, which helps make the cookies tender.
Hairy Monster Cookies Recipe
These Hairy Monster Cookies are pure fun to make and even more fun to eat. They’re soft, chewy, and loaded with colorful candy, making them a guaranteed hit with kids and adults alike. The “hairy” aspect comes from the generous amount of sprinkles and candy pieces that peek out from the cookie dough, giving them a delightfully monstrous appearance. I love making these for parties or just as a special weekend treat because they bring so much joy and a touch of whimsical chaos to the kitchen. The base cookie is a classic chocolate chip cookie recipe, but we’re jazzing it up with a few extra elements to make them truly special.
Ingredients:
- 1 cup (2 sticks or 227g) unsalted butter, softened
- 3/4 cup (150g) granulated sugar
- 3/4 cup (165g) packed light brown sugar
- 2 large eggs
- 1 teaspoon vanilla extract
- 2 1/4 cups (281g) all-purpose flour
- 1 teaspoon baking soda
- 1/2 teaspoon salt
- 1 cup (170g) semi-sweet chocolate chips
- 1 cup (170g) M&M’s (or similar candy-coated chocolate pieces), divided
- 1/2 cup (about 50g) rainbow jimmies sprinkles
- 1/4 cup (about 25g) mini chocolate chips (optional, for extra texture)
Making the Dough
Creaming the Butter and Sugars
The first step to a perfect cookie is properly creaming the butter and sugars. In a large mixing bowl, beat the softened unsalted butter with the granulated sugar and the packed light brown sugar. You want to beat them together until the mixture is light and fluffy. This process incorporates air into the dough, which helps the cookies rise and gives them a tender texture. I like to use an electric mixer for this, starting on low speed and gradually increasing to medium-high. Scrape down the sides of the bowl a couple of times to make sure everything is evenly combined. The mixture should look pale yellow and airy, almost like frosting.
Adding the Wet Ingredients
Next, add the eggs one at a time, beating well after each addition. This ensures the eggs are fully incorporated into the butter-sugar mixture. After the eggs, stir in the vanilla extract. Vanilla extract adds a lovely depth of flavor to the cookies that complements the chocolate and candy perfectly. Make sure to use real vanilla extract for the best taste; imitation vanilla can sometimes give a slightly artificial flavor. Once these wet ingredients are mixed in, the dough will look smooth and well-combined.
Combining the Dry Ingredients
In a separate medium bowl, whisk together the all-purpose flour, baking soda, and salt. Whisking the dry ingredients together helps to distribute the baking soda and salt evenly throughout the flour, preventing pockets of salty or bitter cookie. Baking soda is what gives the cookies their lift, and salt balances the sweetness. If you don’t have a whisk, you can use a fork to stir them together thoroughly.
Bringing It All Together
Gradually add the dry ingredients to the wet ingredients, mixing on low speed until just combined. Be careful not to overmix the dough at this stage. Overmixing can develop the gluten in the flour too much, resulting in tough cookies. Stop mixing as soon as you no longer see streaks of flour. The dough will be thick and may still have a slightly shaggy appearance, which is perfectly fine.
Incorporating the Goodies
Now for the fun part! Gently stir in the semi-sweet chocolate chips and about three-quarters of the M&M’s (reserve the rest for decorating). If you’re using mini chocolate chips, add them now too. I like to reserve some of the M&M’s to press onto the tops of the cookies before baking, as it makes them look extra colorful and festive. Fold these additions in with a spatula or wooden spoon until they are evenly distributed throughout the dough. The dough will be quite chunky and already looking wonderfully monstrous.
Baking the Monster Cookies
Chilling the Dough (Optional but Recommended)
For cookies that spread less and have a chewier texture, I highly recommend chilling the dough. Cover the bowl with plastic wrap and refrigerate for at least 30 minutes, or up to 2 days. Chilling allows the flour to absorb moisture from the butter and sugars, leading to a denser, chewier cookie. If you’re short on time, you can skip this step, but the cookies might spread out a bit more during baking.
Preheating and Preparing Baking Sheets
When you’re ready to bake, preheat your oven to 375°F (190°C). Line baking sheets with parchment paper. Parchment paper prevents the cookies from sticking to the pan and makes for easy cleanup. If you don’t have parchment paper, you can lightly grease your baking sheets, but parchment is generally preferred for best results.
Shaping the Cookies
Scoop rounded tablespoons of dough onto the prepared baking sheets, leaving about 2 inches of space between each cookie. This spacing allows the cookies to spread as they bake without running into each other. For a more uniform size, you can use a cookie scoop. If you chilled your dough, it will be firmer and easier to scoop.
Adding the “Hair” and Decorating
This is where the “hairy monster” look really comes to life. Gently press the reserved M&M’s onto the tops of the cookie dough balls. Then, sprinkle the rainbow jimmies sprinkles liberally over the tops of each cookie. Don’t be shy with the sprinkles; the more “hairy” the better for these monsters! The sprinkles will adhere to the dough and the candy pieces, creating a wonderfully messy and fun look. If the dough feels too soft to press the candies on, pop it back into the fridge for another 10 minutes.
Baking Time
Bake for 9 to 12 minutes, or until the edges of the cookies are lightly golden brown and the centers are still slightly soft. The exact baking time will depend on your oven and the size of your cookies. It’s better to slightly underbake than overbake if you want chewy cookies. They will continue to set up as they cool on the baking sheet.
Cooling the Cookies
Let the cookies cool on the baking sheets for about 5 minutes before carefully transferring them to a wire rack to cool completely. This resting period on the hot baking sheet is important because it allows the cookies to firm up just enough so they don’t break when you move them. Once on the wire rack, they will cool down fully and reach their perfect chewy consistency.
Conclusion:
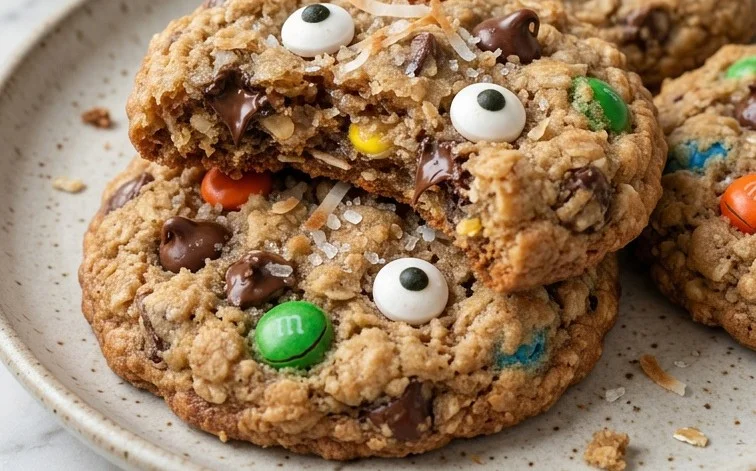
These Hairy Monster Cookies are a fantastic, festive treat that’s always a hit. Their soft, chewy texture combined with the explosion of colorful candies and sprinkles makes them visually exciting and incredibly tasty. They’re not just cookies; they’re a little bit of edible fun that brings smiles to faces, young and old. Whether you’re baking for a birthday party, a Halloween celebration, or just a weekend pick-me-up, these cookies deliver on joy and flavor. Don’t be afraid to get creative with the candy and sprinkle combinations to make them uniquely yours!
Serving Suggestions: Enjoy these cookies with a tall glass of milk, or serve them as part of a dessert spread. They also make great edible party favors.
Variations: For a different look, try using different colored candy pieces or sprinkles. You could even add a few drops of food coloring to the dough for a pop of color. Consider adding chopped nuts for extra crunch if desired, or swap out the semi-sweet chips for milk or dark chocolate.
Frequently Asked Questions:
How do I store Hairy Monster Cookies?
Store cooled cookies in an airtight container at room temperature for up to 3-4 days. You can place parchment paper between layers to prevent sticking.
Can I make the dough ahead of time?
Yes, you can prepare the cookie dough and refrigerate it for up to 2 days. Let it sit at room temperature for about 20-30 minutes before scooping, or bake directly from chilled, adding a few extra minutes to the baking time.
What kind of candy works best for the “hairy” look?
Any small, colorful candy-coated chocolate pieces like M&M’s or Skittles work well. Sprinkles, especially jimmies, are essential for the hairy texture. Mini chocolate chips also add to the delightful chaos.
Hairy Monster Cookies
A fun and spooky Halloween-themed cookie recipe perfect for parties.
Ingredients
-
2 1/4 cups all-purpose flour
-
1 teaspoon baking soda
-
1/2 teaspoon salt
-
1 cup (2 sticks) unsalted butter, softened
-
3/4 cup granulated sugar
-
3/4 cup packed brown sugar
-
2 large eggs
-
1 teaspoon vanilla extract
-
2 cups old-fashioned rolled oats
-
1 cup chocolate chips
-
1 cup candy eyeballs
Instructions
-
Step 1
Preheat oven to 350 degrees F (175 degrees C). Line baking sheets with parchment paper. -
Step 2
In a medium bowl, whisk together the flour, baking soda, and salt. Set aside. -
Step 3
In a large bowl, cream together the softened butter, granulated sugar, and brown sugar until light and fluffy. -
Step 4
Beat in the eggs one at a time, then stir in the vanilla extract. -
Step 5
Gradually add the dry ingredients to the wet ingredients, mixing until just combined. Stir in the rolled oats and chocolate chips. -
Step 6
Drop rounded tablespoons of dough onto the prepared baking sheets. Gently press candy eyeballs into the top of each cookie to resemble monster eyes. -
Step 7
Bake for 10-12 minutes, or until the edges are golden brown and the centers are set. Let cool on the baking sheets for a few minutes before transferring to a wire rack to cool completely.
Important Information
Nutrition Facts (Per Serving)
It is important to consider this information as approximate and not to use it as definitive health advice.
Allergy Information
Please check ingredients for potential allergens and consult a health professional if in doubt.


Leave a Comment