
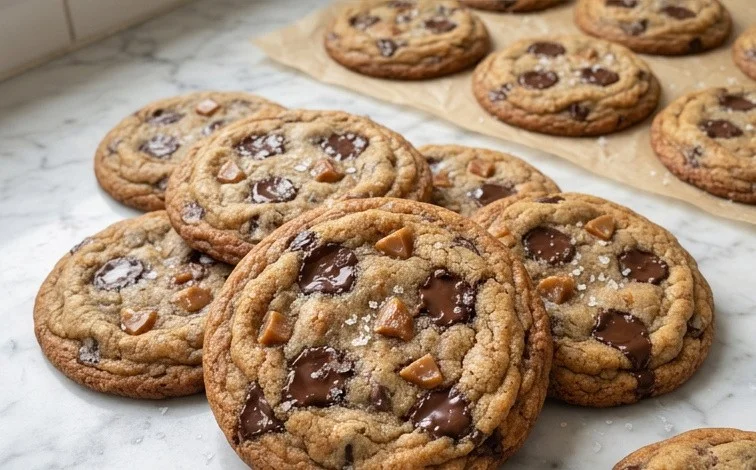
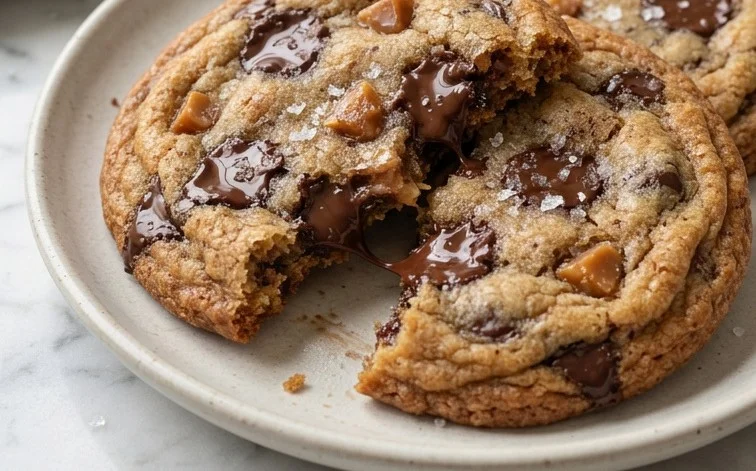
Browned Butter Toffee Chocolate Chip Cookies offer a depth of flavor that standard chocolate chip cookies just can’t reach. The secret is in browning the butter, a simple step that transforms ordinary butter into a rich, nutty elixir with caramel undertones. This process gives these cookies their distinctive aroma and a more complex taste profile. Imagine a cookie that’s wonderfully chewy in the middle, with slightly crisp edges, loaded with pockets of melted chocolate and the delightful crunch of toffee bits. They’re perfect for sharing with friends, enjoying during a cozy afternoon with a warm drink, or anytime you want a truly special treat. This recipe focuses on achieving that perfect balance of chewy and crisp, with the nutty notes from the browned butter shining through. These Browned Butter Toffee Chocolate Chip Cookies are a step above the rest, offering a comforting yet sophisticated cookie experience that will have everyone asking for the recipe.
Browned Butter Toffee Chocolate Chip Cookies
The aroma of browned butter is a game-changer for any cookie. It adds a nutty, deep, almost caramel-like complexity that takes a classic chocolate chip cookie to a whole new level, especially when paired with crunchy toffee bits. These cookies are rich, chewy in the center, and delightfully crisp around the edges, with pockets of melted chocolate and the satisfying crunch of toffee. I love making a big batch of these for gatherings, or just for quiet afternoons with a cup of tea.
Ingredients:
- 2 sticks (227 grams) unsalted butter
- 1/2 (100 grams) cup granulated sugar
- 1 cup (200 grams) lightly packed dark brown sugar
- 1 1/2 cups (190 grams) all-purpose flour
- 1 cup (127 grams) bread flour
- 1 teaspoon baking soda
- 1/2 teaspoon baking powder
- 1 teaspoon fine sea salt
- 1 teaspoon instant espresso powder, (optional)
- 2 large eggs plus 1 egg yolk, (at room temperature)
- 2 teaspoons vanilla
- 10 ounces (283 grams) semisweet chocolate, (chopped)
- 1 cup homemade toffee bits, (or Heath brand)
- Flaky sea salt, (for finishing)
Preparing the Dough
The first step to achieving that superior flavor is browning the butter. You’ll want to use a light-colored saucepan so you can easily see the color changes. Melt the butter over medium heat. As it melts, it will foam, then the foam will subside, and you’ll start to see little brown flecks appearing at the bottom of the pan. Swirl the pan occasionally. It’s crucial to watch this closely because it can go from perfectly browned to burnt very quickly. You’re looking for a rich, amber color and a nutty aroma. Once it reaches this point, immediately remove the pan from the heat and carefully pour the browned butter into a heatproof bowl. Let it cool for about 10-15 minutes. This cooling period is important; you don’t want to pour scorching hot butter into your sugars and eggs, or you’ll end up with scrambled eggs.
While the butter cools, whisk together your dry ingredients. In a medium bowl, combine the all-purpose flour, bread flour, baking soda, baking powder, fine sea salt, and the optional instant espresso powder. The bread flour adds a little extra chewiness and structure, which is lovely in a cookie. Whisking these together ensures the leavening agents and salt are evenly distributed throughout the flour.
Once the browned butter has cooled slightly, add the granulated sugar and dark brown sugar to the bowl with the butter. Whisk vigorously until the mixture is well combined and slightly lighter in color. This creaming process helps to dissolve the sugars and incorporate a bit of air, which contributes to the cookie’s texture.
Incorporating Wet Ingredients and Mix-ins
Now, it’s time to add the eggs and vanilla. Make sure your eggs and egg yolk are at room temperature; this helps them emulsify better with the butter and sugar mixture, creating a smoother, more cohesive dough. Add the 2 large eggs one at a time, beating well after each addition, and then beat in the egg yolk. Mix in the vanilla extract. The dough will look emulsified and glossy at this point.
Gradually add the dry ingredients to the wet ingredients. Mix on low speed or by hand until just combined. Be careful not to overmix the dough. Overmixing can develop the gluten in the flour too much, leading to tougher cookies. Stop mixing as soon as you no longer see streaks of dry flour.
Gently fold in the chopped semisweet chocolate and the toffee bits. Again, you want to do this by hand with a spatula, mixing just until they are evenly distributed throughout the dough. The toffee bits will add a wonderful crunch and a buttery caramel flavor that complements the browned butter beautifully. If you’re making your own toffee, ensure it’s cooled and broken into bite-sized pieces.
Baking the Cookies
This is where the magic happens. For best results, chill the dough. Cover the bowl with plastic wrap and refrigerate for at least 2 hours, or preferably overnight. Chilling the dough not only deepens the flavors but also prevents the cookies from spreading too much during baking, resulting in thicker, chewier cookies. When you’re ready to bake, preheat your oven to 375°F (190°C). Line baking sheets with parchment paper.
Scoop rounded tablespoons of dough onto the prepared baking sheets, leaving about 2 inches between each cookie. For a more rustic look and even bake, you can gently press down on the top of each dough ball slightly. Before baking, sprinkle the tops of the cookies with flaky sea salt. This step is essential – the salt balances the sweetness and enhances all the other flavors.
Bake for 9-12 minutes, or until the edges are golden brown and the centers are still slightly soft. They will continue to set up as they cool on the baking sheet. If you prefer a chewier cookie, err on the side of underbaking. If you like them more crisp, bake them for a minute or two longer.
Allow the cookies to cool on the baking sheets for 5-10 minutes before transferring them to a wire rack to cool completely. This resting period on the hot baking sheet is important for the cookies to finish baking and set properly without becoming dry or crumbly. Enjoy these deeply flavored, textural wonders!
Conclusion:
These Browned Butter Toffee Chocolate Chip Cookies truly are a step above the rest, bringing a wonderful nutty depth from the browned butter that complements the sweet chocolate and crunchy toffee perfectly. They offer that ideal mix of chewy center and crisp edges that cookie lovers crave. Making a batch is a rewarding experience, and the aroma alone is worth the effort. They store well, meaning you can enjoy them for days, though they tend to disappear quickly!
Serving these cookies warm with a glass of milk or a hot cup of coffee is a classic pairing. For a twist, you could try adding a sprinkle of flaky sea salt on top just before baking for a sweet and salty contrast. Consider adding chopped pecans or walnuts to the dough along with the chocolate chips for an extra layer of texture and flavor.
Don’t be intimidated by browning the butter; just pay close attention, and you’ll master it quickly. The result is a cookie that feels gourmet but is made with simple, accessible ingredients and techniques. I encourage you to try this recipe the next time you’re looking for a truly memorable chocolate chip cookie experience.
Can I use regular butter if I don’t have unsalted?
Using salted butter will alter the salt balance in the cookies. If you must, use it and reduce the added salt by about 1/4 teaspoon. Unsalted butter gives you better control over the flavor profile.
How do I store these cookies?
Store cooled cookies in an airtight container at room temperature for up to 3-4 days. You can also freeze baked cookies for longer storage.
What kind of toffee bits work best?
Either homemade toffee bits or good quality store-bought ones like Heath work well. Ensure they are finely crushed if using large pieces, so they distribute evenly and don’t make the cookies too hard to bite.
Browned Butter Toffee Chocolate Chip Cookies
Decadent chocolate chip cookies featuring the rich flavor of browned butter, chunks of toffee, and plenty of chocolate.
Ingredients
-
2 sticks (227 grams) unsalted butter
-
1/2 (100 grams) cup granulated sugar
-
1 cup (200 grams) lightly packed dark brown sugar
-
1 1/2 cups (190 grams) all-purpose flour
-
1 cup (127 grams) bread flour
-
1 teaspoon baking soda
-
1/2 teaspoon baking powder
-
1 teaspoon fine sea salt
-
1 teaspoon instant espresso powder, (optional)
-
2 large eggs plus 1 egg yolk, (at room temperature)
-
2 teaspoons vanilla
-
10 ounces (283 grams) semisweet chocolate, (chopped)
-
1 cup homemade toffee bits, (or Heath brand)
-
Flaky sea salt, (for finishing)
Instructions
-
Step 1
In a medium saucepan over medium heat, melt the butter, swirling occasionally, until it turns a deep golden brown and smells nutty. Remove from heat and let cool slightly. -
Step 2
In a large bowl, whisk together the granulated sugar and dark brown sugar with the cooled browned butter until well combined. -
Step 3
Whisk in the eggs and egg yolk one at a time, followed by the vanilla extract. Stir in the optional espresso powder, if using. -
Step 4
In a separate medium bowl, whisk together the all-purpose flour, bread flour, baking soda, baking powder, and fine sea salt. -
Step 5
Gradually add the dry ingredients to the wet ingredients, mixing until just combined. Fold in the chopped semisweet chocolate and toffee bits. -
Step 6
Cover the dough and chill for at least 2 hours, or preferably overnight, to allow the flavors to meld and the dough to firm up. -
Step 7
Preheat oven to 375°F (190°C). Line baking sheets with parchment paper. -
Step 8
Scoop rounded tablespoons of dough onto the prepared baking sheets, leaving about 2 inches between cookies. -
Step 9
Bake for 9-12 minutes, or until the edges are golden brown and the centers are still slightly soft. Sprinkle with flaky sea salt immediately after removing from the oven. -
Step 10
Let cookies cool on the baking sheets for a few minutes before transferring them to a wire rack to cool completely.
Important Information
Nutrition Facts (Per Serving)
It is important to consider this information as approximate and not to use it as definitive health advice.
Allergy Information
Please check ingredients for potential allergens and consult a health professional if in doubt.



Leave a Comment