
Homemade eggnog is that rich, creamy, spiced hug in a mug that just screams holidays. The aroma of warm spices like nutmeg and cinnamon, combined with the luscious sweetness, instantly transports me to cozy evenings spent with family during the festive season. Making eggnog from scratch might seem a little intimidating at first, but it’s actually quite straightforward, and the result is miles beyond any carton you can buy at the store. The key is to gently cook the egg yolks to create a smooth custard base without scrambling them, and then to let the flavors meld beautifully. This recipe focuses on creating a wonderfully smooth and flavorful eggnog that you can feel good about serving to everyone. It’s the perfect way to capture the essence of holiday gatherings in a glass.
Ingredients:
- 2 cups whole milk or 2%
- 1 cup heavy cream
- ½ teaspoon ground nutmeg
- ¼ teaspoon ground cinnamon
- pinch of ground cloves
- 6 egg yolks (room temperature)
- ½ cup sugar
- ½ teaspoon vanilla extract
- whipped cream (optional)
- extra ground cinnamon or nutmeg (optional)
Making the Custard Base
The foundation of delicious homemade eggnog is a well-made custard. This is where we gently cook the egg yolks with the milk and sugar until it thickens enough to coat the back of a spoon. It’s important to use room temperature egg yolks here. Cold yolks can be more difficult to incorporate smoothly into the sugar, and you run a higher risk of getting streaks of uncooked egg. You can bring your eggs to room temperature by placing them in a bowl of warm (not hot) water for about 10 minutes.
Step 1: Tempering the Egg Yolks
In a medium bowl, whisk together the 6 egg yolks and ½ cup of sugar until the mixture is pale yellow and slightly thickened. This initial whisking helps dissolve the sugar and makes the yolks easier to temper. Now, for the tempering process, which prevents the eggs from cooking too quickly and scrambling. You’ll need to gently introduce the warm milk mixture to the egg yolks. Heat the milk, cream, nutmeg, cinnamon, and cloves in a saucepan over medium heat until it’s steaming, but not boiling. Slowly ladle about ½ cup of the hot milk mixture into the egg yolk and sugar mixture while whisking constantly. This gradually raises the temperature of the yolks. Once combined, pour the tempered egg yolk mixture back into the saucepan with the rest of the milk mixture. Continue to cook over low to medium-low heat, stirring constantly with a wooden spoon or heatproof spatula, until the custard thickens enough to coat the back of the spoon. This usually takes about 8-10 minutes. Be patient and keep stirring to avoid scorching the bottom. Do not let it boil. If you see any signs of scrambling, remove it from the heat immediately and whisk vigorously.
Step 2: Cooling and Flavor Infusion
Once the custard base has reached the desired thickness, immediately remove the saucepan from the heat. Stir in the vanilla extract. Pour the custard through a fine-mesh sieve into a clean bowl or pitcher. This catches any small bits of cooked egg that might have formed, ensuring a silky-smooth texture. Cover the surface of the eggnog directly with plastic wrap (this prevents a skin from forming) and refrigerate for at least 2 hours, or preferably overnight. This chilling period is essential for the flavors to meld and deepen, and for the eggnog to achieve its perfect consistency.
Step 3: Serving Your Homemade Eggnog
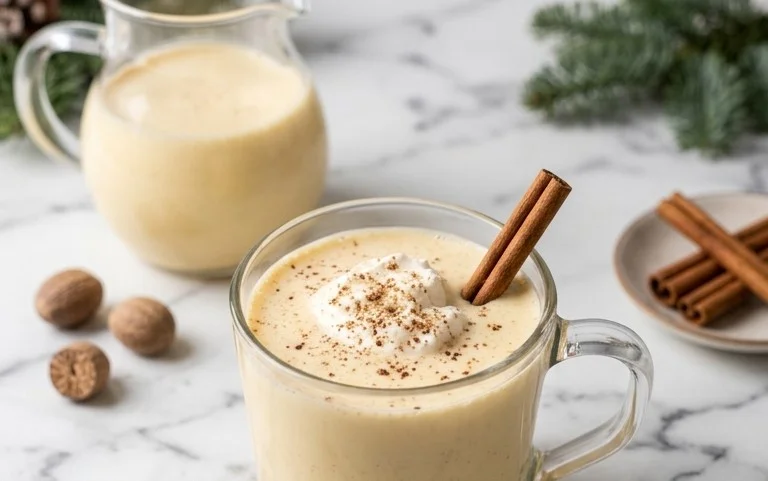
When ready to serve, give the chilled eggnog a good whisk or stir to ensure it’s well combined. Taste and adjust sweetness if needed. Ladle the eggnog into glasses. For an extra special touch, top with a dollop of whipped cream and a sprinkle of ground cinnamon or nutmeg. This homemade eggnog is best served cold. Enjoy the festive and comforting flavors!
Homemade Eggnog Recipe
The aroma of warm spices and creamy richness instantly transports me to cozy evenings spent with family during the holidays. Making eggnog from scratch might seem a little intimidating at first, but it’s actually quite straightforward and the result is miles beyond any carton you can buy at the store. The key is to gently cook the egg yolks to create a luscious custard base without scrambling them, and then to let the flavors meld. This recipe is for a wonderfully smooth and flavorful eggnog that you can feel good about serving to everyone.
Ingredients:
- 2 cups whole milk or 2%
- 1 cup heavy cream
- ½ teaspoon ground nutmeg
- ¼ teaspoon ground cinnamon
- pinch of ground cloves
- 6 egg yolks (room temperature)
- ½ cup sugar
- ½ teaspoon vanilla extract
- whipped cream (optional)
- extra ground cinnamon or nutmeg (optional)
Making the Custard Base
The foundation of delicious homemade eggnog is a well-made custard. This is where we gently cook the egg yolks with the milk and sugar until it thickens enough to coat the back of a spoon. It’s important to use room temperature egg yolks here. Cold yolks can be more difficult to incorporate smoothly into the sugar, and you run a higher risk of getting streaks of uncooked egg. You can bring your eggs to room temperature by placing them in a bowl of warm (not hot) water for about 10 minutes.
Step 1: Tempering the Egg Yolks
In a medium bowl, whisk together the 6 egg yolks and ½ cup of sugar until the mixture is pale yellow and slightly thickened. This process is often called “ribbon stage” because when you lift the whisk, the mixture should fall back into the bowl in a thick ribbon that holds its shape for a few seconds before disappearing. This step is important for dissolving the sugar and starting the thickening process.
Step 2: Heating the Dairy and Spices
In a medium saucepan, combine the 2 cups of milk and 1 cup of heavy cream. Add the ½ teaspoon ground nutmeg, ¼ teaspoon ground cinnamon, and pinch of ground cloves. Heat this mixture over medium-low heat, stirring occasionally, until it is steaming and small bubbles form around the edges of the pan. Do not let it boil. Boiling can scald the milk and affect the flavor. As it heats, the spices will begin to infuse their wonderful aromas into the dairy, creating that signature eggnog scent.
Step 3: Combining and Cooking the Custard
This is the most critical step: tempering the hot milk mixture into the egg yolks. You want to do this very slowly to prevent the egg yolks from cooking too quickly and scrambling. Ladle about ½ cup of the warm milk mixture into the egg yolk and sugar mixture, whisking constantly. Once it’s well combined, slowly pour the tempered egg yolk mixture back into the saucepan with the remaining milk mixture, whisking continuously.
Now, reduce the heat to low and cook, stirring constantly with a wooden spoon or heatproof spatula, until the custard thickens enough to coat the back of the spoon. This usually takes about 8-10 minutes. You can test for doneness by dipping your spoon into the mixture, removing it, and running your finger across the back. If the line your finger makes holds its shape and doesn’t immediately run back together, the custard is ready. Be patient; it’s better to cook it a little longer at low heat than to rush it and scramble the eggs. The temperature should ideally reach around 160-170°F (71-77°C) if you have a thermometer.
Step 4: Finishing and Chilling
Once thickened, immediately remove the saucepan from the heat. Stir in the ½ teaspoon of vanilla extract. For the smoothest possible eggnog, you can strain the mixture through a fine-mesh sieve into a clean bowl or pitcher. This will remove any small bits of cooked egg that might have formed, ensuring a silky texture. Cover the bowl or pitcher tightly with plastic wrap, pressing the wrap directly onto the surface of the eggnog to prevent a skin from forming. Refrigerate for at least 2 hours, but preferably overnight, to allow the flavors to fully meld and the eggnog to chill thoroughly. The longer it chills, the better it tastes.
Step 5: Serving Your Homemade Eggnog
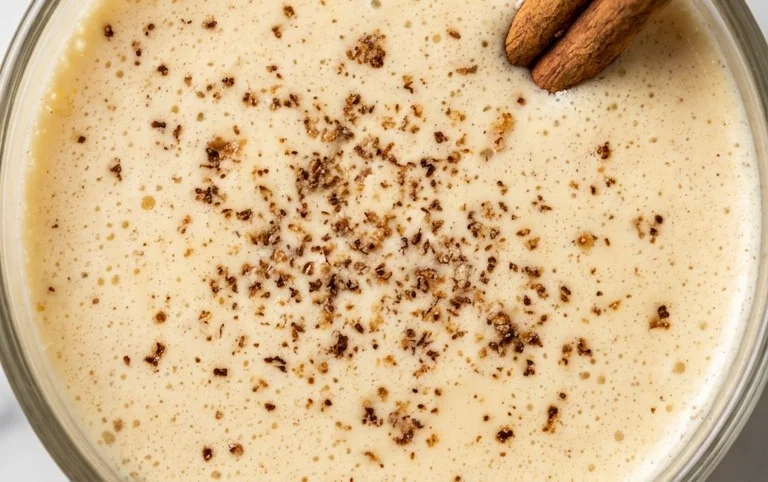
When you’re ready to serve, give the eggnog a good stir. Ladle it into glasses. If you like, top each serving with a dollop of lightly sweetened whipped cream. A final dusting of extra ground cinnamon or nutmeg adds a beautiful touch and enhances the festive aroma. This eggnog is wonderfully rich and satisfying on its own. It’s a perfect drink for holiday gatherings, a special brunch, or simply a comforting treat on a chilly evening. Store any leftovers in the refrigerator for up to 3 days.
Conclusion:
Making your own homemade eggnog is a truly rewarding experience. This recipe delivers a lusciously smooth, rich, and perfectly spiced holiday drink that beats store-bought any day. The process of gently cooking the custard ensures a wonderful texture, and the resting time allows the flavors to develop beautifully. Serving this at your holiday gatherings will undoubtedly impress your guests and create lasting memories. Don’t be intimidated by making it from scratch; it’s simpler than you think and the results are absolutely worth it. Enjoy the comforting warmth and festive spirit in every sip!
Serving Suggestions: This eggnog is wonderful served chilled on its own. You can also use it as a base for holiday mocktails or mocktails. It’s fantastic poured over ice cream, or even used in baking for cakes and custards.
Variations: Feel free to adjust the spices to your liking. Add a bit more cinnamon, nutmeg, or even a touch of cardamom for a different aromatic profile. For a richer drink, you can use all heavy cream and milk, though this recipe strikes a great balance.
FAQs
Can I make this eggnog ahead of time?
Yes, absolutely! In fact, it’s highly recommended. Refrigerating the eggnog for at least 2 hours, and preferably overnight, allows the flavors to meld and deepen, resulting in a much more delicious final product. You can make it up to 2-3 days in advance.
How do I thicken my eggnog if it’s too thin?
If your eggnog isn’t as thick as you’d like after chilling, you can gently reheat it and whisk in a slurry of cornstarch and water (about 1 tablespoon cornstarch mixed with 2 tablespoons cold water). Cook gently until slightly thickened, then re-chill. Alternatively, you can simply add more whipped cream to the final mixture for added richness and body.
What if my custard curdles?
If your custard base accidentally curdles (forms small scrambled egg bits), don’t despair! Immediately remove it from the heat and try to whisk it vigorously. Often, this can help smooth it out. For a perfectly smooth texture, you can strain the custard through a fine-mesh sieve to remove any cooked bits before chilling. It will still taste great!
Homemade Eggnog Recipe
A classic homemade eggnog recipe, rich and creamy, perfect for the holidays. Can be made non-alcoholic.
Ingredients
-
2 cups whole milk or 2%
-
1 cup heavy cream
-
½ teaspoon ground nutmeg
-
¼ teaspoon ground cinnamon
-
pinch of ground cloves
-
6 egg yolks (room temperature)
-
½ cup sugar
-
½ teaspoon vanilla extract
Instructions
-
Step 1
In a medium saucepan, combine milk, heavy cream, nutmeg, cinnamon, and cloves. Heat gently over medium-low heat until warm but not boiling. -
Step 2
In a separate bowl, whisk together the egg yolks and sugar until pale and slightly thickened. -
Step 3
Slowly temper the egg yolk mixture by gradually whisking in about half a cup of the warm milk mixture. This prevents the eggs from scrambling. -
Step 4
Pour the tempered egg yolk mixture back into the saucepan with the remaining milk mixture. Cook over low heat, stirring constantly, until the mixture thickens enough to coat the back of a spoon (do not boil). -
Step 5
Remove from heat and stir in the vanilla extract. -
Step 6
Strain the eggnog through a fine-mesh sieve into a bowl or pitcher. Chill thoroughly in the refrigerator for at least 2 hours. -
Step 7
Serve chilled, optionally topped with whipped cream and a sprinkle of extra cinnamon or nutmeg.
Important Information
Nutrition Facts (Per Serving)
It is important to consider this information as approximate and not to use it as definitive health advice.
Allergy Information
Please check ingredients for potential allergens and consult a health professional if in doubt.

Leave a Comment