Pumpkin cinnamon rolls are a fall favorite for a reason. The soft, pillowy dough gets an extra layer of moisture and earthy sweetness from the pumpkin, making them incredibly tender. When you bite into one, you get that classic warm spice from the cinnamon and cardamom filling, all topped with a creamy, luscious glaze. It’s pure comfort in every bite. Making Your Own Pumpkin Puree While a 425g can of pumpkin puree is convenient, sometimes you might want to make your own, especially if you have fresh sugar pumpkins from the patch. To do this, cut a sugar pumpkin in half, scoop out the seeds and stringy bits, and place the halves cut-side down on a baking sheet lined with parchment paper. Roast at 400°F (200°C) for about 45-60 minutes, or until a fork easily pierces the flesh. Let it cool slightly, then scoop out the cooked flesh and mash it until smooth. For reduced pumpkin puree, spread about 1 cup of this mashed pumpkin onto a baking sheet lined with parchment paper and bake at 250°F (120°C) for about 30-45 minutes, or until it has visibly thickened and reduced. This step is important for concentrating the flavor and removing excess water, which prevents soggy dough. You’ll need about 115g of this reduced puree for the filling and another 140g for the dough itself. The texture should be like thick, spreadable paste. It’s worth the extra effort for that authentic pumpkin taste that canned puree sometimes lacks. These pumpkin cinnamon rolls bring that homemade goodness right to your table.
Ingredients:
- One 425g can Pumpkin Puree (See body of post for making your own)
- 2 1/4 tsp active dry yeast
- 150g whole milk, lukewarm
- 4 Tbsp (50g) brown sugar
- 565g all-purpose flour
- 1 tsp salt
- 1 tsp cinnamon
- 1/2 tsp ground cardamom
- 140g reduced pumpkin puree
- 2 eggs, lightly beaten, at room temperature
- 1 tsp vanilla bean paste
- 120g unsalted butter, at room temperature
- 225g unsalted butter, at room temperature
- 360g light or dark brown sugar
- 115g reduced pumpkin puree
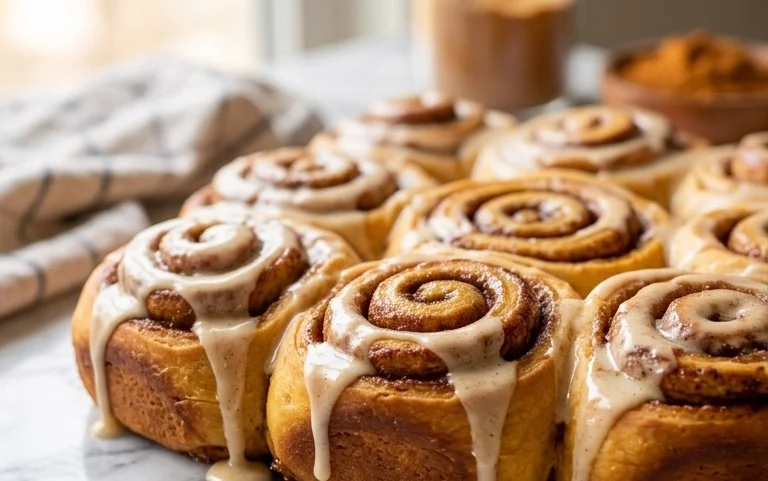
Pumpkin cinnamon rolls are a fall favorite for a reason. The soft, pillowy dough gets an extra layer of moisture and earthy sweetness from the pumpkin, making them incredibly tender. When you bite into one, you get that classic warm spice from the cinnamon and cardamom filling, all topped with a creamy, luscious glaze. It’s pure comfort in every bite.
Making Your Own Pumpkin Puree
While a 425g can of pumpkin puree is convenient, sometimes you might want to make your own, especially if you have fresh sugar pumpkins from the patch. To do this, cut a sugar pumpkin in half, scoop out the seeds and stringy bits, and place the halves cut-side down on a baking sheet lined with parchment paper. Roast at 400°F (200°C) for about 45-60 minutes, or until a fork easily pierces the flesh. Let it cool slightly, then scoop out the cooked flesh and mash it until smooth. For reduced pumpkin puree, spread about 1 cup of this mashed pumpkin onto a baking sheet lined with parchment paper and bake at 250°F (120°C) for about 30-45 minutes, stirring halfway through, until it thickens and the water content reduces. This concentrates the flavor and prevents a soggy dough. You’ll need 140g and 115g of this reduced puree for the recipe.
Preparing the Dough
Start by proofing your yeast. In a small bowl, combine the lukewarm milk (it should feel like a warm bath, not hot) with the 2 1/4 tsp active dry yeast and 4 Tbsp (50g) of brown sugar. Give it a gentle stir and let it sit for about 5-10 minutes. You’re looking for it to become foamy and bubbly. This shows the yeast is alive and ready to work its magic. If it doesn’t foam, your yeast might be old, or the milk was too hot or too cold, and you’ll need to start this step over.
In a large mixing bowl (or the bowl of your stand mixer), whisk together the 565g all-purpose flour, 1 tsp salt, 1 tsp cinnamon, and 1/2 tsp ground cardamom. These dry ingredients will ensure the spices are evenly distributed throughout the dough.
Once the yeast mixture is foamy, add it to the dry ingredients. Then, add the 140g reduced pumpkin puree, 2 lightly beaten eggs (at room temperature so they incorporate smoothly), and 1 tsp vanilla bean paste. If using a stand mixer, attach the dough hook and mix on low speed until everything just starts to come together. If mixing by hand, use a sturdy spoon or spatula until the dough is shaggy.
Now, it’s time to add the butter. Gradually add the 120g unsalted butter, cut into small cubes, to the dough. Continue mixing on low speed until the butter is mostly incorporated. The dough will look a bit messy at this stage, and that’s perfectly fine. It’s important that the butter is at room temperature, not melted, as this creates flaky layers in the dough.
Kneading and First Rise
Increase the mixer speed to medium-low and knead for 8-10 minutes, or knead by hand on a lightly floured surface for about 10-12 minutes. You’re looking for a soft, smooth, and slightly sticky dough. It should spring back slowly when gently poked. It’s better to err on the side of slightly sticky rather than adding too much extra flour, which can make the rolls tough.
Lightly grease a clean large bowl with a little oil or cooking spray. Place the kneaded dough in the bowl, turning it to coat all sides. Cover the bowl tightly with plastic wrap or a clean kitchen towel. Let the dough rise in a warm place for 1 to 1.5 hours, or until it has doubled in size. A slightly warmer spot, like an oven that’s been turned off after being preheated to its lowest setting for a minute, can help speed this up.
Assembling the Rolls
Punch down the risen dough to release the air. Turn it out onto a lightly floured surface. Gently roll or press the dough into a large rectangle, approximately 12×18 inches (30×45 cm). Aim for an even thickness, about 1/4 inch.
Now for the filling. In a medium bowl, combine the 225g unsalted butter, softened but not melted, with the 360g light or dark brown sugar and the 115g reduced pumpkin puree. Mix well until it forms a thick, spreadable paste. This is what makes the filling so rich and gooey.
Spread this pumpkin-butter-sugar mixture evenly over the surface of the rolled-out dough, leaving about a 1/2-inch border along one of the long edges. This border will help seal the roll and prevent the filling from oozing out too much. Sprinkle an additional 1 teaspoon of cinnamon and a pinch of nutmeg over the filling if you like an extra spice kick.
Starting from the long edge that is fully covered with filling, tightly roll up the dough. Pinch the seam to seal it. If the dough feels a bit sticky, dust your hands and the surface lightly with flour. Once rolled, you can gently reshape it into a more uniform log.
Cutting and Second Rise
Using a sharp knife or a piece of unflavored dental floss, cut the log into 12 equal rolls. For perfectly even cuts with floss, slide the floss under the log, bring the ends up, cross them over the top, and pull in opposite directions. This method prevents squishing the delicate dough. Place the cut rolls, cut-side up, into a greased 9×13 inch (23×33 cm) baking dish. Leave a little space between them as they will expand.
Cover the baking dish loosely with plastic wrap or a clean kitchen towel and let the rolls rise again in a warm place for another 30-45 minutes, or until they are visibly puffy and have nearly doubled in size. This second rise is essential for light and airy cinnamon rolls.
Baking and Glazing
Preheat your oven to 375°F (190°C). Once the rolls have finished their second rise, remove the cover and bake for 20-25 minutes, or until they are golden brown on top and cooked through. The centers should look set. If they start to brown too quickly, you can loosely tent the pan with foil.
While the rolls are baking, prepare the glaze. In a medium bowl, whisk together 1 cup (120g) powdered sugar, 2 tablespoons softened cream cheese (optional, but adds a lovely tang), 1 tablespoon milk or cream, and 1/2 teaspoon vanilla extract. Add more milk or cream a teaspoon at a time until you reach your desired drizzling consistency.
Once the rolls are out of the oven, let them cool in the pan for about 10-15 minutes before drizzling the glaze generously over the warm rolls. The warmth of the rolls will help the glaze melt slightly and coat them beautifully. Serve warm for the ultimate treat. These are best enjoyed the day they are made, but leftovers can be stored in an airtight container at room temperature for a day or two. Reheat gently in the microwave for a few seconds to revive their softness.
Conclusion:
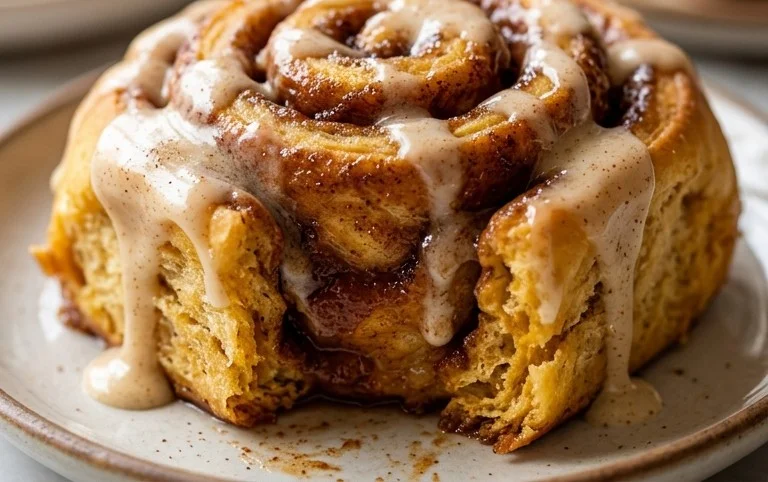
These pumpkin cinnamon rolls really are something special. The pumpkin in the dough makes them unbelievably soft and moist, and the warm spices in the filling are just perfect for a cozy day. They’re great for a weekend brunch, a holiday treat, or just because you want something comforting. Serve them warm with that sweet cream cheese glaze; it’s the best way to enjoy them. A little extra glaze never hurt anyone! If you want to change things up, try adding chopped pecans or walnuts to the filling, or a pinch of nutmeg to the glaze for an extra layer of spice. You can also use a maple glaze instead of cream cheese. They store well, too. Just keep them in an airtight container at room temperature for a couple of days, or in the fridge if you want them to last longer.
Frequently Asked Questions:
Q: Can I make the dough ahead of time?
A: Yes, you can prepare the dough and let it do its first rise in the refrigerator overnight. Punch it down in the morning and proceed with shaping the rolls.
Q: My rolls didn’t rise much. What went wrong?
A: Make sure your yeast was active. You can test it by dissolving it in the lukewarm milk with a pinch of sugar. If it gets foamy after 5-10 minutes, it’s good to go. Also, ensure your milk wasn’t too hot, as that can kill the yeast.
Q: How do I get that nice swirl in the filling?
A: Roll the dough out evenly into a rectangle. Spread the softened butter and then the sugar-spice mixture all the way to the edges. Roll it up tightly from one of the long sides. Sealing the seam well helps keep everything contained during baking.
Pumpkin Cinnamon Rolls
Deliciously spiced pumpkin cinnamon rolls with a sweet brown sugar filling and optional cream cheese frosting.
Ingredients
-
One 425g can Pumpkin Puree
-
2 1/4 tsp active dry yeast
-
150g whole milk, lukewarm
-
4 Tbsp (50g) brown sugar
-
565g all-purpose flour
-
1 tsp salt
-
1 tsp cinnamon
-
1/2 tsp ground cardamom
-
140g reduced pumpkin puree
-
2 eggs, lightly beaten, at room temperature
-
1 tsp vanilla bean paste
-
120g unsalted butter, at room temperature
-
225g unsalted butter, at room temperature
-
360g light or dark brown sugar
-
115g reduced pumpkin puree
Instructions
-
Step 1
In a small bowl, combine the lukewarm milk, active dry yeast, and 1 tablespoon of the brown sugar. Let it sit for 5-10 minutes until foamy. -
Step 2
In a large bowl, whisk together the flour, salt, cinnamon, and cardamom. Add the remaining 3 tablespoons of brown sugar. -
Step 3
Add the activated yeast mixture, pumpkin puree, eggs, and vanilla bean paste to the dry ingredients. Mix until a shaggy dough forms. -
Step 4
Turn the dough out onto a lightly floured surface and knead for 6-8 minutes until smooth and elastic. Gradually incorporate the 120g of room temperature unsalted butter, a little at a time, until fully combined. -
Step 5
Place the dough in a greased bowl, cover, and let rise in a warm place for 1-1.5 hours, or until doubled in size. -
Step 6
While the dough rises, prepare the filling by combining the 225g unsalted butter, 360g brown sugar, 140g reduced pumpkin puree, and 115g reduced pumpkin puree. Mix until smooth. -
Step 7
Once the dough has risen, punch it down and roll it out into a large rectangle. Spread the pumpkin filling evenly over the dough. -
Step 8
Roll the dough tightly from one long side to create a log. Slice the log into 12 equal rolls. -
Step 9
Place the rolls in a greased baking dish, cover, and let rise for another 30 minutes. -
Step 10
Bake in a preheated oven at 375°F (190°C) for 20-25 minutes, or until golden brown. Let cool slightly before serving.
Important Information
Nutrition Facts (Per Serving)
It is important to consider this information as approximate and not to use it as definitive health advice.
Allergy Information
Please check ingredients for potential allergens and consult a health professional if in doubt.


Leave a Comment