
The unmistakable scent of butter baking, the delicate crispness giving way to a tender crumb – that’s the magic of authentic Danish Butter Cookies. These aren’t your average crumbly cookies; they are incredibly light, rich, and truly melt in your mouth, leaving you wanting just one more. I find myself making batches of these during the holiday season, but honestly, they are a welcome treat any time of year. The simplicity of the ingredients is key to their extraordinary flavor, letting the high-quality butter shine through. Getting the texture just right is all about the technique, and once you nail it, you’ll understand why these are a classic for a reason. Ingredients: 1 cup (227 g) European salted butter (room temperature) 1/2 cup (100 g) granulated sugar 1/8 teaspoon salt 2 egg yolks 2 teaspoons (10 g) vanilla extract 1 tablespoon (15 g) whole milk (or more to soften) 2 cups (220 g) all-purpose flour 1/2 cup (50 g) cake flour Coarse sugar (for decorating) Making the Dough The foundation of these delightful cookies lies in properly creaming your butter and sugar. This step is essential for incorporating air, which contributes significantly to the cookies’ light and tender texture. Start with your European salted butter, ensuring it’s truly at room temperature. It should be soft enough to indent easily with a fingertip but not so soft that it’s melting or greasy. If your butter is too cold, it won’t cream properly, resulting in a dense cookie. Add the granulated sugar and salt to the softened butter. Beat them together on medium speed using an electric mixer until the mixture is pale yellow and fluffy, which typically takes about 3-5 minutes. This creaming process is where much of the cookie’s signature lightness begins. Don’t rush this step; it’s vital for the final texture of your Danish Butter Cookies.
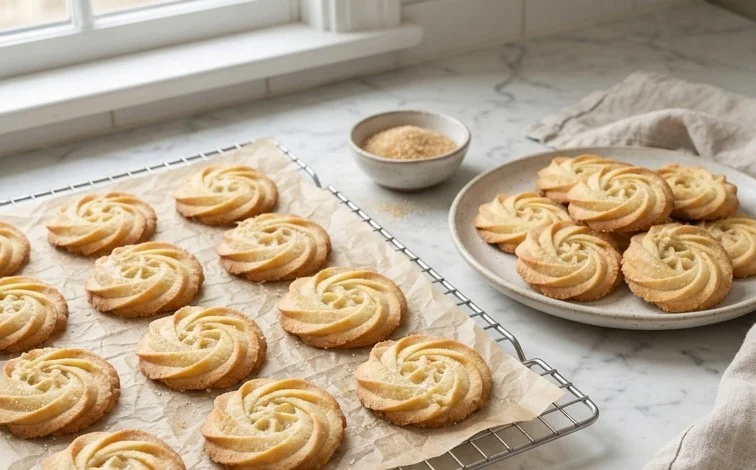
Danish Butter Cookies (Melt in your mouth)
The unmistakable scent of butter baking, the delicate crispness giving way to a tender crumb – that’s the magic of authentic Danish butter cookies. These aren’t your average crumbly cookies; they are incredibly light, rich, and truly melt in your mouth, leaving you wanting just one more. I find myself making batches of these during the holiday season, but honestly, they are a welcome treat any time of year. The simplicity of the ingredients is key to their extraordinary flavor, letting the high-quality butter shine through. Getting the texture just right is all about the technique, and once you nail it, you’ll understand why these are a classic for a reason.
Ingredients:
- 1 cup (227 g) European salted butter (room temperature)
- 1/2 cup (100 g) granulated sugar
- 1/8 teaspoon salt
- 2 egg yolks
- 2 teaspoons (10 g) vanilla extract
- 1 tablespoon (15 g) whole milk (or more to soften)
- 2 cups (220 g) all-purpose flour
- 1/2 cup (50 g) cake flour
- Coarse sugar (for decorating)
Making the Dough
The foundation of these delightful cookies lies in properly creaming your butter and sugar. This step is essential for incorporating air, which contributes significantly to the cookies’ light and tender texture. Start with your European salted butter, ensuring it’s truly at room temperature. It should be soft enough to indent easily with a fingertip but not so soft that it’s melting or greasy. If your butter is too cold, it won’t cream properly, resulting in a dense cookie. If it’s too warm, the cookies might spread too much during baking.
In a large mixing bowl, combine the softened butter with the granulated sugar and the 1/8 teaspoon of salt. Use an electric mixer, either a stand mixer with a paddle attachment or a hand mixer, to cream these ingredients together. Beat them on medium speed for about 3 to 5 minutes. You are looking for a pale yellow, fluffy mixture. Scrape down the sides of the bowl periodically to ensure everything is evenly incorporated. This creaming process is where much of the air is whipped into the dough, making those cookies airy and light.
Next, add your egg yolks one at a time, beating well after each addition until fully incorporated. The egg yolks add richness and help bind the dough. Following the egg yolks, mix in the vanilla extract. Ensure the vanilla is evenly distributed throughout the butter mixture.
Now, for the liquid element: add the tablespoon of whole milk. Mix until just combined. If your dough seems excessively stiff at this point, you can add another teaspoon of milk, but be careful not to make it too wet. The consistency should be thick but pliable.
Combining the Flours
In a separate medium bowl, whisk together the all-purpose flour and the cake flour. Whisking them together beforehand ensures they are evenly distributed. Cake flour has a lower protein content than all-purpose flour, which helps create a more tender and delicate crumb in the cookies. This blend is crucial for achieving that signature melt-in-your-mouth texture.
Gradually add the flour mixture to the butter and sugar mixture. You can do this in two or three additions, mixing on low speed until just combined. It’s very important not to overmix the dough once the flour is added. Overmixing develops the gluten in the flour, which can lead to tough cookies. Stop mixing as soon as you no longer see streaks of dry flour. The dough will be quite soft and sticky at this stage.
Shaping and Baking
Now for the fun part – shaping! This dough is too soft to roll out easily. The traditional way to shape these cookies is using a piping bag with a star tip. If you don’t have a piping bag, you can use a sturdy plastic bag with a corner snipped off, or even just drop spoonfuls of dough onto the baking sheet and gently flatten them with a fork.
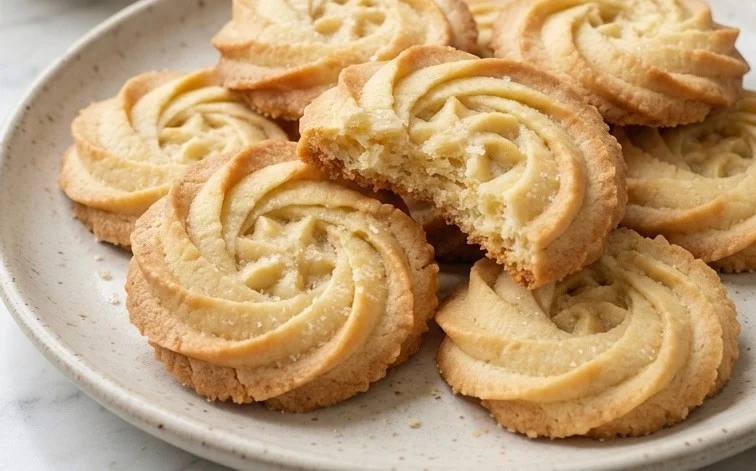
Prepare your baking sheets by lining them with parchment paper. This prevents sticking and makes for easy cleanup. Spoon the dough into a piping bag fitted with a large star tip. Pipe the dough onto the prepared baking sheets, creating your desired shapes. Swirls, rosettes, or simple S-shapes are classic choices. Leave about an inch of space between cookies as they will spread slightly.
Before baking, lightly sprinkle the tops of the cookies with coarse sugar. This adds a lovely sparkle and a delightful crunch. It also enhances the visual appeal of these delicate cookies.
Baking to Perfection
Preheat your oven to 350°F (175°C). This is a moderate baking temperature that allows the cookies to bake through evenly without browning too quickly.
Bake the cookies for 10 to 14 minutes, or until the edges are lightly golden brown. Keep a close eye on them, as baking times can vary depending on your oven and the size of your cookies. The centers should still look pale. Overbaking will result in hard cookies, and we’re aiming for melt-in-your-mouth tenderness.
Once baked, remove the baking sheets from the oven and let the cookies cool on the sheets for about 5 minutes. This allows them to firm up slightly before you move them. Then, carefully transfer the cookies to a wire rack to cool completely. This step is important for achieving the correct crispness and preventing them from becoming soggy.
Storage
Once completely cool, store your Danish butter cookies in an airtight container at room temperature. They will stay fresh and delicious for up to a week. The best part is that they actually get even more melt-in-your-mouth tender after a day or two, as the flavors meld and the texture softens. Enjoy them with a cup of coffee or tea, or simply on their own for a moment of pure, buttery bliss.
Conclusion:
You’ve now learned the simple yet effective steps to creating authentic Danish Butter Cookies that truly melt in your mouth. The emphasis on quality butter and proper creaming techniques ensures a tender, rich cookie that stands out from the rest. These cookies are wonderful on their own, but they also make a fantastic base for ice cream sandwiches or can be paired with fresh fruit for a simple dessert. For variations, consider adding a pinch of cardamom to the dough for a subtle spice, or dipping half of the cooled cookies in melted dark chocolate for an extra touch of indulgence. They store exceptionally well, making them perfect for holiday cookie platters or as thoughtful homemade gifts. I encourage you to try this recipe; the aroma alone while baking is a reward, and the taste is simply divine. You’ll be delighted with how simple it is to achieve such an elegant result at home.
Why are these cookies called Danish?
They originate from Denmark and are a traditional part of Danish Christmas baking, known for their rich butter flavor and delicate texture.
Can I use unsalted butter?
Yes, you can use unsalted butter. If you do, add an extra 1/4 teaspoon of salt to the dough to compensate for the lack of salt.
How do I get the perfect shape?
Using a piping bag fitted with a star tip helps achieve the classic swirled shape. Alternatively, you can roll small portions of dough into logs and then into a crescent shape before baking.
Danish Butter Cookies (Melt in your mouth)
Deliciously rich and tender Danish butter cookies that truly melt in your mouth, perfect for any occasion.
Ingredients
-
1 cup (227 g) European salted butter (room temperature)
-
1/2 cup (100 g) granulated sugar
-
1/8 teaspoon salt
-
2 egg yolks
-
2 teaspoons (10 g) vanilla extract
-
1 tablespoon (15 g) whole milk (or more to soften)
-
2 cups (220 g) all-purpose flour
-
1/2 cup (50 g) cake flour
-
coarse sugar (for decorating)
Instructions
-
Step 1
In a large bowl, cream together the softened butter, granulated sugar, and salt until light and fluffy. -
Step 2
Beat in the egg yolks and vanilla extract until well combined. -
Step 3
Gradually add the all-purpose flour and cake flour, mixing until just combined. If the dough is too stiff, add a little more milk to soften. -
Step 4
Transfer the dough to a piping bag fitted with a star tip and pipe desired shapes onto baking sheets lined with parchment paper. -
Step 5
Sprinkle the tops of the cookies with coarse sugar. -
Step 6
Bake in a preheated oven at 350°F (175°C) for 10-12 minutes, or until the edges are lightly golden. -
Step 7
Let the cookies cool on the baking sheets for a few minutes before transferring them to a wire rack to cool completely.
Important Information
Nutrition Facts (Per Serving)
It is important to consider this information as approximate and not to use it as definitive health advice.
Allergy Information
Please check ingredients for potential allergens and consult a health professional if in doubt.


Leave a Comment