
Easy No Bake Christmas Treats! These no-bake Christmas treats are a lifesaver when the holiday season gets hectic. Forget the oven stress; we’re talking simple ingredients, minimal effort, and maximum festive cheer. My personal favorite thing about making these is how quickly they come together, leaving me more time to actually enjoy the season, and less time worrying about burning something! Plus, the kids absolutely love helping out with these, making them a perfect family activity. Ingredients: 1 cup unsalted butter 4 cups powdered sugar 1/2 cup unsweetened cocoa powder 1/4 cup milk 1 teaspoon vanilla extract 1 cup chopped nuts (like walnuts or pecans), optional 1/2 cup sprinkles (holiday colors are great) Instructions: Preparing the Base In a large, microwave-safe bowl, melt the unsalted butter. This usually takes about 60-90 seconds on high power, depending on your microwave. Keep an eye on it to prevent it from burning. Once melted, let it cool slightly for a minute or two. Sift the powdered sugar and unsweetened cocoa powder into the bowl with the melted butter. Sifting is key here to prevent any lumps in your final treat mixture. This ensures a smooth, creamy texture. If you don’t have a sifter, you can use a fine-mesh sieve. Add the milk and vanilla extract to the bowl. Start mixing everything together. At first, it will look a bit crumbly and dry, but keep going. I usually use a sturdy spoon or a silicone spatula to mix. As you continue to stir, the mixture will gra

Easy No Bake Christmas Treats!
These no-bake Christmas treats are a lifesaver when the holiday season gets hectic. Forget the oven stress; we’re talking simple ingredients, minimal effort, and maximum festive cheer. My personal favorite thing about making these is how quickly they come together, leaving me more time to actually enjoy the season, and less time worrying about burning something! Plus, the kids absolutely love helping out with these, making them a perfect family activity.
Ingredients:
- 1 cup unsalted butter
- 4 cups powdered sugar
- 1/2 cup unsweetened cocoa powder
- 1/4 cup milk
- 1 teaspoon vanilla extract
- 1 cup chopped nuts (like walnuts or pecans), optional
- 1/2 cup sprinkles (holiday colors are great)
Instructions:
Preparing the Base
- In a large, microwave-safe bowl, melt the unsalted butter. This usually takes about 60-90 seconds on high power, depending on your microwave. Keep an eye on it to prevent it from burning. Once melted, let it cool slightly for a minute or two.
- Sift the powdered sugar and unsweetened cocoa powder into the bowl with the melted butter. Sifting is key here to prevent any lumps in your final treat mixture. This ensures a smooth, creamy texture. If you don’t have a sifter, you can use a fine-mesh sieve.
- Add the milk and vanilla extract to the bowl. Start mixing everything together. At first, it will look a bit crumbly and dry, but keep going. I usually use a sturdy spoon or a silicone spatula to mix. As you continue to stir, the mixture will gradually come together into a thick, fudgy dough.
Shaping and Decorating
- If you’re using chopped nuts, stir them into the mixture now. Make sure they’re evenly distributed throughout the dough. This adds a lovely crunch and flavor.
- Now comes the fun part: shaping! Take about a tablespoon of the mixture at a time and roll it into small balls between your palms. If the mixture is too sticky, you can lightly grease your hands with a tiny bit of butter or oil. Aim for uniform-sized balls so they cook (or in this case, set) evenly. Place the rolled balls onto a baking sheet lined with parchment paper. This parchment paper is important; it stops the treats from sticking to the sheet.
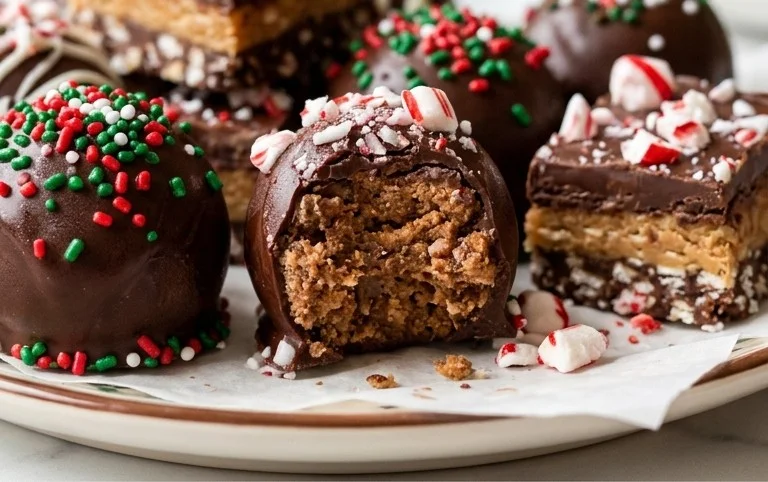
- Get your sprinkles ready. Gently roll each ball in the holiday sprinkles until they are well coated. This is where you can really get creative with your festive designs. You can use a single color, mix and match, or even press a few extra sprinkles onto individual truffles for a more detailed look. This step is a great way to involve children, as they usually love decorating!
Setting and Serving
- Once all the balls are shaped and decorated, place the baking sheet into the refrigerator. Let the treats chill for at least 30 minutes to an hour. This chilling time is essential for them to firm up properly and hold their shape. You want them to be firm to the touch, not soft or melty.
- After chilling, the treats should be firm enough to handle. You can serve them immediately, or store them in an airtight container in the refrigerator. They will keep well for about a week. If you stack them, it’s a good idea to place a layer of parchment paper between each layer to prevent them from sticking together.
- These little bites are perfect for cookie platters, party favors, or just a sweet treat with your afternoon tea. Their rich chocolatey flavor, combined with the festive sprinkles, makes them a hit with everyone. They’re so easy to make, you might find yourself whipping up a batch more than once during the holiday season! Enjoy the simplicity and the delicious results.
Conclusion:
These Easy No Bake Christmas Treats are a fantastic way to add some homemade holiday magic without the baking stress. They come together so fast, using just a few pantry staples, making them ideal for last-minute gatherings or when you’re short on time. The rich, chocolatey flavor is always a hit, and you can customize them with your favorite nuts or sprinkles to match your personal style or holiday theme. Serve them on a festive platter with hot cocoa or spiced cider for a complete holiday experience. They also make wonderful edible gifts, so package them up in cellophane bags tied with ribbon for a thoughtful, homemade present that anyone would be thrilled to receive. Don’t be afraid to get creative with the decorations! The joy of making these no-bake treats is how forgiving and fun they are for everyone involved. They truly are a testament to simple ingredients creating something special.
FAQ
Can I make these treats ahead of time?
Absolutely! These no-bake treats store very well. Once they are fully set, you can keep them in an airtight container at room temperature for up to a week. This makes them perfect for making a few days before Christmas, freeing up your schedule for other preparations.
What if I don’t have cocoa powder?
If you’re out of cocoa powder, you can try substituting it with an equal amount of finely melted unsweetened chocolate. You might need to adjust the milk slightly to get the right consistency. Another option is to simply omit the cocoa and make vanilla-flavored no-bake cookies, though they won’t have the same rich, chocolatey taste. You could also add a bit more powdered sugar if omitting the cocoa powder to maintain sweetness.
How do I get a smoother texture?
Sifting your dry ingredients, especially the powdered sugar and cocoa powder, is the most important step for a smooth texture. Ensure your butter is fully melted but not browned. Mixing thoroughly, even when it looks crumbly at first, will help all the ingredients combine. If the mixture becomes too stiff, you can add a tiny bit more milk, a teaspoon at a time, until it’s spreadable.
Easy No Bake Christmas Treats!
Simple and delicious no-bake Christmas treats perfect for holiday gatherings.
Ingredients
-
2 cups crushed graham crackers
-
1/2 cup melted butter
-
1/4 cup granulated sugar
-
1 cup powdered sugar
-
1/2 cup peanut butter
-
1/4 cup milk
-
1 teaspoon vanilla extract
-
Red and green sprinkles
Instructions
-
Step 1
In a medium bowl, combine crushed graham crackers, melted butter, and granulated sugar. Mix well. -
Step 2
Press the mixture evenly into the bottom of an 8×8 inch baking dish. -
Step 3
In a separate bowl, beat together peanut butter, powdered sugar, milk, and vanilla extract until smooth. -
Step 4
Spread the peanut butter mixture evenly over the graham cracker crust. -
Step 5
Sprinkle generously with red and green sprinkles. -
Step 6
Refrigerate for at least 1 hour to allow the treats to set. Cut into squares and serve.
Important Information
Nutrition Facts (Per Serving)
It is important to consider this information as approximate and not to use it as definitive health advice.
Allergy Information
Please check ingredients for potential allergens and consult a health professional if in doubt.


Leave a Comment