
Puerto Rican Coquito Recipe – Coquito de Puerto Rico offers a velvety smooth, coconut milk beverage that is deeply rooted in holiday traditions. This authentic Puerto Rican Coquito de Puerto Rico is a rich and creamy delight, often described as a coconut hug in a glass. Its signature taste comes from a harmonious blend of coconut milk, sweetened condensed milk, and evaporated milk, perfumed with warm spices like cinnamon and nutmeg. While it’s a staple during the Christmas season, its comforting flavor makes it a treat to enjoy anytime. Making this classic drink at home is a simple pleasure that fills your kitchen with wonderful aromas. Many find the process of blending the ingredients to be quite forgiving, making it accessible even for those new to cooking. The trick to a perfectly chilled coquito is ensuring all your dairy and coconut milk bases are thoroughly cold before you begin mixing them. I often put mine in the refrigerator the night before or for at least several hours.
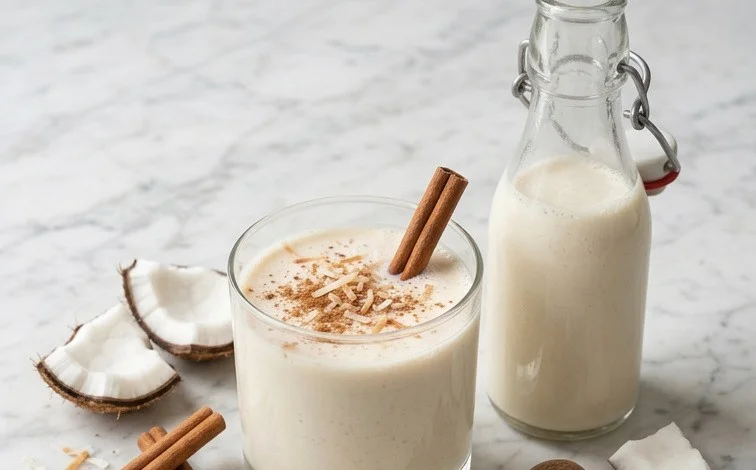
Puerto Rican Coquito Recipe – Coquito de Puerto Rico
Coquito, a beloved Puerto Rican holiday drink, is more than just a beverage; it’s a creamy, coconut-infused hug in a glass that embodies the spirit of Puerto Rican Christmas. This rich, decadent drink is typically made with a base of coconut milk, sweetened condensed milk, and evaporated milk, all infused with the warm spices of cinnamon and nutmeg. While traditionally enjoyed during the festive season, its deliciousness makes it a welcome treat any time of year. Making coquito at home is incredibly rewarding, and it’s a wonderful way to share a taste of Puerto Rican tradition with friends and family. The scent of cinnamon and coconut filling your kitchen as you prepare it is a special kind of magic.
Ingredients:
- 3 cans (13.5 ounces each) unsweetened full-fat coconut milk
- 1 can (14 ounces) sweetened condensed milk
- 1 can (12 ounces) evaporated milk
- 1/2 cup water
- 2 teaspoons vanilla extract
- 1 teaspoon ground cinnamon
- 1/2 teaspoon ground nutmeg
- Pinch of ground cloves (optional, for deeper spice)
- Extra ground cinnamon for garnish
Making the Coquito
The process of making coquito is quite straightforward and forgiving, making it accessible even for novice cooks. The key is to blend the ingredients until smooth and well combined. I like to chill all my ingredients in the refrigerator for at least a few hours, or even overnight, before I start. This ensures the coquito will be perfectly cold when it’s ready to serve, and it also helps the flavors meld together beautifully.
Step 1: Combine the Milks
In a large blender, I start by pouring in the contents of all three cans of unsweetened full-fat coconut milk. Full-fat coconut milk is essential here; it provides the creamy texture and rich flavor that makes coquito so special. If you use light coconut milk, your coquito will be thinner and less satisfying. Next, I add the entire can of sweetened condensed milk. This is where much of the sweetness comes from, so be sure to use the full can. Following that, I add the can of evaporated milk. Evaporated milk adds another layer of creaminess without diluting the coconut flavor too much.
Step 2: Add Water and Flavorings
Now it’s time to add the liquid and spices that will bring the coquito to life. I pour in 1/2 cup of water. This helps to create a smoother consistency and makes the drink a little lighter. Then comes the vanilla extract. I use 2 teaspoons, but you can adjust this slightly to your preference. After the vanilla, I add 1 teaspoon of ground cinnamon and 1/2 teaspoon of ground nutmeg. These warm spices are characteristic of coquito and evoke the feeling of the holidays. For those who enjoy a more complex spice profile, a tiny pinch of ground cloves can be added, but be careful not to overdo it, as cloves can be quite potent.
Step 3: Blend Until Smooth
With all the ingredients in the blender, I secure the lid tightly. I start blending on a low speed, gradually increasing to high speed. I blend for about 1 to 2 minutes, or until the mixture is completely smooth and no longer has any lumps or streaks of spices. It’s important to blend thoroughly to ensure all the flavors are well distributed. If you don’t have a blender, you can whisk everything together vigorously in a large bowl, but a blender will give you the smoothest result. Make sure to scrape down the sides of the blender with a spatula if needed to ensure everything is incorporated.
Step 4: Chill the Coquito
Once blended, I carefully pour the coquito into an airtight container or bottle. It’s crucial to chill the coquito thoroughly before serving. I usually refrigerate it for at least 4 hours, but overnight is even better. This allows the flavors to fully develop and meld together, and it ensures the coquito is served refreshingly cold. The chilling process also helps the coquito to thicken slightly. If you are in a hurry, you can fill your serving glasses with ice and pour the coquito over it, but the flavor is best when the drink itself is chilled.
Step 5: Serve and Garnish
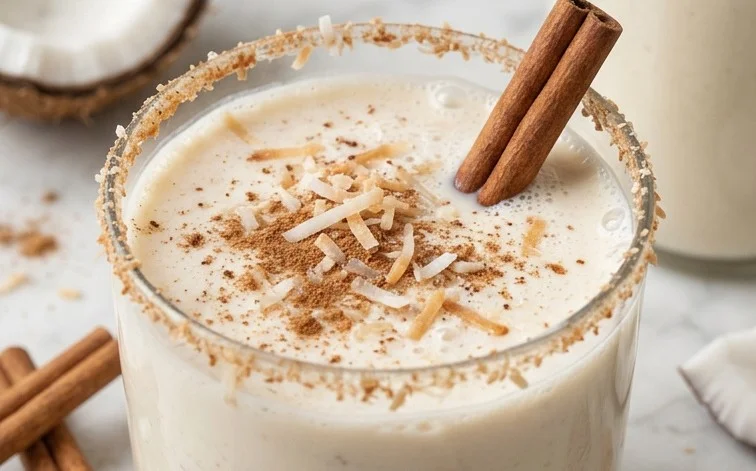
When it’s time to serve, I give the coquito a good shake or stir, as some of the coconut solids might settle at the bottom. I then pour it into small glasses or festive cups. For an extra touch of holiday cheer and to enhance the aroma, I generously sprinkle a bit of ground cinnamon on top of each serving just before presenting it. This final touch is not only visually appealing but also adds a delightful fragrant layer to the experience. Coquito is best enjoyed chilled. You can store leftover coquito in the refrigerator for up to a week. Just remember to give it a good shake or stir before each serving, as the natural ingredients may separate. Enjoy this taste of Puerto Rican tradition!
Conclusion:
Making Puerto Rican Coquito is a rewarding experience that brings a taste of the holidays right into your home. This creamy, coconut-infused drink is wonderfully versatile and can be enjoyed chilled year-round, not just during festive seasons. Its rich texture and warm spice notes make it a comforting treat for any occasion, perfect for sharing with loved ones or enjoying as a personal indulgence. Remember, the key is well-chilled ingredients for the best texture. Experiment with the spice levels to find your perfect balance. For a fun twist, consider adding a hint of pure almond extract along with the vanilla, or even a pinch of ground ginger for extra warmth. When serving, a sprinkle of cinnamon on top adds a lovely visual appeal and an extra layer of aroma. Store any leftovers in an airtight container in the refrigerator; it keeps well for about a week.
Frequently Asked Questions:
Can I make coquito ahead of time?
Absolutely! Coquito is best when made at least a day in advance to allow the flavors to meld together. It needs to be thoroughly chilled before serving.
How long does homemade coquito last?
Properly stored in an airtight container in the refrigerator, homemade coquito will last for about 5-7 days. Give it a good shake before each serving as the ingredients can separate.
What can I use instead of coconut milk?
While full-fat coconut milk is essential for the authentic rich texture, you could experiment with other creamy plant-based milks if needed, but the flavor and consistency will differ. Stick to full-fat canned versions for the best results.
Puerto Rican Coquito Recipe – Coquito de Puerto Rico
A traditional creamy and festive Puerto Rican holiday beverage, often enjoyed during Christmas celebrations.
Ingredients
-
1 (13.5 ounce) can evaporated milk
-
1 (15 ounce) can cream of coconut
-
1 (14 ounce) can sweetened condensed milk
-
1/2 cup white apple juice
-
1 teaspoon ground cinnamon
-
1/2 teaspoon ground nutmeg
Instructions
-
Step 1
Combine evaporated milk, cream of coconut, and sweetened condensed milk in a blender. -
Step 2
Blend on medium speed until smooth and well combined. -
Step 3
Add white apple juice to the mixture in the blender. -
Step 4
Blend briefly to incorporate the apple juice. -
Step 5
Pour the coquito into bottles or a pitcher. -
Step 6
Chill thoroughly in the refrigerator for at least 2 hours before serving. -
Step 7
Garnish with a sprinkle of ground cinnamon and nutmeg before serving.
Important Information
Nutrition Facts (Per Serving)
It is important to consider this information as approximate and not to use it as definitive health advice.
Allergy Information
Please check ingredients for potential allergens and consult a health professional if in doubt.

Leave a Comment