
Brown Butter Iced Oatmeal Cookies offer a flavor profile that’s both familiar and excitingly new. The secret to their incredible depth is browning the butter, a simple step that transforms it into a nutty, toasty elixir. This process gives the classic oatmeal cookie an unexpected complexity that elevates it far beyond the ordinary. Paired with a sweet, velvety glaze, these cookies are a true treat. They have that sought-after chewy interior with just the right amount of crisp around the edges. The warm spices of cinnamon and nutmeg complement the rich, browned butter perfectly, making them suitable for any moment you want a little something special. I often find myself making a double batch on a quiet Saturday, and the aroma alone is worth the effort.
Why You’ll Love This Recipe
- Deep Flavor: Browning the butter adds a nutty, toasted dimension.
- Perfect Texture: Chewy centers with slightly crisp edges.
- Comforting Spices: Cinnamon and nutmeg provide a warm, inviting aroma.
- Simple Glaze: A sweet, creamy topping complements the cookie.
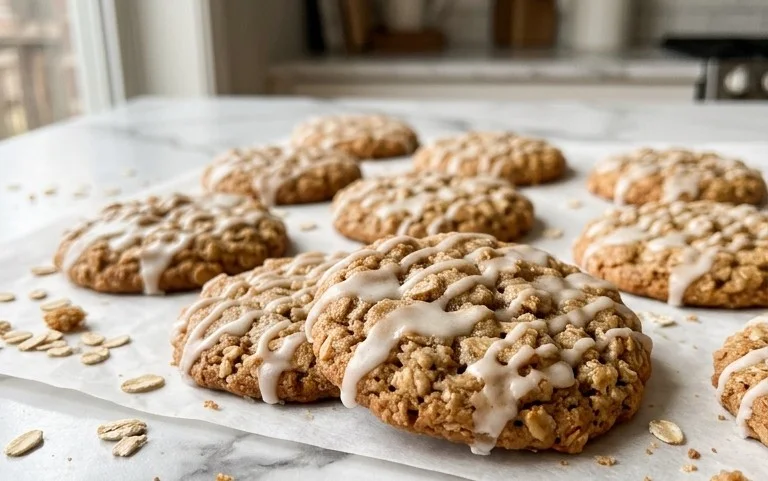
Brown Butter Iced Oatmeal Cookies
There’s something incredibly comforting about a classic oatmeal cookie, but browning the butter before you start takes this humble treat to a whole new level. The nutty, toasty depth it adds is just divine, and when paired with a sweet, creamy glaze, these brown butter iced oatmeal cookies become truly irresistible. They have a wonderfully chewy texture with slightly crisp edges, and the subtle warmth of cinnamon and nutmeg makes them perfect for any occasion, especially when you want a little extra something special. I love making a big batch of these on a weekend afternoon, and the aroma that fills the house is simply heavenly.
Ingredients:
- 1 1/4 cups (282 g) unsalted butter
- 2 cups (190 g) old fashioned oats
- 2 cups (plus 4 tablespoons (280 g) all-purpose flour, spooned and leveled)
- 2 teaspoons baking soda
- 2 teaspoons ground cinnamon
- 1/2 teaspoon ground nutmeg
- 1 1/2 teaspoons salt
- 1 cup (200 g) light brown sugar, packed
- 1 cup (200 g) granulated sugar
- 2 large eggs (room temperature)
- 2 teaspoons vanilla
- 2 tablespoons molasses (not blackstrap)
- 2 cups powdered sugar (sifted)
- 3 tablespoons milk or heavy cream
- 1/4 teaspoon vanilla
Instructions:
Step 1: Brown the Butter and Toast the Oats
This is where the magic begins. Place your 1 1/4 cups of unsalted butter in a light-colored saucepan over medium heat. Watch it carefully; you’ll see it melt, then start to foam. Continue cooking, swirling the pan occasionally, until the milk solids at the bottom turn a deep amber color and the butter smells nutty and toasted. This usually takes about 5-8 minutes. Don’t let it burn – burnt butter is bitter! Once browned, immediately pour the butter into a heatproof bowl to stop the cooking process. Add the 2 cups of old-fashioned oats to the still-warm brown butter and stir to coat. Let them sit and soak up that delicious flavor while you prepare the rest of the dough. This step gives the oats a wonderfully toasty, nutty taste that’s far superior to plain oats.
Step 2: Combine Dry Ingredients
In a medium bowl, whisk together your 2 cups plus 4 tablespoons of all-purpose flour, 2 teaspoons of baking soda, 2 teaspoons of ground cinnamon, 1/2 teaspoon of ground nutmeg, and 1 1/2 teaspoons of salt. Whisking ensures that the leavening agents and spices are evenly distributed throughout the flour, which is key for consistent cookie texture and flavor. Make sure your flour is spooned and leveled into the measuring cup, rather than scooping directly, to avoid packing too much flour, which can lead to dry cookies.
Step 3: Cream Wet Ingredients
In a large mixing bowl, cream together 1 cup of packed light brown sugar and 1 cup of granulated sugar. You can use an electric mixer on medium speed or a sturdy whisk and some elbow grease. Creaming means beating them together until the mixture is light, fluffy, and pale in color. This process incorporates air, which helps with the cookies’ rise and texture. Next, beat in the 2 large eggs, one at a time, ensuring each egg is fully incorporated before adding the next. Add the 2 teaspoons of vanilla and 2 tablespoons of molasses. Beat until everything is well combined and smooth. The molasses adds a subtle depth and chewiness.
Step 4: Combine and Chill the Dough
Gradually add the dry ingredient mixture to the wet ingredients, mixing on low speed (or by hand) until just combined. Be careful not to overmix, as this can develop the gluten in the flour too much, resulting in tough cookies. Once the dough is mostly mixed, gently fold in the oat and brown butter mixture from Step 1. The dough will be quite soft. Cover the bowl tightly with plastic wrap and refrigerate for at least 1 hour, or preferably 2-3 hours. Chilling the dough is essential. It allows the fats to firm up, making the cookies easier to scoop and preventing them from spreading too much in the oven. It also allows the flavors to meld together beautifully.
Step 5: Bake the Cookies
Preheat your oven to 350°F (175°C). Line baking sheets with parchment paper for easy cleanup and to prevent sticking. Scoop rounded tablespoons of the chilled dough onto the prepared baking sheets, leaving about 2 inches between cookies to allow for spreading. I like to press them down slightly with the palm of my hand or the bottom of a glass for a more uniform shape, but you can leave them as mounds for a more rustic look. Bake for 10-13 minutes, or until the edges are golden brown and the centers are still slightly soft. The cookies will continue to firm up as they cool on the baking sheet. Let them cool on the baking sheet for 5 minutes before transferring them to a wire rack to cool completely. Trying to move them too soon will likely result in broken cookies.
Step 6: Make the Brown Butter Icing
While the cookies are cooling, prepare the icing. In a medium bowl, whisk together 2 cups of sifted powdered sugar with 3 tablespoons of milk or heavy cream and 1/4 teaspoon of vanilla. Sifting the powdered sugar is important to prevent lumps in your icing. Start with 3 tablespoons of liquid and add more a teaspoon at a time, if needed, until you reach your desired drizzling consistency. You want it thick enough to coat the cookies but thin enough to drizzle easily. If it’s too thin, add a bit more powdered sugar. If it’s too thick, add a tiny bit more milk.
Step 7: Ice the Cookies
Once the cookies are completely cool, you can ice them. You can dip the tops of the cookies into the icing, or use a spoon or a piping bag to drizzle the icing over the tops. I often just use a spoon to create random drizzles, which looks lovely and is super easy. Let the icing set for about 15-30 minutes before stacking or storing the cookies.
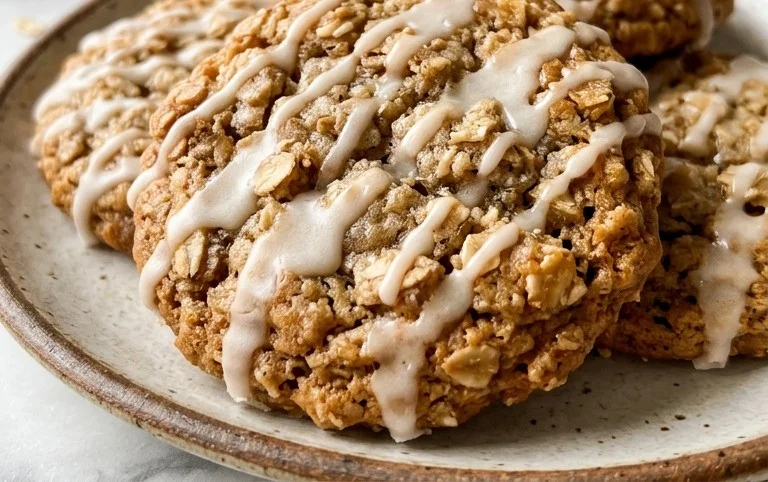
These brown butter iced oatmeal cookies are a real treat. The nutty depth from the browned butter, the chewy texture from the oats, and the sweet contrast of the glaze make them a standout cookie. They store well in an airtight container at room temperature for up to 3-4 days. Enjoy!
Conclusion:
These Brown Butter Iced Oatmeal Cookies are a wonderful way to enjoy a classic with a sophisticated twist. The browned butter adds an incredible depth that makes each bite memorable, while the simple glaze brings a touch of sweetness and elegance. They are comforting, flavorful, and surprisingly easy to make, even with the extra step of browning the butter. I find they are perfect for sharing with friends and family, or just enjoying with a cup of tea on a cozy afternoon. Don’t be afraid to experiment with the glaze – a hint of lemon zest or a different spice could be lovely too!
Serving Suggestions:
Serve these cookies with a glass of cold milk, hot coffee, or your favorite herbal tea. They are also excellent alongside a scoop of vanilla or caramel ice cream.
Variations:
Add a handful of chopped nuts like walnuts or pecans to the dough for extra crunch. You could also stir in some dried cranberries or raisins for a chewy, fruity counterpoint.
Frequently Asked Questions:
Can I skip browning the butter?
While you can technically skip browning the butter, you’ll miss out on the signature nutty flavor that makes these cookies so special. The process is straightforward and only adds a few extra minutes to your prep time. If you do skip it, use the same amount of regular melted butter.
How should I store these cookies?
Store the iced cookies in an airtight container at room temperature for up to 3-4 days. If you stack them, place a piece of parchment paper between layers to prevent the icing from sticking.
Brown Butter Iced Oatmeal Cookies
Deliciously chewy oatmeal cookies with a rich brown butter flavor, topped with a sweet and simple vanilla glaze.
Ingredients
-
1 1/4 cups (282 g) unsalted butter
-
2 cups (190 g) old fashioned oats
-
2 cups (plus 4 tablespoons (280 g)) all-purpose flour, spooned and leveled
-
2 teaspoons baking soda
-
2 teaspoons ground cinnamon
-
1/2 teaspoon ground nutmeg
-
1 1/2 teaspoons salt
-
1 cup (200 g) light brown sugar, packed
-
1 cup (200 g) granulated sugar
-
2 large eggs (room temperature)
-
2 teaspoons vanilla
-
2 tablespoons molasses (not blackstrap)
-
2 cups powdered sugar (sifted)
-
3 tablespoons milk or heavy cream
-
1/4 teaspoon vanilla
Instructions
-
Step 1
Melt unsalted butter in a saucepan over medium heat. Cook, stirring occasionally, until the butter turns a golden brown and smells nutty. Remove from heat and let cool slightly. -
Step 2
In a large bowl, whisk together the all-purpose flour, baking soda, cinnamon, nutmeg, and salt. -
Step 3
In a separate large bowl, cream together the light brown sugar and granulated sugar. Beat in the room temperature eggs one at a time, then stir in the vanilla and molasses until well combined. -
Step 4
Gradually add the cooled brown butter to the wet ingredients, mixing until just combined. Stir in the old fashioned oats. -
Step 5
Slowly incorporate the dry ingredients into the wet ingredients until a dough forms. Cover the dough and chill for at least 30 minutes. -
Step 6
Preheat oven to 350°F (175°C). Line baking sheets with parchment paper. Roll dough into 1-inch balls and place them on the prepared baking sheets, spacing them about 2 inches apart. -
Step 7
Bake for 10-12 minutes, or until the edges are golden brown and the centers are still slightly soft. Let cool on the baking sheets for a few minutes before transferring to a wire rack to cool completely. -
Step 8
For the icing, whisk together the sifted powdered sugar, milk or heavy cream, and vanilla until smooth. Adjust consistency with more milk or powdered sugar as needed. -
Step 9
Drizzle or spread the icing over the cooled cookies.
Important Information
Nutrition Facts (Per Serving)
It is important to consider this information as approximate and not to use it as definitive health advice.
Allergy Information
Please check ingredients for potential allergens and consult a health professional if in doubt.



Leave a Comment