
Polar Bear Cookies offer a delightful combination of a slightly crisp, tender cookie base and a creamy, sweet frosting, all finished with a sparkly crunch. The name comes from their resemblance to a white bear when decorated simply. They are perfect for holidays or just when you want a special treat. Getting the dough right is key to a good cookie texture. First, in a large mixing bowl, cream together the softened unsalted butter and the softened full-fat cream cheese. You want this mixture to be light and fluffy. It’s important that both the butter and cream cheese are at room temperature. This means they should feel soft to the touch, but not melted. Cold butter and cream cheese won’t incorporate properly, leading to a lumpy dough and potentially uneven baking. Use an electric mixer on medium speed for about 2-3 minutes until you have a pale, creamy base. Gradually add the granulated sugar and continue mixing until the mixture is even lighter in color and looks fluffy, about another 3-4 minutes. This step incorporates air, which is vital for the cookie’s tender texture. Next, beat in the large egg and vanilla extract until just combined. Be careful not to overmix at this stage, as it can toughen the cookies. Scrape down the sides of the bowl as needed to ensure everything is evenly incorporated. Your creamy base is now ready for the dry ingredients.
Ingredients:
- 3/4 cup (1 1/2 sticks) unsalted butter, room temperature (170g)
- 1/2 cup or 4 oz. full fat cream cheese, room temp (113g)
- 1 1/2 cups granulated sugar (300g)
- 1 large egg, room temperature (56g)
- 2 tsp vanilla extract or vanilla bean paste (8g)
- 3 cups all-purpose flour (375g)
- 1 Tbsp cornstarch (8g)
- 1/2 tsp baking powder (2g)
- 1/2 tsp fine salt (3g)
- 1 cup unsalted butter, room temperature (226g)
- 1 Tbsp vanilla extract or vanilla bean paste (12g)
- 1/2 tsp fine salt (3g)
- 3 1/2 cups powdered sugar (454g or 1 lb. box)
- 1/4 cup heavy whipping cream, room temperature (60g)
- 1 cup coarse sanding sugar.
Making the Polar Bear Cookie Dough
These Polar Bear Cookies are a delightful combination of a slightly crisp, tender cookie base and a creamy, sweet frosting, all finished with a sparkly crunch. The name comes from their resemblance to a white bear when decorated simply. They’re perfect for holidays or just when you want a special treat. Getting the dough right is key to a good cookie texture.
First, in a large mixing bowl, cream together the softened unsalted butter and the softened full-fat cream cheese. You want this mixture to be light and fluffy. It’s important that both the butter and cream cheese are at room temperature. This means they should feel soft to the touch, but not melted. Cold butter and cream cheese won’t incorporate properly, leading to a lumpy dough and potentially uneven baking. Use an electric mixer on medium speed for about 2-3 minutes until you have a pale yellow, smooth mixture.
Next, gradually add the granulated sugar to the creamed butter and cream cheese mixture. Continue beating on medium speed until the mixture is light and airy, and the sugar is well incorporated. This process might take another 2-3 minutes. Scrape down the sides of the bowl periodically to ensure everything is mixing evenly.
Now it’s time to add the wet ingredients for the cookie dough. Beat in the large egg until it’s fully combined. Then, stir in the vanilla extract or vanilla bean paste. If you’re using vanilla bean paste, you’ll see little flecks of vanilla bean, which adds a beautiful visual and a deeper flavor.
In a separate bowl, whisk together the all-purpose flour, cornstarch, baking powder, and fine salt. Whisking these dry ingredients together beforehand ensures they are evenly distributed. The cornstarch is a secret ingredient here; it helps to create a tender crumb and a slightly crispier edge on your cookies. The baking powder provides a little lift.
Gradually add the dry ingredients to the wet ingredients, mixing on low speed until just combined. Be careful not to overmix the dough once the flour is added. Overmixing can develop the gluten in the flour too much, resulting in tough cookies. You’re looking for a soft, cohesive dough. If the dough seems too sticky to handle, you can add a tablespoon more flour at a time, but do so sparingly.
Wrap the dough tightly in plastic wrap and flatten it into a disk. Refrigerate the dough for at least 1 hour, or up to 2 days. Chilling the dough is essential for several reasons. It firms up the butter, making the dough easier to roll and cut without spreading too much during baking. It also allows the flavors to meld and deepen.
Preheat your oven to 350°F (175°C). Line baking sheets with parchment paper.
Shaping and Baking the Cookies
On a lightly floured surface, roll out the chilled cookie dough to about 1/4 inch thickness. Use your favorite cookie cutters to cut out shapes. For Polar Bear cookies, simple round or slightly irregular shapes work well, or you can use a specific polar bear cutter if you have one. If you don’t have cutters, you can simply roll the dough into small balls and flatten them slightly with the palm of your hand or the bottom of a glass.
Carefully transfer the cut-out cookies to the prepared baking sheets, leaving about 1-2 inches between them to allow for spreading.
Bake for 9-12 minutes, or until the edges are lightly golden brown. The centers should still look slightly soft. They will continue to set up as they cool. Avoid overbaking, as this will result in dry, hard cookies.
Let the cookies cool on the baking sheets for 5 minutes before transferring them to a wire rack to cool completely. It’s important they are fully cooled before frosting, otherwise the frosting will melt.
Preparing the Polar Bear Frosting
While the cookies are cooling, you can prepare the frosting. In a clean, dry bowl, cream together the softened unsalted butter. You want this to be smooth and creamy.
Gradually add the powdered sugar, mixing on low speed at first to prevent the sugar from flying everywhere. Once most of the sugar is incorporated, increase the speed to medium-high and beat until smooth and fluffy.
Add the vanilla extract or vanilla bean paste and the fine salt.
Slowly drizzle in the heavy whipping cream, mixing on low speed until the frosting reaches your desired consistency. You want a thick but spreadable frosting. If it’s too thick, add a tiny bit more cream (a teaspoon at a time). If it’s too thin, add a bit more powdered sugar.
Decorating Your Polar Bear Cookies
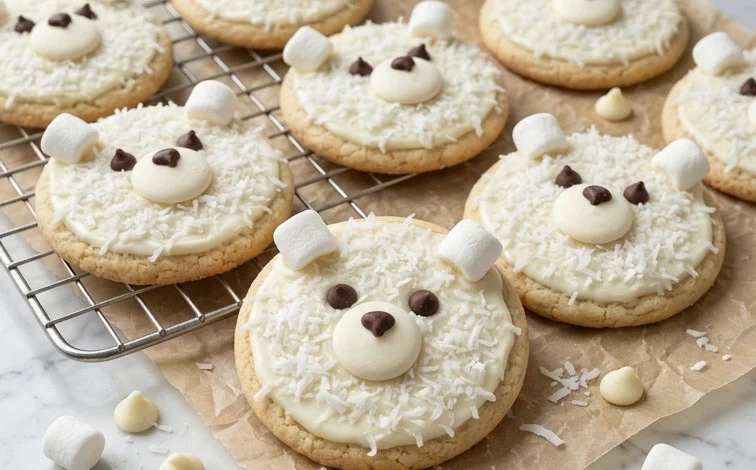
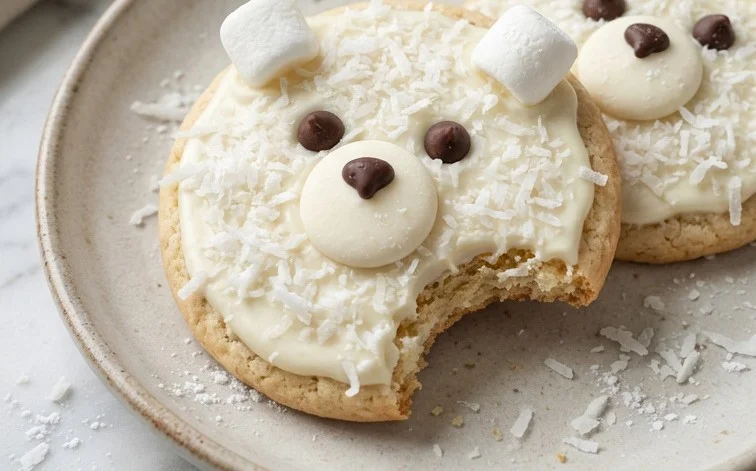
Once your cookies are completely cool, it’s time for the fun part: decorating! Spread a generous layer of the white frosting over the tops of the cookies. You can use an offset spatula or a butter knife for this. Aim for an even coating.
Immediately after frosting, sprinkle the coarse sanding sugar over the wet frosting. This gives the cookies their sparkly, icy appearance, reminiscent of a polar bear’s frosty environment. The coarse sugar provides a lovely crunch.
You can leave the cookies as is for a simple, elegant look, or you can add small touches of melted dark chocolate or edible black food coloring to create simple eyes and noses if you used bear-shaped cutters. However, the simple frosted and sugared look is very effective and keeps them very accessible.
Let the frosting set for about 15-20 minutes before stacking or storing. These cookies are best stored in an airtight container at room temperature for up to 3-4 days. Enjoy your homemade Polar Bear Cookies!
Conclusion:
These Polar Bear Cookies are more than just a festive treat; they are a joy to make and a guaranteed hit with anyone who tries them. The delicate balance of a tender cookie with a rich, sweet frosting, finished with that signature crunch, makes them truly special. They hold up well for holiday cookie platters, birthday parties, or simply as an afternoon pick-me-up with a cup of tea or coffee. For a fun variation, consider adding a drop of peppermint extract to the frosting for a minty twist, or a hint of lemon zest to the cookie dough for a brighter flavor profile. Don’t be afraid to play with the sanding sugar – colored sanding sugars can add a different festive look. The key is the quality of your ingredients and taking your time during the creaming and mixing stages. Making these Polar Bear Cookies is a rewarding process that results in a beautiful and delicious cookie you’ll want to make again and again.
Frequently Asked Questions:
Can I make the dough ahead of time?
Yes, the cookie dough can be made up to 2 days in advance. Wrap it tightly in plastic wrap and refrigerate. You may need to let it sit at room temperature for 10-15 minutes before shaping, as it will firm up considerably in the cold.
How should I store leftover cookies?
Store fully cooled Polar Bear Cookies in an airtight container at room temperature for up to 5 days. Placing parchment paper between layers can prevent sticking if you stack them. Avoid refrigerating them, as this can make the cookies tough.
Can I use a stand mixer instead of an electric hand mixer?
Absolutely. A stand mixer with a paddle attachment works wonderfully for this recipe. Just follow the same steps for creaming the butter and cream cheese, adding sugar, and incorporating the wet and dry ingredients.
Polar Bear Cookies
Deliciously sweet and creamy cookies with a fluffy frosting, perfect for any occasion.
Ingredients
-
3/4 cup (1 1/2 sticks) unsalted butter, room temperature (170g)
-
1/2 cup or 4 oz. full fat cream cheese, room temp (113g)
-
1 1/2 cups granulated sugar (300g)
-
1 large egg, room temperature (56g)
-
2 tsp vanilla extract or vanilla bean paste (8g)
-
3 cups all-purpose flour (375g)
-
1 Tbsp cornstarch (8g)
-
1/2 tsp baking powder (2g)
-
1/2 tsp fine salt (3g)
-
1 cup unsalted butter, room temperature (226g)
-
1 Tbsp vanilla extract or vanilla bean paste (12g)
-
1/2 tsp fine salt (3g)
-
3 1/2 cups powdered sugar (454g or 1 lb. box)
-
1/4 cup heavy whipping cream, room temperature (60g)
-
1 cup coarse sanding sugar
Instructions
-
Step 1
In a large bowl, cream together the 3/4 cup butter and cream cheese until smooth. -
Step 2
Add the granulated sugar and beat until light and fluffy. -
Step 3
Beat in the egg and vanilla extract until well combined. -
Step 4
In a separate bowl, whisk together the flour, cornstarch, baking powder, and salt. -
Step 5
Gradually add the dry ingredients to the wet ingredients, mixing until just combined. -
Step 6
Cover the dough and chill for at least 2 hours. -
Step 7
Preheat oven to 350°F (175°C). Roll dough into balls and place on a baking sheet lined with parchment paper. -
Step 8
Bake for 10-12 minutes, or until edges are lightly golden. -
Step 9
Let cookies cool on the baking sheet for a few minutes before transferring to a wire rack to cool completely. -
Step 10
For the frosting, cream together the 1 cup butter and 1 Tbsp vanilla extract. -
Step 11
Gradually beat in the powdered sugar and heavy whipping cream until smooth and creamy. -
Step 12
Frost the cooled cookies and immediately decorate with coarse sanding sugar.
Important Information
Nutrition Facts (Per Serving)
It is important to consider this information as approximate and not to use it as definitive health advice.
Allergy Information
Please check ingredients for potential allergens and consult a health professional if in doubt.


Leave a Comment