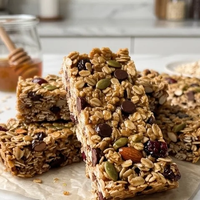
Peanut Butter Cheerio Bars are a go-to for busy afternoons and quick snacks. They come together in a flash and are made with just a few simple ingredients you probably already have in your pantry. They have a delightful chewy texture from the peanut butter and honey mixture, with the satisfying crunch of the Cheerios. They’re perfect for packing in lunchboxes, or just having on hand when a craving strikes. This recipe is incredibly simple, relying on pantry staples to create a treat that everyone will love. The magic happens when the warm, melted peanut butter and honey coating coats the toasted cereal, transforming it into delightful bars. These bars are a fantastic way to use up leftover cereal and offer a satisfying bite that balances sweet and nutty flavors. The minimal effort required makes them ideal for even the busiest weeknights or last-minute snack preparations.
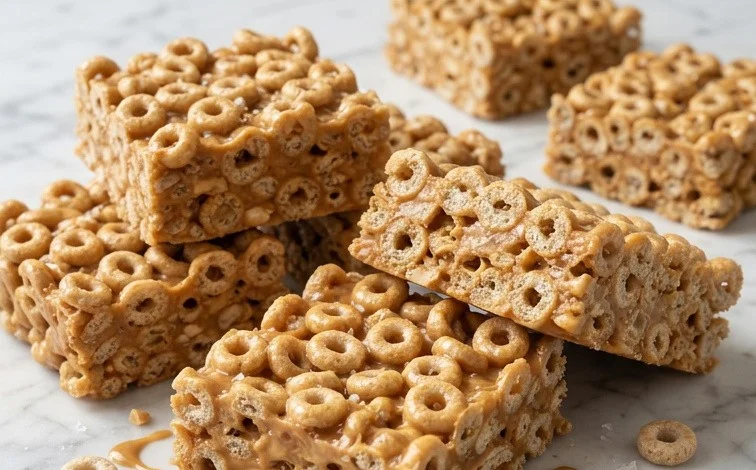
Peanut Butter Cheerio Bars
These Peanut Butter Cheerio Bars are a go-to for busy afternoons and quick snacks. They come together in a flash and are made with just a few simple ingredients you probably already have in your pantry. They have a delightful chewy texture from the peanut butter and honey mixture, with the satisfying crunch of the Cheerios. They’re perfect for packing in lunchboxes, or just having on hand when a craving strikes.
Ingredients:
- 1/2 cup peanut butter (I try to use unsalted with peanuts listed as the only ingredient—but use what you have!)
- 1/2 cup honey (no honey under 1 year)
- 4 cups plain Cheerios
Instructions:
- Prepare Your Pan: Start by lining a square baking pan, about 8×8 inches, with parchment paper. You want enough overhang on the sides so you can easily lift the bars out once they’ve set. If you don’t have parchment paper, you can lightly grease the pan with a neutral oil or cooking spray, but the parchment paper really makes removal a breeze.
- Melt the Peanut Butter and Honey: In a medium saucepan, combine the peanut butter and honey. Place the saucepan over low heat. Stir constantly until both ingredients are melted and smoothly combined. This step is important: you don’t want to scorch the honey or peanut butter, so keep the heat gentle and stir continuously. The goal is a smooth, pourable mixture that will coat the Cheerios evenly. If your peanut butter is very stiff, you might need to stir it for a couple of minutes to get it fully melted and incorporated with the honey.
- Combine with Cheerios: Once the peanut butter and honey are smooth and well combined, remove the saucepan from the heat. Immediately add the 4 cups of plain Cheerios to the saucepan. Gently fold the Cheerios into the peanut butter and honey mixture. Make sure every Cheerio is coated. You can use a sturdy spatula for this. Be careful not to crush the Cheerios too much; you want to keep their structure for the best texture in the finished bars. This coating process ensures that the bars hold together well.
- Press into Pan: Pour the coated Cheerios mixture into your prepared baking pan. Use your spatula or lightly greased hands to press the mixture down firmly and evenly into the pan. The firmer you press, the more cohesive your bars will be. This is probably the most important step for getting them to hold their shape when you cut them. Really pack it in there! You can even use a piece of wax paper or parchment paper on top to help press it down evenly without sticking to your fingers.
- Chill to Set: Once pressed into the pan, place the pan in the refrigerator for at least 30 minutes, or until the bars are firm and set. This chilling time allows the peanut butter and honey to solidify, binding the Cheerios together. For even firmer bars, you can leave them in the refrigerator for an hour.
- Cut and Serve: After the bars have set, use the parchment paper overhang to lift the entire block out of the pan. Place it on a cutting board. Using a sharp knife, cut the block into squares or rectangles, depending on your preference. These bars are best stored in an airtight container in the refrigerator to maintain their shape and texture. They should stay fresh for about a week.
These bars are wonderfully versatile. They make a fantastic quick breakfast for kids (and adults!) on busy mornings, a satisfying after-school snack, or even a simple dessert. You can easily customize them by adding a sprinkle of chia seeds or a handful of mini chocolate chips (stir them in with the Cheerios) if you like. Just remember that adding extra ingredients might slightly alter the setting time or texture. When cutting, if they seem a little soft, just pop them back in the fridge for another 15-20 minutes. Enjoy!
Conclusion:
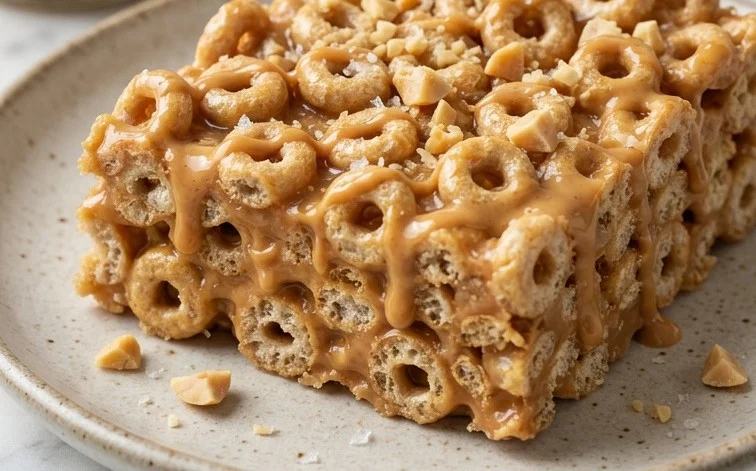
These Peanut Butter Cheerio Bars truly are a fantastic, fuss-free treat. They deliver on that satisfying chewy and crunchy texture combination that makes them so appealing. Whether you need a quick breakfast on the go, a school lunchbox filler, or an afternoon pick-me-up, these bars hit the spot every time. They are proof that simple ingredients can create something wonderfully delicious. Encourage yourself to make a batch soon; you’ll be glad you did when that snack craving hits. They are a reliable recipe that always turns out well.
Frequently Asked Questions:
Can I use a different type of cereal?
While Cheerios are perfect for their texture and mild flavor, you can experiment with other puffed cereals. Crispy O’s or even rice crisp cereal can work, but be aware that the texture and sweetness might change. Plain or lightly sweetened cereals are best. Avoid heavily flavored or sugary cereals, as they can overpower the peanut butter and honey.
How should I store these bars?
Store the Peanut Butter Cheerio Bars in an airtight container at room temperature for up to 3 days. If your kitchen is very warm, they might soften. You can also refrigerate them for firmer bars, though this can make them a bit harder to bite into. Placing parchment paper between layers can prevent sticking.
Can I add anything to the bars?
Absolutely! For added texture and flavor, you can mix in about 1/4 cup of mini chocolate chips, some chopped peanuts, or even a sprinkle of sea salt on top before they set. These additions can give your Peanut Butter Cheerio Bars an extra layer of deliciousness. Ensure any additions are mixed in just before pressing into the pan.
Peanut Butter Cheerio Bars
Easy and quick no-bake bars perfect for a snack, featuring peanut butter and Cheerios.
Ingredients
-
1/2 cup peanut butter (unsalted with peanuts listed as the only ingredient recommended)
-
1/2 cup honey
-
4 cups plain Cheerios
-
1 teaspoon vanilla extract
-
1/4 teaspoon salt (optional, if using salted peanut butter)
-
1 tablespoon butter or margarine
Instructions
-
Step 1
Line an 8×8 inch baking dish with parchment paper, leaving an overhang on the sides. -
Step 2
In a medium saucepan, melt the butter over low heat. -
Step 3
Add the peanut butter and honey to the melted butter. Stir until well combined and smooth. -
Step 4
Remove the saucepan from the heat. Stir in the vanilla extract and salt (if using). -
Step 5
Add the Cheerios to the peanut butter mixture and stir gently until they are evenly coated. -
Step 6
Pour the mixture into the prepared baking dish and press it down evenly using a spatula or your hands. You can lightly grease your hands with butter to prevent sticking. -
Step 7
Refrigerate for at least 30 minutes, or until firm. -
Step 8
Once firm, lift the bars out of the dish using the parchment paper overhang. Cut into squares.
Important Information
Nutrition Facts (Per Serving)
It is important to consider this information as approximate and not to use it as definitive health advice.
Allergy Information
Please check ingredients for potential allergens and consult a health professional if in doubt.
Leave a Comment