
The scent of cinnamon and sugar filling the kitchen is one of my favorite parts of the holiday season. These old-fashioned Christmas candies bring back so many wonderful memories, and they’re surprisingly simple to make. They aren’t just delicious treats; they’re edible pieces of nostalgia, perfect for gifting or simply enjoying by the fireplace. I’ve gathered a collection of tried-and-true recipes that are sure to become new family traditions.
Peppermint Stick Candy
This classic candy is a festive favorite, and the vibrant red and white swirls always feel so Christmassy. The key is to work quickly and have everything prepared before you start cooking the sugar mixture.
Ingredients for Peppermint Stick Candy:
- 1 cup granulated sugar
- 1/2 cup corn syrup
- 1/4 cup water
- 1/2 teaspoon peppermint extract
- Red food coloring (optional)
- Green food coloring (optional)
Instructions:
- Combine sugar, corn syrup, and water in a saucepan. Cook over medium heat, stirring until sugar dissolves.
- Bring to a boil without stirring until a candy thermometer reaches 300°F (150°C), the hard-crack stage.
- Remove from heat. Stir in peppermint extract and food coloring, if using.
- Pour onto a greased baking sheet or silicone mat.
- When cool enough to handle, pull and twist the candy until it becomes opaque and forms stripes.
- Cut into desired lengths or break into pieces. Let cool completely.
Peanut Butter Fudge
Creamy, rich peanut butter fudge is a holiday staple for a reason. This recipe uses simple pantry ingredients and comes together quickly, making it perfect for last-minute treats.
Ingredients for Peanut Butter Fudge:
- 1 cup powdered sugar
- 1/4 cup butter, softened
- 1/4 cup creamy peanut butter
- 1 teaspoon vanilla extract
Instructions:
- Beat together powdered sugar, softened butter, peanut butter, and vanilla extract until smooth and creamy.
- Press the mixture into a small, greased pan (about 8×8 inches).
- Chill for at least 30 minutes before cutting into squares.
Old Fashioned Peanut Clusters
Crunchy peanuts coated in sweet, smooth chocolate are irresistible. These clusters are incredibly easy to make and always a hit with everyone.
Ingredients for Old Fashioned Peanut Clusters:
- 2 cups chopped peanuts
- 1/2 cup light corn syrup
- 1/2 cup granulated sugar
- 1/4 cup butter
- 1 teaspoon vanilla extract
Instructions:
- Combine corn syrup, sugar, and butter in a saucepan. Cook over medium heat, stirring until sugar dissolves.
- Bring to a boil and cook for 5 minutes, stirring occasionally.
- Remove from heat and stir in peanuts and vanilla extract.
- Drop spoonfuls onto a greased baking sheet or parchment paper.
- Let cool completely until firm.
Nostalgic Divinity
Divinity is a classic, melt-in-your-mouth candy that feels wonderfully old-fashioned. It requires a bit of patience with the egg whites, but the airy, sweet result is well worth the effort.
Ingredients for Divinity:
- 1 cup granulated sugar
- 1/2 cup corn syrup
- 1/4 cup water
- 2 egg whites, beaten to stiff peaks
- 1 teaspoon vanilla extract
Instructions:
- Combine sugar, corn syrup, and water in a saucepan. Cook to 240°F (115°C) on a candy thermometer.
- Slowly pour the hot syrup into the beaten egg whites, beating constantly with an electric mixer.
- Continue beating until the mixture is thick, glossy, and holds its shape.
- Stir in vanilla extract.
- Drop by spoonfuls onto waxed paper. Let set completely.
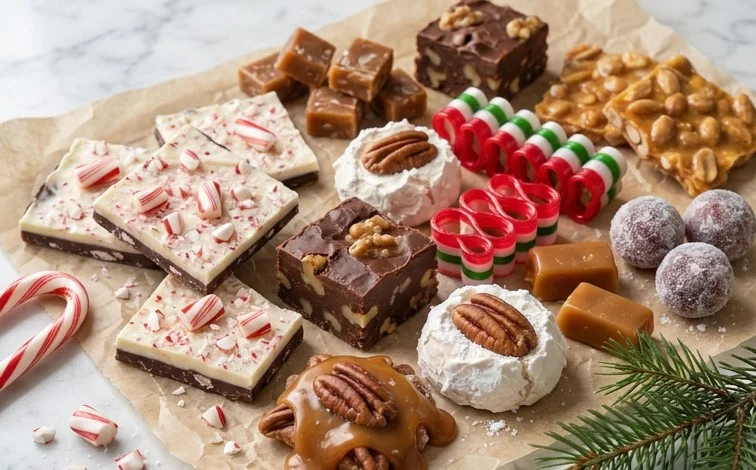
57 Old-Fashioned Christmas Candies
The scent of cinnamon and sugar filling the kitchen is one of my favorite parts of the holiday season. These old-fashioned Christmas candies bring back so many wonderful memories, and they’re surprisingly simple to make. They aren’t just delicious treats; they’re edible pieces of nostalgia, perfect for gifting or simply enjoying by the fireplace. I’ve gathered a collection of tried-and-true recipes that are sure to become new family traditions.
Ingredients:
- 1 cup granulated sugar
- 1/2 cup corn syrup
- 1/4 cup water
- 1/2 teaspoon peppermint extract
- Red food coloring (optional)
- Green food coloring (optional)
- 1 cup powdered sugar
- 1/4 cup butter, softened
- 1/4 cup creamy peanut butter
- 1 teaspoon vanilla extract
- 2 cups confectioners’ sugar
- 1/4 cup milk
- 1/2 teaspoon almond extract
- 1 cup graham cracker crumbs
- 1/2 cup condensed milk
- 1/2 cup chopped dates
- 1/2 cup chopped pecans
- 1/4 cup butter
- 1/2 cup packed brown sugar
- 1/4 cup granulated sugar
- 1/4 cup milk
- 1 teaspoon vanilla extract
- 2 cups chopped peanuts
- 1/2 cup light corn syrup
- 1/2 cup granulated sugar
- 1/4 cup butter
- 1 teaspoon vanilla extract
- 1 cup semisweet chocolate chips
- 2 tablespoons peanut butter
- 1/4 cup white chocolate chips
- 1 tablespoon shortening
Peppermint Stick Candy
This classic candy is a festive favorite, and the vibrant red and white swirls always feel so Christmassy. The key is to work quickly and have everything prepared before you start cooking the sugar mixture.
Ingredients:
- 1 cup granulated sugar
- 1/2 cup corn syrup
- 1/4 cup water
- 1/2 teaspoon peppermint extract
- Red food coloring (optional)
- Green food coloring (optional)
Instructions:
- In a medium saucepan, combine the granulated sugar, corn syrup, and water. Stir until the sugar is dissolved.
- Cook over medium heat, without stirring, until the mixture reaches 270 degrees Fahrenheit (132 degrees Celsius) on a candy thermometer. This is the firm-ball stage. Be patient; it can take a little while. If you don’t have a thermometer, you can test by dropping a small amount of syrup into cold water. It should form a firm, pliable ball that flattens when removed from the water.
- Remove the saucepan from the heat. Carefully stir in the peppermint extract. If you’re using food coloring, divide the mixture into two portions. Add red food coloring to one and green food coloring to the other, stirring until evenly distributed. Let both mixtures cool slightly until they are just warm enough to handle, but not so cool they start to harden.
- Grease a baking sheet or marble slab. Lightly oil your hands or wear heat-resistant gloves. Take portions of the red and green candy mixtures and twist them together. Stretch and fold the candy repeatedly, just like taffy. This process incorporates air and creates the marbled effect. Continue stretching and folding until the candy is firm and slightly opaque.
- Once the candy is sufficiently stretched and marbled, quickly roll it into thin ropes. Use scissors to cut the ropes into desired lengths. Place the cut pieces onto the prepared baking sheet to cool completely. Once cool, they will be hard and ready to break apart. Store in an airtight container.
Old-Fashioned Peanut Butter Fudge
This creamy fudge is a guaranteed crowd-pleaser. The rich peanut butter flavor is irresistible, and it’s so simple to whip up.
Ingredients:
- 1 cup powdered sugar
- 1/4 cup butter, softened
- 1/4 cup creamy peanut butter
- 1 teaspoon vanilla extract
Instructions:
- In a medium bowl, cream together the softened butter and creamy peanut butter until smooth and well combined. This is best done with an electric mixer, but you can also use a sturdy whisk or a wooden spoon. Ensure there are no lumps of butter remaining.
- Gradually add the powdered sugar to the butter and peanut butter mixture, about a quarter cup at a time, mixing well after each addition. The mixture will become thick and difficult to stir. This gradual addition helps prevent the powdered sugar from flying everywhere.
- Stir in the vanilla extract until it’s fully incorporated. The mixture should be uniformly flavored.
- Once the fudge mixture is thoroughly combined, press it evenly into a small, greased baking dish (an 8×8 inch pan works well, or even a smaller loaf pan for thicker fudge). Use a spatula or the back of a spoon to get a smooth, even surface.
- Chill the fudge in the refrigerator for at least 1 hour, or until firm. Once chilled, cut it into small squares. This fudge is best stored in an airtight container in the refrigerator.
Date Nut Balls
These no-bake treats are full of chewy goodness and a hint of sweetness from the dates. They are a fantastic option when you want something delicious without the fuss of baking.
Ingredients:
- 1 cup graham cracker crumbs
- 1/2 cup condensed milk
- 1/2 cup chopped dates
- 1/2 cup chopped pecans
Instructions:
- In a medium bowl, combine the graham cracker crumbs, chopped dates, and chopped pecans. Mix these dry ingredients together so they are evenly distributed. Make sure your dates are pitted and finely chopped. If they are a bit dry, you can soak them in a tablespoon of warm water for a few minutes before chopping.
- Pour the condensed milk over the dry ingredients. Stir everything together until a cohesive dough forms. It should be moist enough to hold together when squeezed. If it seems too dry, add another tablespoon of condensed milk. If it’s too wet, add a few more graham cracker crumbs.
- Using your hands, roll the mixture into small balls, about 1 inch in diameter. Squeeze the mixture firmly as you roll to ensure the balls are compact and won’t fall apart.
- Place the rolled balls onto a parchment-lined baking sheet. These can be enjoyed immediately, but they firm up nicely if chilled for at least 30 minutes in the refrigerator.
- Store these date nut balls in an airtight container in the refrigerator. They are a delightful, energy-boosting snack.
Caramel Nut Clusters
The combination of gooey caramel and crunchy nuts is truly classic. These are wonderfully simple and always disappear quickly.
Ingredients:
- 1/4 cup butter
- 1/2 cup packed brown sugar
- 1/4 cup granulated sugar
- 1/4 cup milk
- 1 teaspoon vanilla extract
- 2 cups chopped peanuts
Instructions:
- In a heavy-bottomed saucepan, melt the butter over medium heat. Once melted, add the packed brown sugar and granulated sugar to the saucepan. Stir them together until the sugars begin to dissolve into the butter.
- Pour in the milk and continue to stir constantly. Bring the mixture to a gentle boil. Allow it to boil for about 5 minutes, stirring frequently to prevent scorching. The mixture should thicken slightly.
- Remove the saucepan from the heat and stir in the vanilla extract. The aroma of vanilla will immediately enhance the caramel.
- Add the chopped peanuts to the caramel mixture and stir until they are well coated. Make sure every peanut gets a nice layer of the caramel.
- Drop spoonfuls of the mixture onto parchment paper or wax paper-lined baking sheets. Work relatively quickly as the caramel will start to set as it cools. Let the clusters cool completely until firm. Store in an airtight container.
Chocolate Peanut Butter Balls
These are often called “Buckeye candies” and are incredibly popular for a reason. The smooth chocolate coating over the creamy peanut butter filling is a match made in heaven.
Ingredients:
- 1/2 cup light corn syrup
- 1/2 cup granulated sugar
- 1/4 cup butter
- 1 teaspoon vanilla extract
- 2 cups chopped peanuts
- 1 cup semisweet chocolate chips
- 2 tablespoons peanut butter
Instructions:
- In a medium saucepan, combine the light corn syrup, granulated sugar, and butter. Cook over medium heat, stirring until the butter is melted and the sugar is dissolved. Bring the mixture to a boil and cook for 1 minute, stirring constantly.
- Remove the saucepan from the heat and stir in the vanilla extract and chopped peanuts. Mix until all the peanuts are thoroughly coated with the mixture.
- Let the peanut mixture cool slightly, just enough so you can handle it. Then, roll the mixture into small balls, about 1 inch in diameter. Place these balls on a parchment-lined baking sheet.
- Chill the peanut butter balls in the refrigerator for at least 30 minutes, or until firm. This step is essential to ensure they hold their shape when you dip them in chocolate.
- In a microwave-safe bowl, combine the semisweet chocolate chips and 2 tablespoons of peanut butter. Microwave in 30-second intervals, stirring between each, until the chocolate is smooth and melted. Be careful not to overheat.
- Dip each chilled peanut butter ball into the melted chocolate mixture, using a fork or a toothpick to help coat them. Allow any excess chocolate to drip off. Place the coated balls back onto the parchment-lined baking sheet.
- Let the chocolate harden completely. You can speed this up by placing the baking sheet back in the refrigerator for a short period. Store the chocolate peanut butter balls in an airtight container.
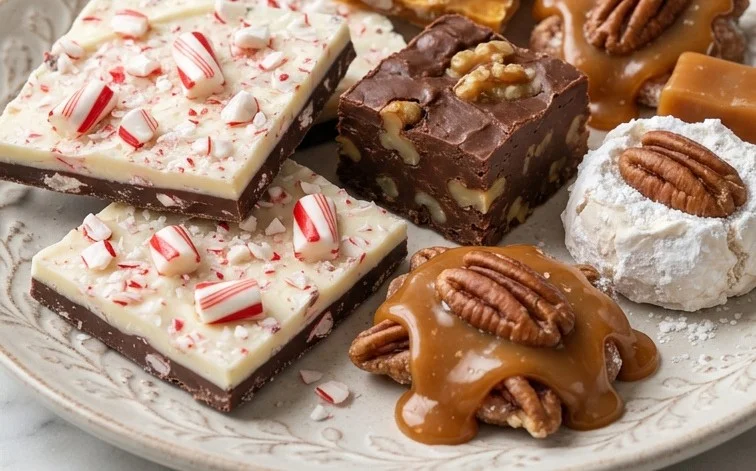
White Chocolate Bark with Cranberries and Pistachios
This bark is as beautiful as it is delicious, with its festive red and green colors. It’s incredibly easy to make and looks so elegant.
Ingredients:
- 1 cup white chocolate chips
- 1 tablespoon shortening
- 1/4 cup dried cranberries
- 1/4 cup chopped pistachios
Instructions:
- Line a baking sheet with parchment paper or wax paper. This will make it easy to lift the hardened bark off the sheet.
- In a microwave-safe bowl, combine the white chocolate chips and shortening. Microwave on 50% power for 30-second intervals, stirring well after each interval. Continue until the white chocolate is completely melted and smooth. White chocolate can scorch easily, so low power and frequent stirring are key.
- Pour the melted white chocolate onto the prepared baking sheet. Use a spatula to spread it into a thin, even layer, about 1/4 inch thick. You can make it into a rough rectangle or spread it out more organically.
- Immediately sprinkle the dried cranberries and chopped pistachios evenly over the melted white chocolate. Gently press them down slightly so they adhere to the chocolate.
- Allow the bark to set completely at room temperature, or place it in the refrigerator for about 15-20 minutes to speed up the process.
- Once the bark is firm, break it into irregular pieces. Store in an airtight container at room temperature. If stored in a very warm place, it may soften slightly.
Conclusion:
These old-fashioned Christmas candies are more than just sweets; they are little packages of holiday spirit that connect us to traditions and memories. From the crisp swirl of peppermint sticks to the creamy comfort of peanut butter fudge, each candy tells a story. Making them brings a special kind of magic into the kitchen, filling the air with wonderful aromas and the promise of festive gatherings. They’re perfect for filling cookie tins, decorating the Christmas tree, or just enjoying with a warm mug of cocoa on a cold winter’s night.
Don’t be afraid to get the whole family involved in making these delightful treats. Kids love helping with the decorating and shaping. You can also get creative with variations: try adding different extracts to the peppermint candy, or mix chopped nuts into the peanut butter fudge for extra crunch. For the peanut clusters, experiment with different types of chocolate or add a sprinkle of sea salt on top.
Frequently Asked Questions:
How do I store homemade Christmas candies?
Store most hard candies, like peppermint sticks, in airtight containers at room temperature for several weeks. Softer candies like fudge and divinity are best stored in layers separated by parchment paper in an airtight container, also at room temperature. For longer storage, some candies can be frozen, but check individual recipe notes. Moisture is the enemy of most homemade candies, so ensure they are completely cool and dry before storing.
Can I make these candies ahead of time?
Absolutely! Most old-fashioned Christmas candies can be made days or even weeks in advance, which is a huge help during the busy holiday season. Hard candies are especially good for making ahead as they keep well. Fudge and divinity are also good candidates, though their texture might change slightly over longer periods. Peanut clusters are also quite stable. This allows you to focus on other holiday preparations.
What if my candy doesn’t reach the right temperature?
Using a candy thermometer is the most reliable way to ensure success. If your candy doesn’t reach the specified temperature, it likely won’t set correctly. Hard-crack stage (300°F/150°C) for peppermint sticks is essential for their crispness. If you undercook fudge or divinity, they might be too soft or sticky. If you can’t get to the right temp, it’s often due to humidity. Try making candy on a dry day, as high humidity can significantly affect the cooking process and prevent sugar mixtures from reaching high temperatures.
57 Old-Fashioned Christmas Candies
A collection of delightful old-fashioned Christmas candies perfect for the holiday season.
Ingredients
-
Sugar
-
Corn syrup
-
Water
-
Butter
-
Vanilla extract
-
Chocolate chips
-
Peanut butter
-
Powdered sugar
-
Cream cheese
-
Peppermint extract
-
Cocoa powder
-
Sweetened condensed milk
-
Nuts
-
Dried fruit
Instructions
-
Step 1
Prepare your working surfaces by greasing them or lining them with parchment paper. -
Step 2
Combine sugar, corn syrup, and water in a saucepan. Stir until sugar dissolves. -
Step 3
Cook the mixture to the desired candy stage (e.g., soft ball, hard ball) using a candy thermometer. -
Step 4
Stir in flavorings and any other desired additions like butter or vanilla. -
Step 5
Pour the mixture onto prepared surfaces to cool and set. -
Step 6
Once cooled, cut or break the candy into desired pieces.
Important Information
Nutrition Facts (Per Serving)
It is important to consider this information as approximate and not to use it as definitive health advice.
Allergy Information
Please check ingredients for potential allergens and consult a health professional if in doubt.


Leave a Comment