
Brown Butter Iced Oatmeal Cookies are a delightful twist on a classic. The nutty depth of browned butter elevates humble oats into something truly special. I first started making these on a crisp autumn afternoon, and they’ve been a favorite ever since. It’s the combination of that warm, toasted butter flavor, the chewy texture from old-fashioned oats, and the sweet, slightly tart glaze that makes these cookies so comforting. This isn’t just any oatmeal cookie; it’s an experience. The process of browning the butter, while simple, transforms the entire cookie, making it richer and more complex. The addition of a simple glaze adds a final touch of sweetness and tang, balancing the nutty notes perfectly. They’re perfect with a cup of tea or coffee, and they always bring smiles.
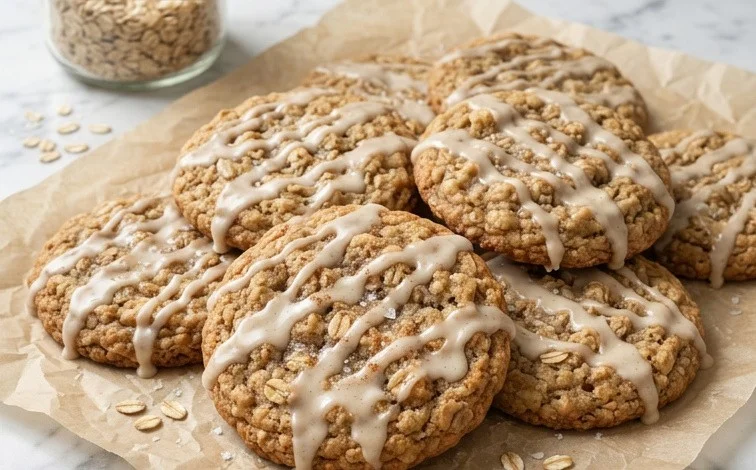
Brown Butter Iced Oatmeal Cookies
The aroma of browned butter alone is enough to make these cookies special, but when combined with the comforting chewiness of old-fashioned oats and a sweet, tangy glaze, you get a cookie that’s truly irresistible. I love making these when there’s a slight chill in the air, or honestly, anytime I need a little pick-me-up. The nutty depth from the browned butter transforms a simple oatmeal cookie into something extraordinary.
Ingredients:
- 1 1/4 cups (282 g) unsalted butter
- 2 cups (190 g) old fashioned oats
- 2 cups (plus 4 tablespoons (280 g)) all-purpose flour, spooned and leveled
- 2 teaspoons baking soda
- 2 teaspoons ground cinnamon
- 1/2 teaspoon ground nutmeg
- 1 1/2 teaspoons salt
- 1 cup (200 g) light brown sugar, packed
- 1 cup (200 g) granulated sugar
- 2 large eggs (room temperature)
- 2 teaspoons vanilla
- 2 tablespoons molasses (not blackstrap)
- 2 cups powdered sugar (sifted)
- 3 tablespoons milk or heavy cream
- 1/4 teaspoon vanilla
Making the Dough
The first step, and arguably the most important for flavor, is browning the butter. Place your 1 1/4 cups of unsalted butter in a light-colored saucepan over medium heat. Watch it closely. The butter will melt, then foam, and small brown specks will begin to appear at the bottom of the pan. Swirl the pan occasionally. You’re looking for a rich, nutty aroma and a deep amber color. Once it reaches this stage, immediately remove it from the heat and pour it into a heatproof bowl to stop the cooking process. Let it cool slightly for about 10-15 minutes. While the butter is cooling, gather and measure out all your dry ingredients: the flour, baking soda, cinnamon, nutmeg, and salt. Whisk them together in a medium bowl. This ensures the leavening agents and spices are evenly distributed.
In a large bowl, combine the slightly cooled brown butter with the packed light brown sugar and granulated sugar. Use an electric mixer or a sturdy whisk to cream these together until the mixture is light and fluffy. This process incorporates air, which contributes to the cookie’s texture. Next, add the room-temperature eggs one at a time, beating well after each addition until fully incorporated. Stir in the vanilla extract and the molasses. The molasses adds a subtle depth of flavor and a beautiful color to the cookies, complementing the richness of the brown butter.
Now, it’s time to add the dry ingredients to the wet ingredients. Gradually add the whisked flour mixture to the butter and sugar mixture, mixing on low speed or by hand until just combined. Be careful not to overmix at this stage, as overmixing can lead to tough cookies. Finally, gently fold in the 2 cups of old-fashioned oats. I like to use old-fashioned oats because they give the cookies a lovely chewy texture and hold their shape better than quick oats. Ensure the oats are evenly distributed throughout the dough.
Baking the Cookies
Preheat your oven to 350°F (175°C). Line baking sheets with parchment paper or silicone baking mats. This prevents the cookies from sticking and makes for easy cleanup. Drop rounded tablespoons of dough onto the prepared baking sheets, leaving about 2 inches between each cookie to allow for spreading. I typically use a cookie scoop for uniform size, which helps them bake evenly. You can also gently flatten the tops of the dough balls with your palm or the bottom of a glass if you prefer a slightly flatter cookie.
Bake for 10-12 minutes, or until the edges are golden brown and the centers are still slightly soft. The cookies will continue to cook and firm up as they cool on the baking sheet. For a chewy cookie, it’s important not to overbake. Once they’re out of the oven, let them cool on the baking sheet for about 5 minutes before transferring them to a wire rack to cool completely. This cooling period on the baking sheet is essential for their structure.
Making the Brown Butter Glaze
While the cookies are cooling, prepare the glaze. In a medium bowl, whisk together the sifted powdered sugar and the milk or heavy cream, starting with 3 tablespoons of liquid. You’re aiming for a smooth, pourable consistency that isn’t too thin or too thick. If it’s too thick, add a tiny bit more milk or cream, a teaspoon at a time. If it’s too thin, add a little more sifted powdered sugar. Stir in the 1/4 teaspoon of vanilla extract. For an extra hint of brown butter flavor in the glaze, you can melt about 1 tablespoon of butter, brown it, and stir it into the glaze, but this recipe works wonderfully without that extra step.
Glazing and Serving
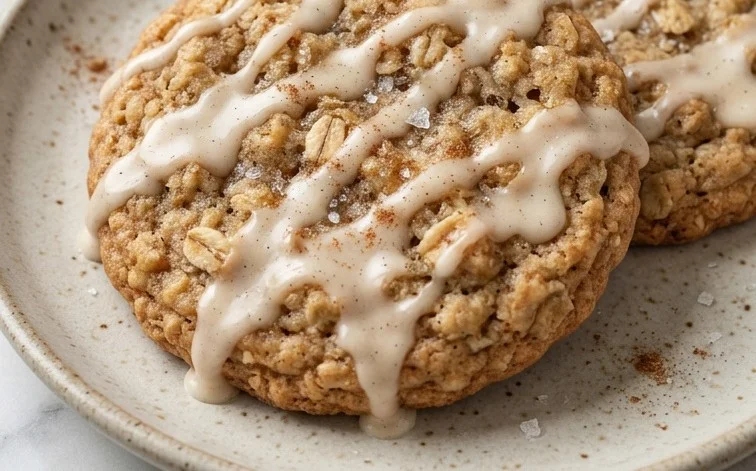
Once the cookies have cooled completely on the wire rack, it’s time to glaze them. You can do this by drizzling the glaze over the cookies with a spoon or fork, or by dipping the tops of the cookies into the glaze. If you’re drizzling, a squeeze bottle can also be helpful for creating thin, even lines. Let the glaze set for about 15-20 minutes before serving or stacking. These cookies are fantastic on their own, but they also pair beautifully with a cup of tea or coffee. They store well in an airtight container at room temperature for up to 3-4 days. Enjoy the rich, nutty, and spiced goodness!
Conclusion:
These Brown Butter Iced Oatmeal Cookies are a testament to how a simple technique can transform a familiar treat. The rich, nutty flavor from the browned butter, combined with the satisfying chew of oats and a sweet glaze, makes them an unforgettable cookie. They are wonderful for sharing, perfect for a cozy afternoon treat, or whenever you need a little something special. Don’t be afraid of browning the butter; it’s the key to unlocking their full flavor potential. Embrace the nutty aroma and the beautiful amber color it brings. The glaze is simple to make and adds that essential finishing touch.
Frequently Asked Questions:
Can I use quick oats instead of old-fashioned oats?
While you can use quick oats, the texture of the cookie will change. Quick oats will result in a softer, more cake-like cookie, whereas old-fashioned oats provide that signature chewy texture that works so well with the brown butter flavor.
How long do these cookies last?
Stored in an airtight container at room temperature, these cookies will stay fresh for about 3-5 days. They tend to be even chewier the next day.
My browned butter looks too dark, is it ruined?
If your browned butter smells burnt rather than nutty, or if it has black, charred bits, it has likely gone too far. It’s best to start over. The goal is a deep amber color and a rich, nutty aroma, not a burnt smell. Watch it closely, especially towards the end.
Brown Butter Iced Oatmeal Cookies
Chewy, flavorful oatmeal cookies elevated with rich brown butter and a sweet, tangy glaze.
Ingredients
-
1 1/4 cups (282 g) unsalted butter
-
2 cups (190 g) old fashioned oats
-
2 cups plus 4 tablespoons (280 g) all-purpose flour, spooned and leveled
-
2 teaspoons baking soda
-
2 teaspoons ground cinnamon
-
1/2 teaspoon ground nutmeg
-
1 1/2 teaspoons salt
-
1 cup (200 g) light brown sugar, packed
-
1 cup (200 g) granulated sugar
-
2 large eggs (room temperature)
-
2 teaspoons vanilla
-
2 tablespoons molasses (not blackstrap)
-
2 cups powdered sugar (sifted)
-
3 tablespoons milk or heavy cream
-
1/4 teaspoon vanilla
Instructions
-
Step 1
Melt the unsalted butter in a saucepan over medium heat, stirring occasionally, until it turns golden brown and fragrant. Remove from heat and let it cool slightly. -
Step 2
In a large bowl, whisk together the all-purpose flour, baking soda, cinnamon, nutmeg, and salt. -
Step 3
In a separate bowl, cream together the cooled brown butter, light brown sugar, and granulated sugar until light and fluffy. Beat in the eggs one at a time, followed by the vanilla and molasses. -
Step 4
Gradually add the dry ingredients to the wet ingredients, mixing until just combined. Stir in the old fashioned oats. -
Step 5
Drop rounded tablespoons of dough onto baking sheets lined with parchment paper. Bake at 350°F (175°C) for 9-11 minutes, or until the edges are golden brown and the centers are still slightly soft. -
Step 6
Let the cookies cool on the baking sheets for a few minutes before transferring them to a wire rack to cool completely. -
Step 7
While the cookies cool, prepare the glaze by whisking together the sifted powdered sugar, milk or heavy cream, and vanilla until smooth and pourable. Add more milk or cream, a teaspoon at a time, if a thinner glaze is desired. -
Step 8
Drizzle or dip the cooled cookies into the glaze. Let the glaze set before serving.
Important Information
Nutrition Facts (Per Serving)
It is important to consider this information as approximate and not to use it as definitive health advice.
Allergy Information
Please check ingredients for potential allergens and consult a health professional if in doubt.


Leave a Comment