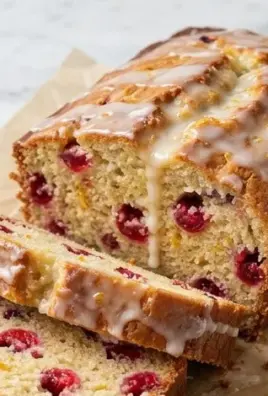
The aroma that fills your kitchen as this Cranberry Walnut Bread bakes is just divine, a mix of warm bread, tart cranberries, and toasted walnuts. It’s the kind of bread that makes a simple breakfast feel like a treat or turns an ordinary afternoon snack into something memorable. The best part? It’s a no-knead recipe, meaning minimal fuss and maximum deliciousness. The long, slow fermentation process develops incredible flavor and a fantastic texture, all without you having to do any heavy lifting. The bread has a wonderfully comforting quality that feels so special, yet is surprisingly simple to pull off. Its crumb is tender and slightly chewy, studded with chewy-sweet cranberries and the satisfying crunch of toasted walnuts. This Cranberry Walnut Bread is ideal for slicing and toasting, or simply enjoying as is with a smear of butter.
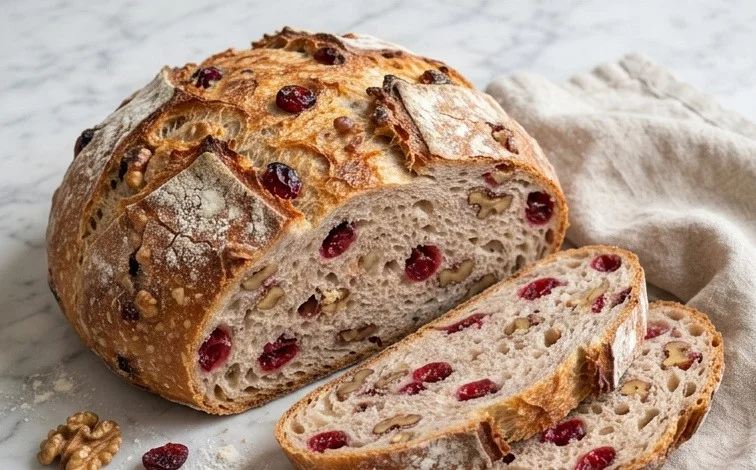
Cranberry Walnut Bread (No-Knead)
This Cranberry Walnut Bread is one of those wonderfully comforting bakes that feels so special, yet is surprisingly simple to pull off. The aroma that fills your kitchen as it bakes is just divine, a mix of warm bread, tart cranberries, and toasted walnuts. It’s the kind of bread that makes a simple breakfast feel like a treat or turns an ordinary afternoon snack into something memorable. The best part? It’s a no-knead recipe, meaning minimal fuss and maximum deliciousness. The long, slow fermentation process develops incredible flavor and a fantastic texture, all without you having to do any heavy lifting.
Ingredients:
- ½ teaspoon active dry yeast
- 1 ½ cups warm water (warmed to 110 to 115 degrees F)
- 1 teaspoon granulated sugar
- 2 teaspoons Kosher salt
- 3 cups bread flour, plus 2 tablespoons (plus more for surface)
- ¾ cup dried cranberries
- ½ cup dried walnuts, roughly chopped
- 1 tablespoon honey
- 1 tablespoon orange zest
Making the Dough
The magic of no-knead bread lies in its simplicity and the time it takes to develop flavor. We start by activating the yeast. In a large mixing bowl, combine the warm water, active dry yeast, and granulated sugar. Give it a gentle stir, then let it sit for about 5 to 10 minutes. You should see a foamy, bubbly layer form on the surface. This tells you the yeast is alive and ready to work its wonders. If you don’t see any foam, your yeast might be old, or the water wasn’t quite the right temperature. It’s best to start with fresh yeast if this happens.
Once the yeast is foamy, add the Kosher salt and the bread flour to the bowl. Start mixing with a sturdy spoon or a spatula. You’re not looking for a smooth, elastic dough like you would with a traditional kneaded bread. Instead, you want to mix until just combined and no dry flour remains. The dough will be shaggy and very sticky, almost like a thick batter. This is exactly what we’re aiming for. Now, add the dried cranberries, chopped walnuts, honey, and orange zest to the dough. Fold them in gently with your spatula until they are evenly distributed. Don’t overmix at this stage; just get everything incorporated.
The Long Fermentation
Cover the bowl tightly with plastic wrap or a damp kitchen towel. Find a warm spot in your kitchen – the top of the refrigerator or inside a slightly warmed (and then turned off) oven works well. Let the dough rest and ferment for at least 12 hours, or up to 18 hours. This long, slow fermentation is what develops the wonderful flavor and airy texture. During this time, the yeast will work its magic, producing gases that create those lovely holes in the bread, and the enzymes in the flour will break down, creating more complex flavors.
Shaping and Baking
After the long rest, the dough will have doubled in size and will be bubbly and slightly sticky. Lightly flour a clean work surface generously with bread flour. Gently scrape the dough out of the bowl onto the floured surface. Try to handle it as little as possible to keep all those precious air bubbles intact. You can do a gentle fold or two by taking the edges of the dough and folding them towards the center, creating a slightly rounder shape. Be careful not to deflate it too much.
Place a piece of parchment paper on top of the shaped dough and invert a medium-sized bowl or a Dutch oven lid over it. Let it rest, covered, for another 30 minutes while you preheat your oven and your Dutch oven. Preheat your oven to 450 degrees F (230 degrees C). If you’re using a Dutch oven, place the empty pot and its lid into the oven as it preheats. A hot Dutch oven is key to getting that beautiful crusty exterior. If you don’t have a Dutch oven, you can use a baking sheet lined with parchment paper, but the crust might not be as thick or as uniformly browned.
Carefully remove the hot Dutch oven from the oven. Remove the lid. Using the parchment paper as a sling, carefully lower the dough into the preheated Dutch oven. You can also carefully slide it directly onto a preheated baking sheet if not using a Dutch oven. If using a Dutch oven, place the lid back on. Place the covered Dutch oven back into the hot oven. Bake for 30 minutes with the lid on. After 30 minutes, carefully remove the lid. Continue to bake for another 15 to 20 minutes, or until the crust is a deep golden brown and the internal temperature of the bread reaches 200 to 210 degrees F (93 to 99 degrees C). The exact baking time will depend on your oven and the size of your loaf.
Cooling and Enjoying
Once baked, carefully remove the bread from the Dutch oven or baking sheet and place it on a wire rack to cool completely. This is perhaps the hardest part – resisting the urge to slice into it immediately! Letting it cool completely allows the internal structure to set and prevents the inside from becoming gummy. You’ll hear the crust crackling as it cools, which is always a good sign.
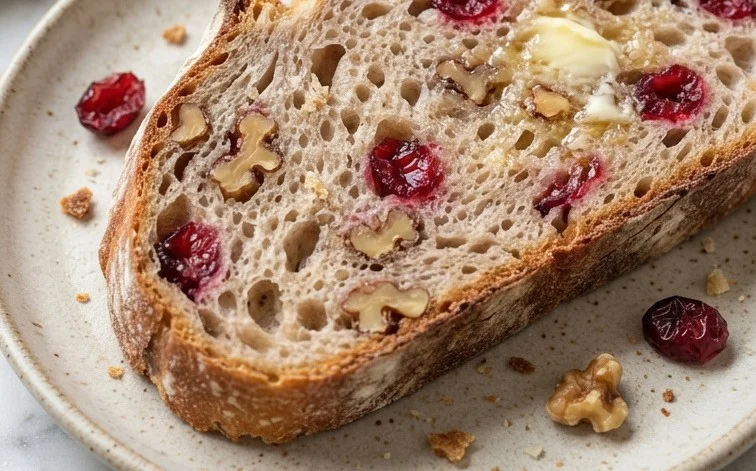
This Cranberry Walnut Bread is absolutely delicious served simply with a pat of butter. It’s also wonderful toasted and served with cream cheese or jam. It makes for a fantastic addition to a holiday brunch spread or as a comforting accompaniment to a hearty soup. Store any leftovers at room temperature in an airtight container for up to 2-3 days. For longer storage, you can wrap it tightly in plastic wrap and then in foil, and freeze it for up to 3 months.
Conclusion:
This no-knead Cranberry Walnut Bread truly is a joy to make and to eat. The minimal effort required for such an incredibly flavorful and texturally pleasing loaf is remarkable. The long fermentation does all the hard work, giving you a loaf that feels artisan, right from your own oven. It’s a testament to how simple ingredients and a bit of patience can yield something so special. Enjoy it warm, toasted, or as the star of your next brunch spread.
Serving Suggestions: This bread is wonderful served warm with butter. It also pairs beautifully with cream cheese or a light drizzle of honey. For a more substantial meal, try it alongside a simple green salad or a hearty soup. It makes an excellent base for French toast too, soaking up the eggy mixture perfectly.
Variations: While cranberries and walnuts are a classic combination, feel free to experiment. You could substitute pecans for walnuts, or add a hint of spice like cinnamon or nutmeg to the dough. Orange zest is listed, but lemon zest works just as well for a brighter citrus note. Some find adding a tablespoon of molasses along with the honey gives the bread a deeper color and richer flavor.
Frequently Asked Questions:
Can I make this bread ahead of time?
Yes, absolutely. The dough can be refrigerated for up to 3 days after the initial mixing. This slow fermentation in the fridge further develops flavor. Just bring it to room temperature for about an hour before shaping and baking as directed. The baked bread also keeps well for a few days stored in an airtight container at room temperature.
What if I don’t have bread flour?
All-purpose flour can be substituted for bread flour, though the texture might be slightly less chewy and the crust a bit softer. Ensure you measure the flour accurately by spooning it into the cup and leveling it off, rather than scooping directly from the bag, to avoid a dense loaf.
How do I get a good crust on no-knead bread?
Baking in a preheated Dutch oven is the key. The lid traps steam released from the dough during the initial phase of baking, creating a moist environment that allows the crust to expand fully before it sets. This results in a wonderfully crisp crust. For an even darker crust, you can remove the lid for the last 10-15 minutes of baking.
Cranberry Walnut Bread (No-Knead)
A simple and delicious no-knead bread bursting with the flavors of cranberries and walnuts, with a hint of orange zest.
Ingredients
-
½ teaspoon active dry yeast
-
1 ½ cups warm water (warmed to 110 to 115 degrees F)
-
1 teaspoon granulated sugar
-
2 teaspoons Kosher salt
-
3 cups bread flour, plus 2 tablespoons
-
¾ cup dried cranberries
-
½ cup dried walnuts, roughly chopped
-
1 tablespoon honey
-
1 tablespoon orange zest
Instructions
-
Step 1
In a large bowl, combine the warm water, sugar, and yeast. Stir gently and let sit for 5-10 minutes, or until foamy. -
Step 2
Add the Kosher salt, bread flour, dried cranberries, dried walnuts, honey, and orange zest to the bowl. Stir with a wooden spoon or spatula until just combined and a shaggy dough forms. Do not overmix. -
Step 3
Cover the bowl with plastic wrap or a damp towel and let rise in a warm place for at least 1 hour, or until doubled in size. -
Step 4
Preheat your oven to 450 degrees F (230 degrees C) with a Dutch oven or oven-safe pot inside for at least 30 minutes. -
Step 5
Generously flour a clean surface. Turn the dough out onto the floured surface and gently shape it into a rough ball. Do not knead. -
Step 6
Carefully remove the hot Dutch oven from the oven. Gently place the dough into the hot Dutch oven. Score the top of the dough with a sharp knife or razor if desired. -
Step 7
Cover the Dutch oven and bake for 30 minutes. Remove the lid and bake for an additional 15-20 minutes, or until the crust is golden brown and the internal temperature reaches 200-210 degrees F (93-99 degrees C). -
Step 8
Let the bread cool completely on a wire rack before slicing and serving.
Important Information
Nutrition Facts (Per Serving)
It is important to consider this information as approximate and not to use it as definitive health advice.
Allergy Information
Please check ingredients for potential allergens and consult a health professional if in doubt.
Leave a Comment