
No-Bake Chocolate Peppermint Squares These No-Bake Chocolate Peppermint Squares are a fantastic treat, especially when you need something festive and delicious without turning on the oven. They remind me of cool winter evenings and the joy of easy holiday baking. The layers of creamy chocolate and refreshing peppermint, all atop a simple cookie crust, make them a crowd-pleaser. They’re incredibly simple to put together, making them perfect for last-minute gatherings or just a sweet craving. Ingredients: 1 1/2 cups vanilla wafer crumbs 1/4 cup 1/2 stick unsalted butter 2 tbs sugar 8 oz cream cheese (softened) 1/2 cup finely crushed peppermint candy cane -OR- starlight mints 2 tbs milk 1/3 cup sugar 1 1/4 cup whipped topping 1 pkg 4-serving size instant chocolate pudding 1 3/4 cups milk 8 oz 1 tub whipped topping 1/4 cup coarsely chopped peppermint candy cane Instructions: Step 1: Prepare the Crust First, we need to make the base for our squares. In a medium bowl, combine the 1 1/2 cups of vanilla wafer crumbs with the 1/4 cup of unsalted butter, which should be melted. Add in the 2 tablespoons of sugar. Stir everything together until the crumbs are well moistened and resemble wet sand. This mixture is what will give our squares a nice, firm base. Press this crumb mixture evenly into the bottom of an 8×8 inch baking pan. Using the bottom of a glass or a flat measuring cup helps to create a compact and even layer. You can chill this crust in the refrigerator while you prepare the next layer.
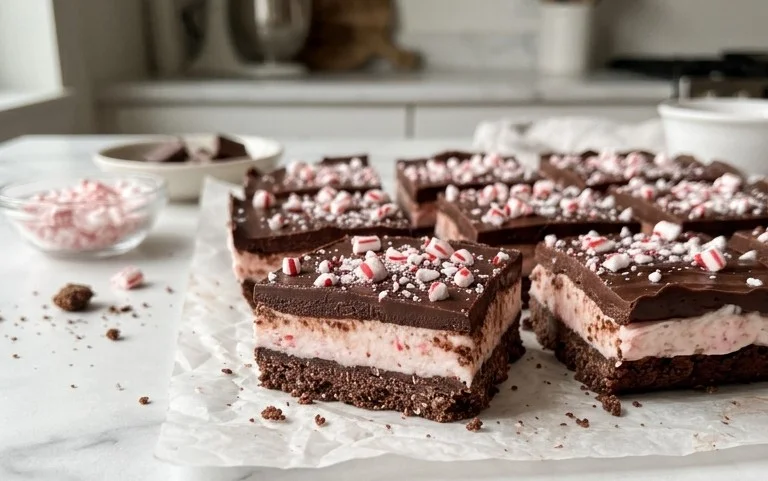
No-Bake Chocolate Peppermint Squares
These No-Bake Chocolate Peppermint Squares are a fantastic treat, especially when you need something festive and delicious without turning on the oven. They remind me of cool winter evenings and the joy of easy holiday baking. The layers of creamy chocolate and refreshing peppermint, all atop a simple cookie crust, make them a crowd-pleaser. They’re incredibly simple to put together, making them perfect for last-minute gatherings or just a sweet craving.
Ingredients:
- 1 1/2 cups vanilla wafer crumbs
- 1/4 cup 1/2 stick unsalted butter
- 2 tbs sugar
- 8 oz cream cheese (softened)
- 1/2 cup finely crushed peppermint candy cane -OR- starlight mints
- 2 tbs milk
- 1/3 cup sugar
- 1 1/4 cup whipped topping
- 1 pkg 4-serving size instant chocolate pudding
- 1 3/4 cups milk
- 8 oz 1 tub whipped topping
- 1/4 cup coarsely chopped peppermint candy cane
Instructions:
Step 1: Prepare the Crust
First, we need to make the base for our squares. In a medium bowl, combine the 1 1/2 cups of vanilla wafer crumbs with the 1/4 cup of unsalted butter, which should be melted. Add in the 2 tablespoons of sugar. Stir everything together until the crumbs are well moistened and resemble wet sand. This mixture is what will give our squares a nice, firm base. Press this crumb mixture evenly into the bottom of an 8×8 inch baking pan. Using the bottom of a glass or a flat measuring cup helps to create a compact and even layer. You can chill this crust in the refrigerator while you prepare the next layer; this helps it set up nicely.
Step 2: Create the Creamy Chocolate Filling
Now, let’s make the luscious chocolate layer. In a large bowl, beat the 8 ounces of softened cream cheese until it is smooth and creamy. This is important to avoid any lumps. Gradually beat in the 1/3 cup of sugar until well combined. Then, add in the 2 tablespoons of milk and the 1 1/4 cups of whipped topping. Mix until everything is just combined and smooth. Be careful not to overmix at this stage, especially with the whipped topping. You want to maintain its airy texture. Next, add the contents of the 1 package of 4-serving size instant chocolate pudding. Mix this in until the pudding is fully incorporated and the mixture is a uniform chocolate color. This will be a thick and decadent filling.
Step 3: Add the First Peppermint Crunch
This is where we start adding that delightful peppermint flavor and texture. Take about half of the 1/2 cup of finely crushed peppermint candy cane or starlight mints and gently fold them into the chocolate cream cheese mixture. You don’t want to beat them in vigorously, as that could break down the candy too much and create a less pleasant texture. Folding them in preserves those little crunchy bits. This will give you little pockets of minty goodness throughout the chocolate layer.
Step 4: Assemble the Layers and Chill
Retrieve your prepared crust from the refrigerator. Carefully spread the chocolate peppermint filling evenly over the chilled crust. Use a spatula to smooth the top. Once the chocolate layer is spread, sprinkle the remaining 1/2 cup of finely crushed peppermint candy cane evenly over the top of the chocolate filling. This will be visible on top of this layer, adding to the visual appeal. Now, cover the pan tightly with plastic wrap. Place the pan in the refrigerator and let it chill for at least 2 to 3 hours, or until the filling is firm. This chilling time is essential for the layers to set properly so you can cut neat squares.
Step 5: Finish with the Whipped Topping and Garnish
Once the chocolate layer has set, it’s time for the final topping. In a clean bowl, take the remaining 8 ounces (which is typically one tub) of whipped topping and spread it evenly over the chilled chocolate layer. Make sure to cover the entire surface for a smooth finish. Finally, sprinkle the 1/4 cup of coarsely chopped peppermint candy cane over the top of the whipped topping. This provides a beautiful decorative element and an extra crunch of peppermint. Return the pan to the refrigerator for at least another 30 minutes to allow the whipped topping to firm up slightly, making it easier to slice.
To serve, cut the chilled squares into your desired portions. These are best enjoyed cold. They store well in the refrigerator, covered, for up to 3-4 days. If you find your peppermint candies have a tendency to melt or stick too much, you can lightly dust them with a tiny bit of cornstarch before crushing, though this is usually not necessary. Enjoy these delightful no-bake treats!
Conclusion:
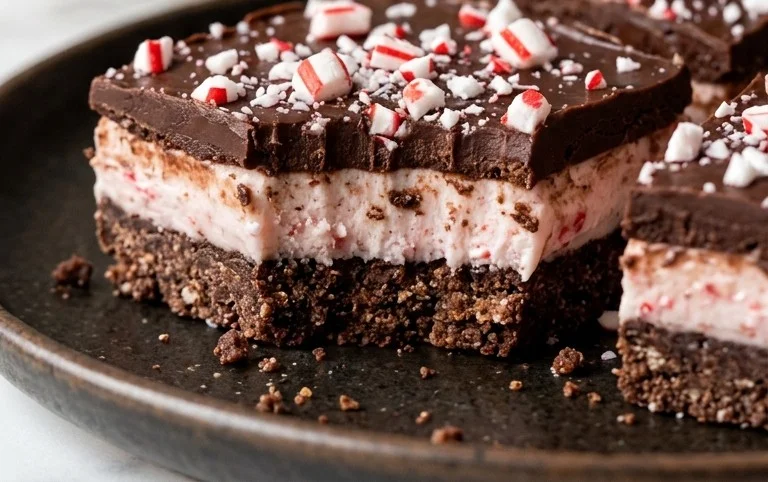
These No-Bake Chocolate Peppermint Squares are a definite winner, especially during the busy holiday season or any time you need a sweet, refreshing treat without the oven. They come together quickly, allowing you more time to enjoy with family and friends. The combination of the buttery cookie crust, the creamy chocolate peppermint filling, and the sweet peppermint topping is simply irresistible. Making these squares is a straightforward process, perfect for bakers of all skill levels. They store well, making them ideal for making ahead of time. Enjoy them as a festive dessert, a holiday party contribution, or simply a sweet afternoon pick-me-up. Consider adding a sprinkle of edible glitter or a drizzle of white chocolate for extra flair. These No-Bake Chocolate Peppermint Squares are always a hit.
FAQ
Can I use a different type of cookie for the crust?
Yes, you can. Shortbread cookies or graham crackers work well as a substitute for vanilla wafers. You might need to adjust the amount of butter slightly depending on how finely crushed your cookies are. Aim for a consistency similar to wet sand.
How should I store the No-Bake Chocolate Peppermint Squares?
Store the squares in an airtight container in the refrigerator for up to 5 days. They tend to firm up even more in the fridge, making them easier to cut cleanly.
What if I don’t have peppermint candy canes?
Starlight mints or any hard peppermint candy will work perfectly as a substitute for crushed candy canes. Just make sure they are crushed finely for even distribution in the filling and coarsely for the topping.
No-Bake Chocolate Peppermint Squares
A festive and easy no-bake dessert featuring layers of chocolate pudding, cream cheese filling, and crushed peppermint.
Ingredients
-
1 1/2 cups vanilla wafer crumbs
-
1/4 cup unsalted butter, melted
-
2 tablespoons sugar
-
8 oz cream cheese, softened
-
1/2 cup finely crushed peppermint candy cane
-
2 tablespoons milk
-
1/3 cup sugar
-
1 1/4 cup whipped topping
-
1 package 4-serving size instant chocolate pudding
-
1 3/4 cups milk
-
8 oz whipped topping
-
1/4 cup coarsely chopped peppermint candy cane
Instructions
-
Step 1
In a small bowl, combine vanilla wafer crumbs, melted butter, and 2 tablespoons sugar. Press evenly into the bottom of an 8×8 inch baking dish. -
Step 2
In a medium bowl, beat softened cream cheese until smooth. Beat in 1/2 cup finely crushed peppermint, 2 tablespoons milk, and 1/3 cup sugar until well combined. Gently fold in 1 1/4 cups whipped topping until no streaks remain. -
Step 3
Spread the cream cheese mixture evenly over the crumb crust. -
Step 4
In a separate large bowl, whisk together the instant chocolate pudding mix and 1 3/4 cups milk for 2 minutes, or until thickened. Let stand for 5 minutes. -
Step 5
Gently fold the 8 oz whipped topping into the chocolate pudding until combined. Spoon the chocolate pudding mixture over the cream cheese layer. -
Step 6
Sprinkle the top evenly with 1/4 cup coarsely chopped peppermint candy cane. -
Step 7
Chill in the refrigerator for at least 2 hours, or until firm.
Important Information
Nutrition Facts (Per Serving)
It is important to consider this information as approximate and not to use it as definitive health advice.
Allergy Information
Please check ingredients for potential allergens and consult a health professional if in doubt.

Leave a Comment