
Meringue Christmas Trees are a delightful addition to any holiday spread. These light, airy confections look like they’ve been plucked straight from a winter wonderland, with their festive green hue and sugary sparkle. They’re surprisingly simple to assemble once you get the hang of the meringue technique, making them a fun project for bakers of all levels. Many people love them because they are gluten-free and look incredibly impressive without much fuss. The magic lies in transforming humble egg whites and sugar into delicate, crisp structures that hold their shape beautifully. They’re perfect for a Christmas cookie platter, as edible tree decorations, or even as charming edible gifts. Getting the meringue right is all about clean equipment and a bit of patience. This recipe focuses on achieving that perfect crisp exterior and chewy interior.
Why You’ll Love These Meringue Christmas Trees
These little meringue Christmas trees offer a wonderful contrast in texture to richer holiday bakes. Their delicate sweetness pairs well with almost anything. Plus, their visual appeal is undeniable. Imagine a tray filled with these tiny, edible trees – they instantly bring cheer to a table. They are also naturally gluten-free, which is a bonus for many hosts. Making them yourself adds a personal touch that store-bought treats can’t match. They store well, so you can make them ahead of time.
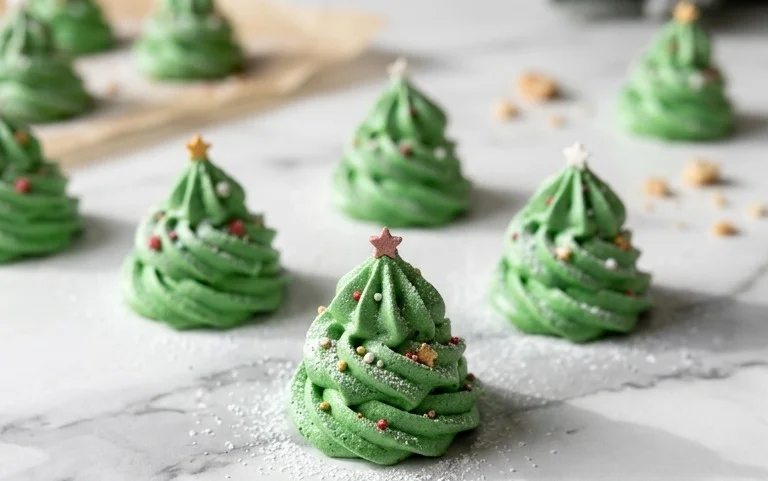
Meringue Christmas Trees
These little meringue Christmas trees are so festive and surprisingly simple to make. The light, airy texture of meringue is always a treat, and piping them into tree shapes and decorating them with green food colouring and sprinkles makes them look like they’ve just come out of Santa’s workshop. They’re a lovely addition to a Christmas cookie platter or even as edible decorations for your tree. The key to perfect meringues is patience and ensuring everything is perfectly clean and dry.
Ingredients:
- 2 large egg whites (room temperature)
- 1/4 teaspoon cream of tartar
- 100 g granulated sugar
- Green gel food colouring
- Sprinkles
Preparing Your Workspace and Equipment
Before you even think about cracking eggs, it’s essential to get your workspace and equipment ready. Meringue is notoriously fussy about fat, so even a tiny trace of grease on your bowl or whisk can prevent the egg whites from whipping up properly. Wash your mixing bowl and whisk attachment thoroughly with hot, soapy water and dry them completely. Some people even like to wipe them down with a little white vinegar and then dry them again to ensure they’re spotless. You’ll also need a baking sheet lined with parchment paper. This prevents sticking and makes clean-up a breeze.
Whipping the Egg Whites
Step 1: Initial Whipping
Start by placing your room-temperature egg whites into your impeccably clean mixing bowl. Add the cream of tartar. Begin whisking on a low speed. You’ll see them start to get foamy, like the top of a latte. Gradually increase the speed to medium-high. Continue whisking until the egg whites form stiff, glossy peaks. This means when you lift the whisk, the peaks stand straight up and don’t flop over. This stage is crucial for a stable meringue.
Step 2: Adding the Sugar
This is where patience really pays off. Once you have stiff peaks, start adding the granulated sugar, one tablespoon at a time, while the mixer is still running on medium-high speed. It’s important to add the sugar slowly to allow it to dissolve properly into the egg whites. If you dump it all in at once, you’ll end up with a grainy meringue that might weep liquid later. Keep whisking after each addition of sugar until it’s incorporated. Continue this process until all the sugar is added and the meringue is thick, shiny, and holds stiff peaks. When you rub a little of the mixture between your fingers, you shouldn’t feel any grittiness from the sugar.
Step 3: Colouring the Meringue
Now for the festive part. Add a few drops of green gel food colouring to the meringue. Gel food colouring is best because it’s highly concentrated and won’t add excess moisture to the mixture. Gently fold the colouring into the meringue using a spatula until it’s evenly distributed. Be careful not to overmix, as you don’t want to deflate the airy structure you’ve worked so hard to create. You can add more colouring if you want a deeper green, but it’s best to start with a little and build up.
Piping the Trees
Step 4: Piping the Tree Shapes
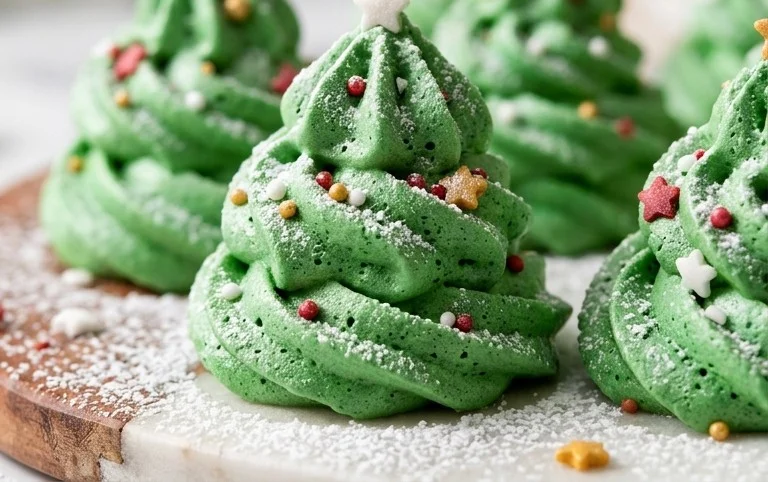
Transfer the green meringue mixture into a piping bag fitted with a star tip. Hold the piping bag vertically, about an inch above the parchment-lined baking sheet. Start piping from the bottom, squeezing steadily and moving upwards in a zig-zag motion to create the shape of a Christmas tree. You can make them different sizes by varying the pressure and the length of your zig-zags. Aim for a wide base and a narrower top. Don’t worry if they’re not perfectly uniform; the handmade charm is part of their appeal. Leave a little space between each tree as they don’t spread much but you don’t want them touching.
Step 5: Decorating and Baking
While the meringue is still soft, gently press sprinkles onto the piped trees. You can be as creative as you like with the placement, mimicking baubles and tinsel. Once decorated, it’s time to bake. Place the baking sheet into a preheated oven at 100°C (210°F). Bake for about 1.5 to 2 hours. The meringues are done when they are crisp to the touch and lift easily from the parchment paper. They should be dry all the way through.
Cooling and Storage
Step 6: Cooling the Meringues
Turn off the oven, but leave the meringues inside with the oven door slightly ajar. This slow cooling process helps prevent cracking. Let them cool completely in the oven, which could take another hour or two. Once fully cooled, they should be light and hollow-sounding when tapped. If you try to remove them when they’re still warm, they can stick or break.
Store your finished meringue Christmas trees in an airtight container at room temperature. They can last for up to two weeks, provided they are kept dry. Humidity is the enemy of meringues, so avoid storing them in humid places like the refrigerator. These delightful treats are perfect for gifting, sharing, or simply enjoying yourself throughout the holiday season. They are a wonderful way to add a touch of edible sparkle to your Christmas celebrations.
Conclusion:
These Meringue Christmas Trees are a charming and festive treat that truly captures the spirit of the holidays. Their crisp texture and sweet, airy lightness make them a delightful alternative to heavier cookies. They are surprisingly robust once baked, making them suitable for decorating or gifting. Whether you are looking for a gluten-free option, a fun baking project with kids, or simply a beautiful addition to your Christmas dessert table, these little trees deliver. They are a testament to how simple ingredients can create something magical with a bit of technique and imagination. Don’t be intimidated by meringue; with clean equipment and the right steps, you’ll be piping these festive trees like a pro.
Serving Suggestions:
Serve these alongside other holiday cookies, arrange them on a festive platter, or use them as edible ornaments on your Christmas tree. They also look lovely tucked into hot chocolate or coffee.
Variations:
Experiment with different food colorings like red or white, or add edible glitter for extra sparkle. You can also pipe different shapes like stars or candy canes.
Frequently Asked Questions:
Why are my meringues cracking?
Meringues can crack if baked at too high a temperature or if they cool down too quickly. Ensure your oven temperature is accurate and allow the meringues to cool completely in the oven after baking with the door slightly ajar.
Can I make meringue kisses instead of trees?
Absolutely! You can pipe smaller dollops of meringue onto the parchment paper to create classic meringue kisses. Adjust the baking time as smaller shapes will bake faster.
How should I store Meringue Christmas Trees?
Store your cooled meringues in an airtight container at room temperature. Avoid storing them in the refrigerator, as the humidity can make them sticky and soft. They can typically be stored for up to two weeks.
Meringue Christmas Trees
Delicate and festive meringue cookies shaped like Christmas trees, perfect for holiday decorating.
Ingredients
-
2 large egg whites (room temperature)
-
1/4 teaspoon cream of tartar
-
100 g granulated sugar
-
green gel food colouring
-
sprinkles
-
1/2 teaspoon vanilla extract
Instructions
-
Step 1
Preheat oven to 200°F (95°C). Line baking sheets with parchment paper. -
Step 2
In a clean, dry bowl, beat egg whites and cream of tartar until soft peaks form. -
Step 3
Gradually add granulated sugar, one tablespoon at a time, beating well after each addition until stiff, glossy peaks form. -
Step 4
Add green gel food colouring and vanilla extract. Beat until evenly combined. -
Step 5
Transfer meringue to a piping bag fitted with a star tip. Pipe cone shapes onto the prepared baking sheets to resemble Christmas trees. -
Step 6
Decorate with sprinkles immediately after piping. Bake for 1 hour and 15 minutes, or until meringues are firm and lift easily off the parchment. Turn off the oven and let the meringues cool completely inside the oven with the door slightly ajar.
Important Information
Nutrition Facts (Per Serving)
It is important to consider this information as approximate and not to use it as definitive health advice.
Allergy Information
Please check ingredients for potential allergens and consult a health professional if in doubt.
Leave a Comment