
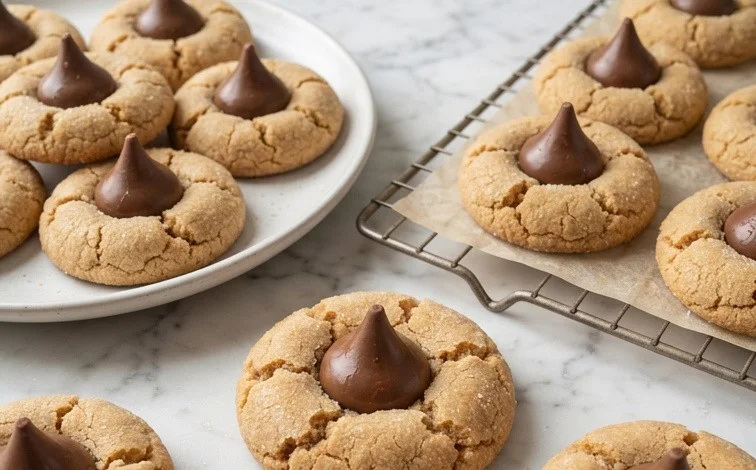
Classic Peanut Butter Blossoms are a holiday classic for a reason. That soft, chewy peanut butter cookie topped with a melted Hershey’s Kiss is pure nostalgia. They’re incredibly simple to make, making them a fantastic project for bakers of all levels, and they always disappear fast. I like to make a big batch every year around the holidays, and they’re always the first cookie to go. The combination of the slightly salty, nutty cookie with the sweet, smooth chocolate is just perfect. It’s a cookie that brings people together and sparks joy with every bite. The gentle peanut butter flavor mingling with the rich chocolate is a taste that many of us grew up with, and revisiting it is always a treat. These blossoms aren’t just cookies; they’re little packages of happy memories, perfect for sharing or savoring yourself.
Ingredients:
- 1 3/4 cup All-Purpose Flour
- 1 tsp Baking Soda
- 1/2 tsp Salt
- 1/2 cup Creamy Peanut Butter
- 1/2 cup Unsalted Butter (room temperature)
- 1/2 cup Granulated Sugar
- 1/2 cup Light Brown Sugar (lightly packed)
- 1 Large Egg
- 2 tbsp Milk
- 1 tsp Vanilla Extract
- 1/2 cup Granulated Sugar (additional amount for coating cookies)
- 11 oz Bag of Hershey Kisses
Cookie Dough Preparation
Cream the Butter and Sugars:
In a large mixing bowl, start by creaming together your softened unsalted butter, granulated sugar, and light brown sugar. Make sure your butter is truly at room temperature – this means it should indent easily when you press it with your finger, but not be greasy or melted. This step is important for creating a light and airy cookie texture. Beat them together with an electric mixer on medium speed until the mixture is pale yellow and fluffy, which usually takes about 2-3 minutes. Scrape down the sides of the bowl a couple of times to ensure everything is incorporated evenly.
Classic Peanut Butter Blossoms
Peanut Butter Blossoms are a holiday classic for a reason. That soft, chewy peanut butter cookie topped with a melted Hershey’s Kiss is pure nostalgia. They’re incredibly simple to make, making them a fantastic project for bakers of all levels, and they always disappear fast. I like to make a big batch every year around the holidays, and they’re always the first cookie to go. The combination of the slightly salty, nutty cookie with the sweet, smooth chocolate is just perfect.
Ingredients:
- 1 3/4 cup All-Purpose Flour
- 1 tsp Baking Soda
- 1/2 tsp Salt
- 1/2 cup Creamy Peanut Butter
- 1/2 cup Unsalted Butter (room temperature)
- 1/2 cup Granulated Sugar
- 1/2 cup Light Brown Sugar (lightly packed)
- 1 Large Egg
- 2 tbsp Milk
- 1 tsp Vanilla Extract
- 1/2 cup Granulated Sugar (additional amount for coating cookies)
- 11 oz Bag of Hershey Kisses
Cookie Dough Preparation
- Cream the Butter and Sugars: In a large mixing bowl, start by creaming together your softened unsalted butter, granulated sugar, and light brown sugar. Make sure your butter is truly at room temperature – this means it should indent easily when you press it with your finger, but not be greasy or melted. This step is important for creating a light and airy cookie texture. Beat them together with an electric mixer on medium speed until the mixture is pale yellow and fluffy, which usually takes about 2-3 minutes. Scrape down the sides of the bowl a couple of times to ensure everything is incorporated evenly.
- Add Wet Ingredients: Next, add the creamy peanut butter to the sugar and butter mixture. Beat until well combined. Then, crack in your large egg, add the milk, and the vanilla extract. Beat again until everything is thoroughly incorporated. Don’t overmix at this stage; you just want it to come together smoothly. The consistency should be soft and slightly sticky.
- Combine Dry Ingredients and Mix: In a separate medium bowl, whisk together the all-purpose flour, baking soda, and salt. This ensures that your leavening agent and salt are evenly distributed throughout the flour, preventing pockets of salt or uneven rising. Gradually add the dry ingredients to the wet ingredients, mixing on low speed until just combined. Be careful not to overwork the dough once the flour is added, as this can lead to tough cookies. Stop mixing as soon as you no longer see streaks of flour. The dough will be soft.
Shaping and Baking
- Chill and Roll the Dough: Cover the bowl with plastic wrap and refrigerate the dough for at least 30 minutes, or up to 2 days. Chilling the dough makes it much easier to handle and roll, and it also helps the cookies spread less in the oven, resulting in a thicker cookie. Once chilled, scoop the dough into roughly 1-inch balls. You can use a cookie scoop for uniformity. Place the additional 1/2 cup of granulated sugar in a shallow bowl or plate. Roll each dough ball gently in the sugar until it’s well coated. This extra sugar coating gives the cookies a lovely sparkle and a slightly crisp exterior.
- Bake and Add the Kisses: Place the sugar-coated dough balls about 2 inches apart on ungreased baking sheets. For that signature blossom shape, bake the cookies in a preheated oven at 375°F (190°C) for 8 to 10 minutes, or until the edges are lightly golden brown. They should still look slightly underbaked in the center. Immediately after taking the cookies out of the oven, gently press one unwrapped Hershey’s Kiss into the center of each warm cookie. The heat from the cookie will soften the chocolate kiss, allowing it to sink in slightly and create that beautiful blossom effect. If the edges of your cookies are browning too quickly, you can tent them loosely with foil during the last few minutes of baking.
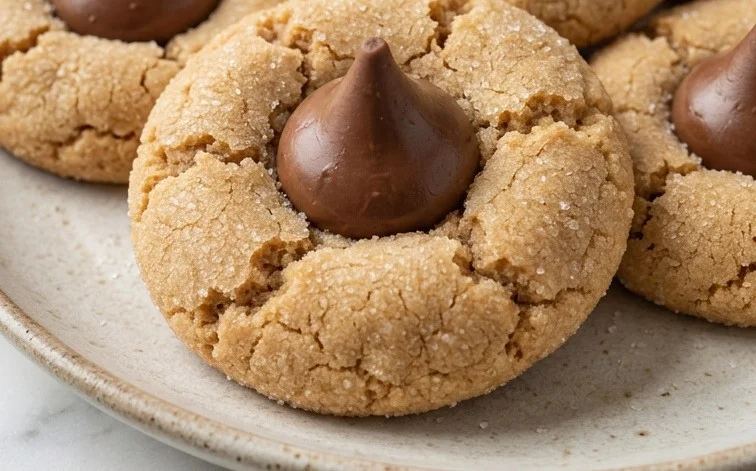
- Cool and Enjoy: Allow the cookies to cool on the baking sheets for about 5 minutes before transferring them to a wire rack to cool completely. This resting period allows the chocolate kiss to firm up slightly and prevents the cookies from breaking when you move them. The peanut butter cookies will be soft and chewy, with the melted chocolate creating a perfect sweet topping. These cookies are best enjoyed fresh but can be stored in an airtight container at room temperature for up to 3 days.
Conclusion:
These Classic Peanut Butter Blossoms are more than just a holiday treat; they’re a cherished tradition and a delightful way to connect with sweet memories. The combination of soft, chewy peanut butter cookie and the melty chocolate Hershey’s Kiss is truly a winner every time. They are remarkably straightforward to make, proving that exceptional flavor doesn’t require complicated steps. Whether you’re baking for a crowd, a family gathering, or just because, these cookies are sure to bring smiles. The aroma alone as they bake is enough to make any day feel special. Don’t hesitate to add them to your baking rotation – they are always a welcome addition and disappear quickly!
Serving Suggestions:
Enjoy your Peanut Butter Blossoms with a cold glass of milk for a classic pairing, or serve them alongside coffee or tea as a sweet finish to a meal. They are also wonderful as part of a cookie platter during holidays or special occasions.
Variations:
For a different chocolatey experience, try using dark chocolate or white chocolate Hershey’s Kisses. You could also roll the dough balls in colored sanding sugar before pressing the kisses for a festive look, or add a sprinkle of sea salt on top of the kiss for a touch of sweet and salty contrast.
Frequently Asked Questions:
Why do my peanut butter cookies spread too much?
This often happens if your butter is too soft or melted, or if you use too much sugar. Ensure your butter is at true room temperature, not soft enough to be greasy. Measure your sugar accurately. Also, chilling the dough for at least 30 minutes before baking can help prevent excessive spreading.
Can I make the dough ahead of time?
Yes, absolutely! The cookie dough can be made up to 3 days in advance and stored in an airtight container in the refrigerator. When ready to bake, let the dough sit at room temperature for about 15-20 minutes to make it easier to scoop, or just scoop directly from the fridge and adjust baking time as needed.
Classic Peanut Butter Blossoms
A classic cookie recipe featuring soft peanut butter cookies topped with a Hershey’s Kiss.
Ingredients
-
1 3/4 cup All-Purpose Flour
-
1 tsp Baking Soda
-
1/2 tsp Salt
-
1/2 cup Creamy Peanut Butter
-
1/2 cup Unsalted Butter, room temperature
-
1/2 cup Granulated Sugar
-
1/2 cup Light Brown Sugar, lightly packed
-
1 Large Egg
-
2 tbsp Milk
-
1 tsp Vanilla Extract
-
1/2 cup Granulated Sugar, for coating cookies
-
11 oz Bag of Hershey Kisses
Instructions
-
Step 1
Preheat oven to 375°F (190°C). Line baking sheets with parchment paper. -
Step 2
In a medium bowl, whisk together flour, baking soda, and salt. Set aside. -
Step 3
In a large bowl, cream together peanut butter, butter, granulated sugar, and brown sugar until light and fluffy. -
Step 4
Beat in the egg, milk, and vanilla extract until well combined. -
Step 5
Gradually add the dry ingredients to the wet ingredients, mixing until just combined. -
Step 6
Roll dough into 1-inch balls. Roll each ball in the additional granulated sugar. -
Step 7
Place dough balls 2 inches apart on prepared baking sheets. -
Step 8
Bake for 9-11 minutes, or until edges are lightly golden. -
Step 9
Immediately press one Hershey’s Kiss into the center of each cookie. Allow to soften slightly before pressing. -
Step 10
Let cookies cool on the baking sheets for a few minutes before transferring to a wire rack to cool completely.
Important Information
Nutrition Facts (Per Serving)
It is important to consider this information as approximate and not to use it as definitive health advice.
Allergy Information
Please check ingredients for potential allergens and consult a health professional if in doubt.


Leave a Comment