
Snowball cookies are a wonderfully tender, melt-in-your-mouth treat that gets its name from the generous dusting of powdered sugar that coats each delicate bite. I love how simple they are to make, yet they look so elegant, making them a fantastic addition to holiday cookie platters or any gathering. What makes these cookies truly special is their unique texture, achieved through the creaming of butter and powdered sugar. This process incorporates air, creating a light and crumbly cookie that practically dissolves on your tongue. Adding finely chopped nuts like walnuts, almonds, or pecans provides a satisfying crunch that perfectly balances the sweetness. These aren’t just cookies; they’re little bites of pure comfort, perfect for sharing with friends and family or enjoying with a warm cup of tea.
Why You’ll Love This Recipe
Simple Ingredients, Incredible Taste
This recipe uses basic pantry staples that most people already have on hand. The magic happens in the technique, transforming simple ingredients into a cookie with a wonderfully light and crumbly texture. It’s a straightforward process that yields impressive results, proving that delicious treats don’t need to be complicated. The subtle nuttiness from the optional nuts adds another layer of flavor that makes these snowball cookies irresistible.
Special Qualities
Delicate Texture and Festive Appearance
The defining characteristic of a good snowball cookie is its melt-in-your-mouth texture. This is achieved by using a higher ratio of fat to flour and creaming the butter and powdered sugar thoroughly. The final coating of powdered sugar not only adds sweetness but also gives them their signature snowy appearance, making them a festive favorite, especially during the winter holidays.
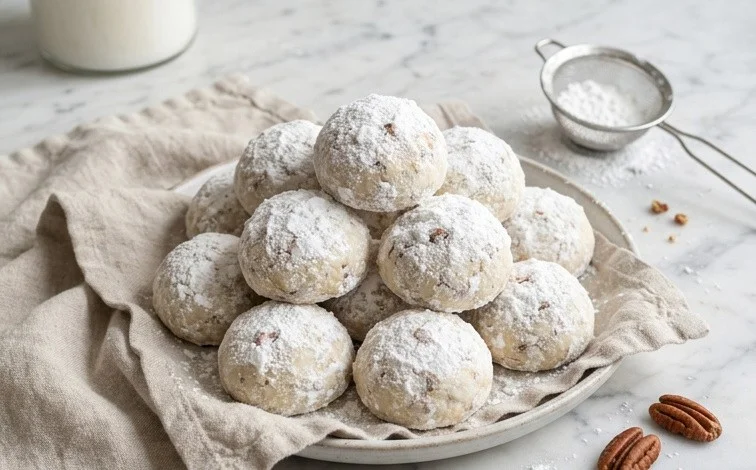
Snowball Cookies
These little snowball cookies are a classic for a reason. They’re tender, melt-in-your-mouth, and coated in a snowy dusting of powdered sugar. I love making them around the holidays because they look so festive, but honestly, they’re delicious any time of year. The key to their unique texture is the combination of butter (or coconut oil for a dairy-free option) and powdered sugar, which creates a delicate crumb. Adding finely chopped nuts gives them a lovely bit of crunch and flavor that complements the sweet dough perfectly.
Ingredients:
- 2 cups flour (white, spelt, whole wheat pastry, or Bob’s Red Mill gluten-free blend all work well)
- 1/2 cup finely chopped walnuts (or almonds or pecans)
- 1 cup butter (softened, or softened coconut oil)
- 1/2 cup powdered sugar
- optional additional powdered sugar (or cocoa powder, for rolling)
Instructions:
Creaming the Butter and Sugar
The first step is to get our base nice and fluffy. In a large mixing bowl, combine the softened butter (make sure it’s not melted, just soft enough to easily press with your finger) and the 1/2 cup of powdered sugar. If you’re using coconut oil, ensure it’s at room temperature and solid but scoopable, not liquid. You want to cream these together until the mixture is light and airy. This process incorporates air into the dough, which is what contributes to the cookies’ delicate texture. I usually use an electric mixer for this, starting on low speed and then increasing to medium-high. Scrape down the sides of the bowl a few times to make sure everything is evenly mixed. This usually takes about 2-3 minutes with an electric mixer. The color should lighten considerably, and the texture should be noticeably fluffy, almost like frosting.
Adding the Dry Ingredients and Nuts
Once your butter and sugar are beautifully creamed, it’s time to add the flour and the finely chopped nuts. If you’re using walnuts, make sure they are chopped quite small. You don’t want large chunks, as this can affect the cookie’s structure and how it holds together. If you want a finer nut texture, you can pulse them briefly in a food processor. Gradually add the flour to the creamed mixture. It’s best to do this in a few additions, mixing on low speed until just combined after each addition. Overmixing after adding flour can develop the gluten too much, resulting in tougher cookies, which is the opposite of what we want for these delicate snowballs. If you find the dough is still a bit crumbly, you can mix it for another 30 seconds or so, but avoid prolonged mixing. Gently fold in the finely chopped nuts with a spatula until they are evenly distributed throughout the dough.
Shaping the Snowballs
Now for the fun part – shaping the cookies! The dough will be quite soft at this stage. You can use a small cookie scoop (about 1 tablespoon size) to portion out the dough. Roll each portion into a ball between your palms. Aim for balls that are roughly the same size so they bake evenly. Don’t worry if they aren’t perfectly smooth; the rustic look is part of their charm. If the dough becomes too sticky to handle, you can pop the bowl into the refrigerator for about 10-15 minutes to firm it up a bit. This makes shaping much easier. Place the formed balls onto baking sheets lined with parchment paper, leaving a little space between them. They don’t spread much during baking, but it’s good practice to give them a bit of room.
Baking the Cookies
Preheat your oven to 325 degrees Fahrenheit (160 degrees Celsius). This moderate temperature is key to preventing the cookies from browning too quickly on the outside before the inside is cooked. Place the baking sheets in the preheated oven. Bake for about 15-18 minutes, or until the edges are just starting to turn a very pale golden color. You don’t want them to get brown; they should remain pale, like little snowballs. Keep an eye on them during the last few minutes of baking, as ovens can vary. If you can gently lift one with a spatula and it feels firm, it’s likely done.
Rolling in Powdered Sugar
This is the signature step for snowball cookies! Once the cookies are out of the oven, let them cool on the baking sheets for about 5 minutes. This allows them to set up just enough so they don’t fall apart when you move them. While they are still warm, carefully transfer them to a plate or shallow bowl filled with the optional additional powdered sugar. Gently roll each cookie in the powdered sugar until it’s completely coated. The warmth of the cookie will help the sugar adhere nicely. If you want a double-dipped look or an extra snowy effect, you can let them cool completely, then roll them again in fresh powdered sugar. For a variation, you can mix a tablespoon or two of unsweetened cocoa powder into the powdered sugar for a marbled or darker coating. Allow the cookies to cool completely on a wire rack before storing them.
Storing these snowball cookies is easy. Once they are completely cooled, keep them in an airtight container at room temperature. They tend to get even softer and more delicious after a day or two. They can last for about a week, though they rarely stick around that long!
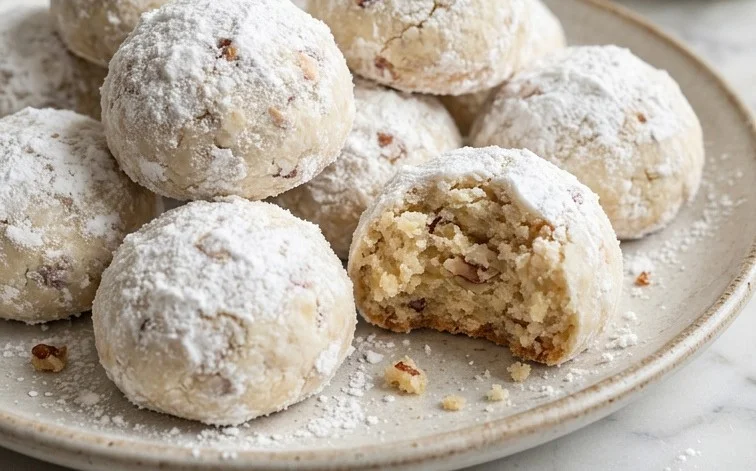
Conclusion:
These snowball cookies truly live up to their classic status. They’re incredibly tender with a delicate crumb that melts in your mouth, all thanks to the simple yet effective creaming method. The subtle crunch from the nuts, if you choose to add them, complements the sweet dough beautifully. Coated in a snowy layer of powdered sugar, they look as delightful as they taste, making them a perfect treat for holidays or any day you need a little pick-me-up. The ease of making them means you can whip up a batch whenever a craving strikes. Don’t hesitate to try this recipe; you’ll find yourself making them again and again.
Serving Suggestions
Snowball cookies are wonderful served alongside a cup of coffee or tea. They also pair nicely with a glass of cold milk. For a festive touch during the holidays, arrange them on a platter with other seasonal treats.
Variations
For a different flavor profile, try substituting almonds or pecans for the walnuts. You can also roll the finished cookies in cocoa powder for a chocolatey twist, or even add a hint of vanilla extract or almond extract to the dough for extra flavor. For a dairy-free version, simply use softened coconut oil as listed.
Frequently Asked Questions
Can I make snowball cookies ahead of time?
Yes, snowball cookies can be made several days in advance. Store them in an airtight container at room temperature. They tend to get even more tender as they sit.
How do I store leftover snowball cookies?
Store leftover snowball cookies in an airtight container at room temperature for up to a week. Avoid refrigerating them, as this can make them hard. If stacking, place parchment paper between layers to prevent sticking.
My cookies are spreading too much. What did I do wrong?
This usually happens if the butter is too soft or melted, or if the dough isn’t chilled enough. Ensure your butter is softened but not melted, and consider chilling the dough for at least 30 minutes before baking if you live in a warm climate or your kitchen is very warm.
Snowball Cookies
Delicate, melt-in-your-mouth snowball cookies, also known as Mexican wedding cookies or Russian tea cakes, dusted with powdered sugar.
Ingredients
-
2 cups flour (white, spelt, ww pastry, or Bob’s gf work)
-
1/2 cup finely chopped walnuts (or almonds or pecans)
-
1 cup butter (or coconut oil)
-
1/2 cup powdered sugar
-
optional additional powdered sugar (or cocoa powder, for rolling)
Instructions
-
Step 1
Preheat oven to 350°F (175°C). Line baking sheets with parchment paper. -
Step 2
In a large bowl, cream together the softened butter (or coconut oil) and 1/2 cup powdered sugar until light and fluffy. -
Step 3
Gradually add the flour, mixing until just combined. Stir in the finely chopped nuts. -
Step 4
Roll dough into 1-inch balls and place on prepared baking sheets. -
Step 5
Bake for 12-15 minutes, or until the edges are lightly golden. -
Step 6
Let cookies cool on the baking sheets for a few minutes before transferring them to a wire rack to cool completely. -
Step 7
Once completely cooled, roll the cookies in additional powdered sugar (or cocoa powder) until well coated.
Important Information
Nutrition Facts (Per Serving)
It is important to consider this information as approximate and not to use it as definitive health advice.
Allergy Information
Please check ingredients for potential allergens and consult a health professional if in doubt.


Leave a Comment