
The scent of warm butter and sweet vanilla is unmistakable, and it always reminds me of the holidays. These Danish butter cookies, often found in those iconic blue tins, are remarkably easy to make at home. The secret to their incredible tenderness and that signature melt-in-your-mouth quality is the high butter content and the careful balance of flours. They’re delicate, crumbly, and utterly addictive. Making them yourself means you can enjoy that authentic taste whenever you fancy, not just during special occasions.
Ingredients:
- 1 cup (227 g) European salted butter (room temperature)
- 1/2 cup (100 g) granulated sugar
- 1/8 teaspoon salt
- 2 egg yolks
- 2 teaspoons (10 g) vanilla extract
- 1 tablespoon (15 g) whole milk (or more to soften)
- 2 cups (220 g) all-purpose flour
- 1/2 cup (50 g) cake flour
- coarse sugar (for decorating)
Making the Dough
Creaming the Butter and Sugar
The foundation of these cookies is the creaming process. Start by ensuring your European salted butter is truly at room temperature. It should be soft and spreadable, but not melted. This is key for incorporating air. In a large bowl, beat the softened butter with the granulated sugar and the 1/8 teaspoon of salt. You can use an electric mixer on medium speed, or a sturdy whisk and some elbow grease. Continue beating until the mixture is light and fluffy, and the color has lightened to a pale yellow. This process can take about 3 to 5 minutes with a mixer. This step is where much of the cookie’s tender texture originates, so don’t rush it. Properly creamed butter and sugar trap tiny air bubbles that expand during baking, contributing to that desirable light and crumbly bite.
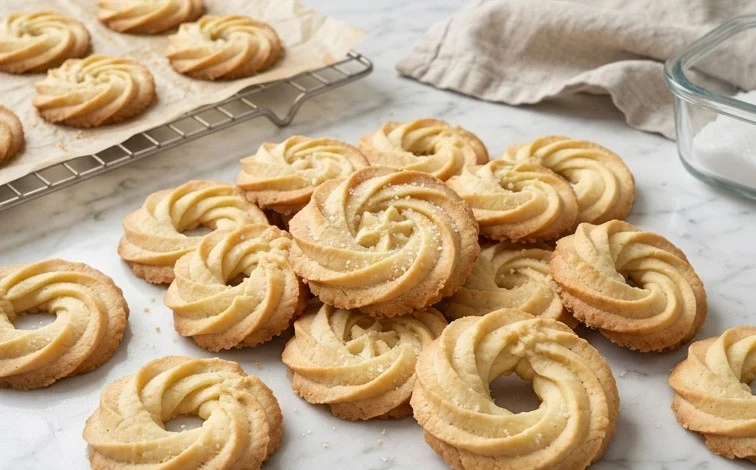
Danish Butter Cookies (Melt in your mouth)
The scent of warm butter and sweet vanilla is unmistakable, and it always reminds me of the holidays. These Danish butter cookies, often found in those iconic blue tins, are remarkably easy to make at home. The secret to their incredible tenderness and that signature melt-in-your-mouth quality is the high butter content and the careful balance of flours. They’re delicate, crumbly, and utterly addictive. Making them yourself means you can enjoy that authentic taste whenever you fancy, not just during special occasions.
Ingredients:
- 1 cup (227 g) European salted butter (room temperature)
- 1/2 cup (100 g) granulated sugar
- 1/8 teaspoon salt
- 2 egg yolks
- 2 teaspoons (10 g) vanilla extract
- 1 tablespoon (15 g) whole milk (or more to soften)
- 2 cups (220 g) all-purpose flour
- 1/2 cup (50 g) cake flour
- coarse sugar (for decorating)
Making the Dough
Creaming the Butter and Sugar
The foundation of these cookies is the creaming process. Start by ensuring your European salted butter is truly at room temperature. It should be soft and spreadable, but not melted. This is key for incorporating air. In a large bowl, beat the softened butter with the granulated sugar and the 1/8 teaspoon of salt. You can use an electric mixer on medium speed, or a sturdy whisk and some elbow grease. Continue beating until the mixture is light and fluffy, and the color has lightened to a pale yellow. This process can take about 3 to 5 minutes with a mixer. This step is where we build the structure and tenderness for our cookies.
Adding Wet Ingredients
Once the butter and sugar are well combined and airy, it’s time to add the egg yolks and vanilla extract. Add the two egg yolks, one at a time, beating well after each addition to ensure they are fully incorporated. This will make the mixture even richer and contribute to the cookie’s delicate texture. Next, stir in the 2 teaspoons of vanilla extract. If your dough feels a little stiff at this point, which can happen depending on the exact humidity and butter temperature, add the 1 tablespoon of whole milk. You might need just a tiny bit more, or perhaps none at all. The goal is to have a dough that’s pliable but not sticky. Be careful not to add too much milk, as this can make the cookies spread too much during baking.
Incorporating the Flours
Now for the dry ingredients. In a separate bowl, lightly whisk together the 2 cups of all-purpose flour and the 1/2 cup of cake flour. Using cake flour, which has a lower protein content than all-purpose flour, helps create that signature tender and crumbly texture that is characteristic of Danish butter cookies. Gradually add the flour mixture to the wet ingredients. Mix on low speed or by hand until just combined. Overmixing at this stage can develop the gluten in the flour, leading to tougher cookies, which is exactly what we want to avoid. Stop mixing as soon as you no longer see streaks of dry flour. The dough will be quite soft and somewhat sticky.
Shaping and Baking
Chilling and Piping
For the best results, it’s important to chill the dough. Wrap the dough tightly in plastic wrap and refrigerate for at least 30 minutes, or up to 2 days. Chilling the dough makes it firmer and much easier to handle, especially if you plan to pipe the cookies. If you don’t have a piping bag and a star tip, don’t worry. You can also roll the dough into small balls and flatten them with the bottom of a glass, or simply shape them into small logs and slice them. If piping, transfer the chilled dough to a piping bag fitted with a star tip. Line baking sheets with parchment paper. Pipe small swirls, rosettes, or other decorative shapes onto the prepared baking sheets, leaving about 1 inch between each cookie as they will spread slightly.
Baking to Perfection
Preheat your oven to 350°F (175°C). Place the baking sheets in the preheated oven. Bake for 10 to 14 minutes, or until the edges of the cookies are lightly golden brown. The centers should still be pale. These cookies bake relatively quickly, so keep a close eye on them to prevent over-baking, which can make them hard. Rotate the baking sheets halfway through the baking time to ensure even browning. Once baked, remove the cookies from the oven and let them cool on the baking sheets for about 5 minutes. This allows them to firm up enough to be moved without breaking. While they are still warm, you can sprinkle them with coarse sugar for a lovely sparkle and a touch of extra sweetness.
Cooling and Storage
After the initial cooling on the baking sheet, carefully transfer the cookies to a wire rack to cool completely. They will become more delicate as they cool. Once completely cool, store the Danish butter cookies in an airtight container at room temperature. They will stay fresh and retain their melt-in-your-mouth texture for up to a week. You can layer them between sheets of parchment paper if you are stacking them to prevent them from sticking together. Enjoy these delightful homemade treats with a cup of tea or coffee, or simply on their own!
Conclusion:
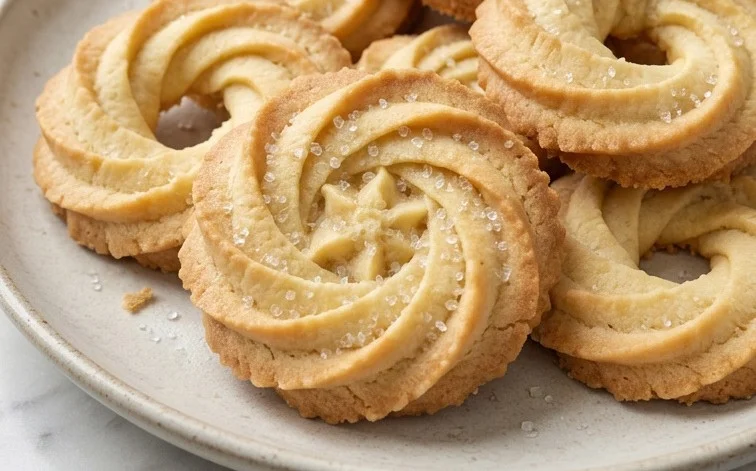
These Danish butter cookies truly live up to their melt-in-your-mouth reputation. The rich butter flavor and delicate crispness make them a wonderful treat any time of year. They are perfect with a cup of coffee or tea, or as a sweet ending to any meal. Don’t be afraid to experiment with decorating them; the coarse sugar adds a lovely sparkle and crunch, but sprinkles or even a light dusting of powdered sugar work wonderfully too. They’re a classic for a reason, offering a taste of tradition that’s always welcome. Making them at home ensures you get that perfect texture and fresh-baked aroma that store-bought versions just can’t match. Give this recipe a try; you might find it becomes a new favorite in your baking repertoire.
Frequently Asked Questions:
Can I use unsalted butter?
Yes, you can use unsalted butter. If you do, I recommend adding a 1/4 teaspoon of salt along with the flour, or adjusting to your taste. European butter has a higher fat content, which contributes to the cookie’s richness and tender texture.
Why are my cookies spreading too much?
This usually happens if the butter was too soft or melted when you started creaming, or if the dough was too warm when baking. Ensure your butter is softened but not greasy. Chilling the dough for 30 minutes before piping can also help prevent excessive spreading and maintain the cookie’s shape.
How should I store Danish butter cookies?
Store your cooled Danish butter cookies in an airtight container at room temperature for up to a week. They will lose some of their crispness over time, but will still be delicious. Adding a small piece of parchment paper between layers can help prevent them from sticking together.
Danish Butter Cookies (Melt in your mouth)
Delicate and buttery cookies that practically melt in your mouth, perfect for any occasion.
Ingredients
-
1 cup (227 g) European salted butter, room temperature
-
1/2 cup (100 g) granulated sugar
-
1/8 teaspoon salt
-
2 egg yolks
-
2 teaspoons (10 g) vanilla extract
-
1 tablespoon (15 g) whole milk (or more to soften)
-
2 cups (220 g) all-purpose flour
-
1/2 cup (50 g) cake flour
-
Coarse sugar (for decorating)
Instructions
-
Step 1
In a large bowl, cream together the softened butter, granulated sugar, and salt until light and fluffy. -
Step 2
Beat in the egg yolks and vanilla extract until well combined. -
Step 3
Gradually add the all-purpose flour and cake flour, mixing until just combined. The dough may seem crumbly; add the milk a tablespoon at a time until it forms a soft, cohesive dough. -
Step 4
Transfer the dough to a piping bag fitted with a star tip and pipe desired shapes onto baking sheets lined with parchment paper. -
Step 5
Sprinkle the piped cookies with coarse sugar. -
Step 6
Bake in a preheated oven at 350°F (175°C) for 10-12 minutes, or until the edges are lightly golden. -
Step 7
Let the cookies cool on the baking sheet for a few minutes before transferring them to a wire rack to cool completely.
Important Information
Nutrition Facts (Per Serving)
It is important to consider this information as approximate and not to use it as definitive health advice.
Allergy Information
Please check ingredients for potential allergens and consult a health professional if in doubt.



Leave a Comment