
Healthy Chocolate Chip Cookies are my go-to when I’m craving something sweet but want to keep things a little lighter. They use oat flour for a heartier texture and have less refined sugar than traditional recipes. The addition of nuts is completely optional, but I find they add a lovely crunch that balances the soft cookie and melty chocolate. They’re perfect with a cup of tea or coffee, or just for a guilt-free treat any time of day. This healthy chocolate chip cookie recipe focuses on wholesome ingredients without sacrificing that classic cookie comfort. They bake up with a wonderfully chewy center and slightly crisp edges, making them incredibly satisfying.
Ingredients:
- 1 cup oat flour
- 1/2 tsp baking soda
- 1/4 tsp salt
- 4 tbsp coconut sugar (or brown sugar)
- 4 tbsp white sugar (or additional coconut sugar)
- 1/3 cup chocolate chips (or more if desired)
- 1/3 cup chopped nuts (optional)
- 1 tsp pure vanilla extract
- 2 tbsp vegetable or melted coconut oil
- 3-5 tbsp milk (of choice, as needed)
Making the Cookies
Mixing the Dry Ingredients
The first step is to get all your dry ingredients together. In a medium-sized bowl, measure out your oat flour, baking soda, and salt. It’s important to give these a good whisk. This helps to distribute the leavening agent (baking soda) and salt evenly throughout the flour, which is key for consistent cookie rise and flavor. If you don’t whisk them well, you might end up with pockets of saltiness or a cookie that doesn’t rise properly. Once they’re well combined, set this bowl aside.
Creaming the Wet Ingredients and Sugars
In a separate, larger bowl, you’ll combine the sugars, vanilla extract, and your chosen oil. If you’re using coconut oil and it’s solid, you’ll want to make sure it’s melted so it incorporates smoothly. Add the coconut sugar (or brown sugar) and white sugar (or more coconut sugar if you prefer). Stir these together vigorously with a whisk or an electric mixer on medium speed until the mixture is light and fluffy. This creaming process incorporates air, which helps create a tender cookie. Don’t rush this step; it takes a couple of minutes, but it makes a difference in the final texture. This is where you start building the foundation for your cookie’s structure and sweetness.
Combining Wet and Dry
Now it’s time to bring the two bowls together. Make a well in the center of your creamed sugar and oil mixture. Pour the dry ingredients from the other bowl into this well. Gently fold the dry ingredients into the wet ingredients using a spatula or wooden spoon. Mix just until barely combined. It’s important not to overmix at this stage, as overmixing can develop the gluten in the oat flour too much, leading to tough cookies. You should still see a few streaks of flour.
Adding Chocolate Chips and Nuts
If you’re using them, add your chocolate chips and chopped nuts to the dough. Fold them in gently until they are evenly distributed throughout the mixture. Again, be careful not to overmix. Just a few gentle turns are all you need to incorporate these tasty additions.
Chilling the Dough (Optional but Recommended)
For the best texture, I highly recommend chilling the cookie dough. Cover the bowl with plastic wrap and refrigerate for at least 30 minutes, or up to 2 days. Chilling allows the oat flour to hydrate fully, which results in a chewier cookie and helps prevent them from spreading too much during baking. If you’re short on time, you can skip this step, but the texture won’t be quite as good.
Baking the Cookies
Preheat your oven to 350°F (175°C). Line a baking sheet with parchment paper. Scoop rounded tablespoons of dough onto the prepared baking sheet, leaving about 2 inches between each cookie to allow for spreading. If you want your cookies to spread more, you can flatten them slightly with the bottom of a glass or your palm before baking. Bake for 10-12 minutes, or until the edges are lightly golden brown and the centers look set but still slightly soft. Keep in mind that oven temperatures can vary, so watch them closely towards the end of the baking time. Baking time will also depend on the size of your cookies.
Cooling the Cookies
Once baked, let the cookies cool on the baking sheet for about 5 minutes. This allows them to firm up before you move them. Then, carefully transfer the cookies to a wire rack to cool completely. Trying to move them too soon can cause them to break apart, especially while they are still warm and soft. Patience here is key for perfectly formed cookies.
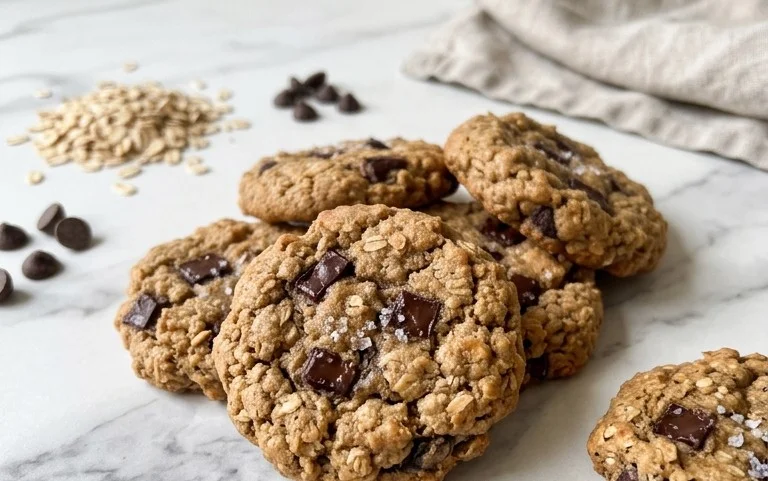
Healthy Chocolate Chip Cookies
These cookies are my go-to when I’m craving something sweet but want to keep things a little lighter. They use oat flour for a heartier texture and have less refined sugar than traditional recipes. The addition of nuts is completely optional, but I find they add a lovely crunch that balances the soft cookie and melty chocolate. They’re perfect with a cup of tea or coffee, or just for a guilt-free treat any time of day.
Ingredients:
- 1 cup oat flour
- 1/2 tsp baking soda
- 1/4 tsp salt
- 4 tbsp coconut sugar (or brown sugar)
- 4 tbsp white sugar (or additional coconut sugar)
- 1/3 cup chocolate chips (or more if desired)
- 1/3 cup chopped nuts (optional)
- 1 tsp pure vanilla extract
- 2 tbsp vegetable or melted coconut oil
- 3-5 tbsp milk (of choice, as needed)
Making the Cookies
Mixing the Dry Ingredients
The first step is to get all your dry ingredients together. In a medium-sized bowl, measure out your oat flour, baking soda, and salt. It’s important to give these a good whisk. This helps to distribute the leavening agent (baking soda) and salt evenly throughout the flour, which is key for consistent cookie rise and flavor. If you don’t whisk them well, you might end up with pockets of saltiness or a cookie that doesn’t rise properly. Once they’re well combined, set this bowl aside.
Creaming the Wet Ingredients and Sugars
In a separate, larger bowl, you’ll combine the sugars, vanilla extract, and your chosen oil. If you’re using coconut oil and it’s solid, you’ll need to melt it first. A quick zap in the microwave or a few minutes in a small saucepan over low heat works perfectly. For this recipe, I like to use a combination of coconut sugar and white sugar. Coconut sugar adds a lovely caramelly depth, while the white sugar contributes to the classic cookie texture and sweetness. Whisk these together until they are well combined and the mixture starts to look a little lighter in color. This process is sometimes called “creaming” and it helps to incorporate air, which will contribute to the cookie’s texture. Don’t worry if it’s not super fluffy like you would get with butter; the oil and sugar combination is what we’re aiming for here.
Combining Wet and Dry Ingredients
Now it’s time to bring the two bowls together. Pour the dry ingredients into the bowl with the sugar and oil mixture. Using a spatula or a wooden spoon, start mixing everything together. At this stage, you’ll add your milk. Start with 3 tablespoons of milk. The amount of milk you need can vary slightly depending on how absorbent your oat flour is and even the humidity in your kitchen. You want to mix until a cohesive dough forms. It should be thick but still moist enough to hold together. If it seems too dry and crumbly, add another tablespoon of milk, mixing after each addition, until you reach the right consistency. The dough shouldn’t be sticky, but it also shouldn’t be dry and crumbly.
Adding the Chocolate Chips and Nuts
Once you have your dough ready, it’s time for the best part: the mix-ins. Gently fold in your chocolate chips and the chopped nuts, if you’re using them. Be careful not to overmix here; you just want to distribute them evenly throughout the dough. Overmixing can develop the gluten in the oat flour too much, which can lead to tougher cookies. If you want extra chocolatey cookies, don’t hesitate to add a few more chips. For the nuts, I like to chop them fairly finely so they distribute well, but you can leave them chunkier if you prefer larger pieces.
Shaping and Baking
Preheat your oven to 350°F (175°C). Line a baking sheet with parchment paper. This prevents sticking and makes for easy cleanup. Use a spoon or a cookie scoop to drop rounded tablespoons of dough onto the prepared baking sheet. Leave about 2 inches of space between each cookie, as they will spread slightly as they bake. I like to flatten my cookies slightly with the bottom of a glass or my palm before baking. This helps them cook more evenly and achieve a chewier texture. Bake for 10-12 minutes, or until the edges are lightly golden brown and the centers still look a little soft. They will continue to set up as they cool. Resist the urge to overbake them; a slightly underbaked cookie is often the most delicious and chewy.
Cooling and Enjoying
Let the cookies cool on the baking sheet for about 5 minutes before transferring them to a wire rack to cool completely. This resting period is important for them to firm up. If you try to move them too soon, they might fall apart. Once they’re cooled, they’re ready to enjoy! These cookies store well in an airtight container at room temperature for up to 3-4 days. They’re also delicious slightly warm if you can resist waiting!
Conclusion:
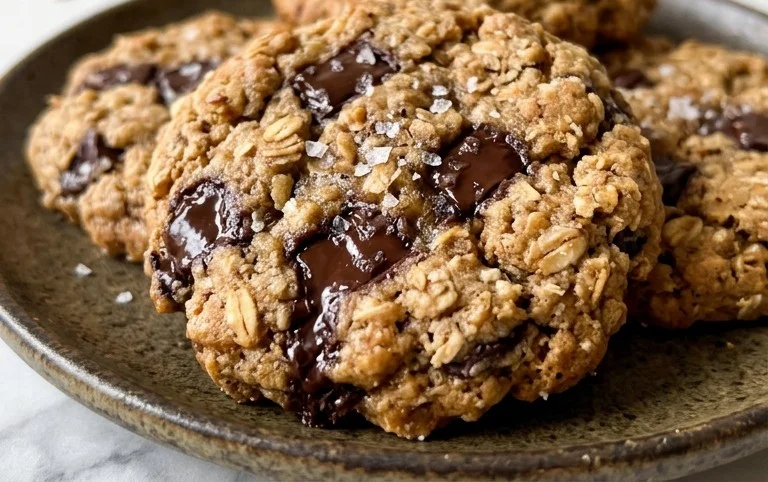
These Healthy Chocolate Chip Cookies are a fantastic way to satisfy your sweet cravings with a treat that feels good to eat. By using oat flour and reducing refined sugar, they offer a heartier, more wholesome alternative to traditional cookies without compromising on flavor or texture. The balance of chewy interior and slightly crisp edges, studded with melty chocolate chips, makes them utterly irresistible. They truly are a guilt-free pleasure you can enjoy any time of day.
Serving Suggestions and Variations:
Enjoy these cookies on their own for a quick snack, or pair them with a glass of milk, your favorite hot beverage, or even a scoop of ice cream for a delightful dessert. For variations, feel free to experiment with different types of chocolate chips like dark chocolate or white chocolate. You can also add a pinch of cinnamon to the dry ingredients for a warm spice note, or swap the nuts for seeds like pumpkin or sunflower seeds if you have allergies.
Frequently Asked Questions:
Can I make these cookies vegan?
Yes, you can easily make these vegan. Substitute the milk with a plant-based milk like almond, soy, or oat milk. Ensure your chocolate chips are dairy-free. The rest of the ingredients are typically vegan-friendly.
How should I store these cookies?
Store cooled cookies in an airtight container at room temperature for up to 3-4 days. You can also freeze the baked cookies for up to 3 months. If you want to freeze the dough, scoop balls onto a baking sheet, freeze until firm, then transfer to a freezer bag.
Why are my cookies spreading too much?
Cookies can spread too much if the dough is too warm, if there’s too much sugar or fat relative to flour, or if the baking temperature is too low. Ensuring your dough is chilled for at least 30 minutes before baking can significantly help prevent excessive spreading.
Healthy Chocolate Chip Cookies
Deliciously healthy chocolate chip cookies made with wholesome ingredients.
Ingredients
-
1 cup oat flour
-
1/2 tsp baking soda
-
1/4 tsp salt
-
4 tbsp coconut sugar
-
4 tbsp white sugar
-
1/3 cup chocolate chips
-
1/3 cup chopped nuts
-
1 tsp pure vanilla extract
-
2 tbsp vegetable oil
-
3 tbsp milk
Instructions
-
Step 1
Preheat oven to 350°F (175°C). -
Step 2
In a medium bowl, whisk together oat flour, baking soda, and salt. -
Step 3
In a separate large bowl, cream together coconut sugar, white sugar, and vegetable oil until well combined. -
Step 4
Stir in the vanilla extract. -
Step 5
Gradually add the dry ingredients to the wet ingredients, mixing until just combined. Add milk one tablespoon at a time until a dough forms. -
Step 6
Fold in the chocolate chips and chopped nuts (if using). -
Step 7
Drop rounded tablespoons of dough onto a baking sheet lined with parchment paper. -
Step 8
Bake for 10-12 minutes, or until the edges are golden brown and the centers are still slightly soft. -
Step 9
Let cool on the baking sheet for a few minutes before transferring to a wire rack to cool completely.
Important Information
Nutrition Facts (Per Serving)
It is important to consider this information as approximate and not to use it as definitive health advice.
Allergy Information
Please check ingredients for potential allergens and consult a health professional if in doubt.



Leave a Comment