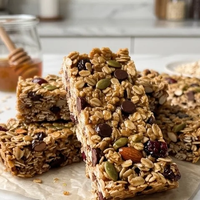
Baked oatmeal bars are a weeknight savior. They come together with minimal effort and can be made ahead, making them perfect for busy mornings or afternoon snacks. The mashed banana brings a natural sweetness and lovely moisture, while the oats provide a satisfying chew. They’re wonderfully adaptable too, so feel free to mix in your favorite additions. My go-to recipe uses simple ingredients you probably already have, like rolled oats and mashed banana for natural sweetness. This recipe is fantastic because it requires very little hands-on time. You just mix everything together and bake. The resulting baked oatmeal bars are chewy, satisfying, and great for grabbing on the go. They hold their shape well, making them ideal for packing in lunchboxes or enjoying with a cup of coffee. What makes these bars truly special is their versatility; they aren’t just a breakfast item but a snack that everyone in the family will love.
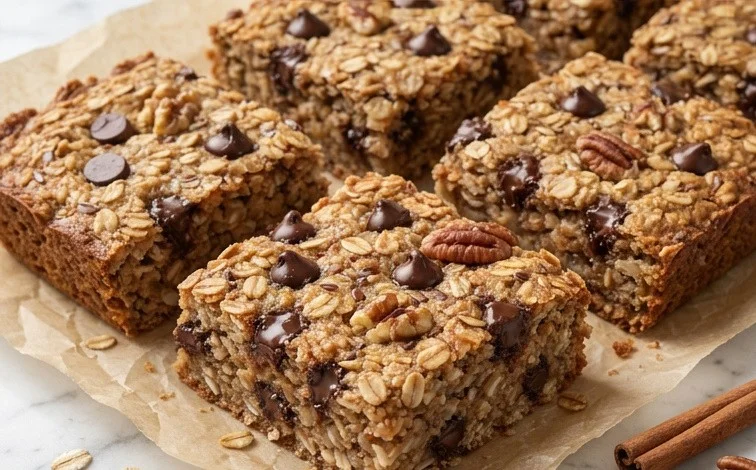
Baked Oatmeal Bars
These baked oatmeal bars are a weeknight savior. They come together with minimal effort and can be made ahead, making them perfect for busy mornings or afternoon snacks. The mashed banana brings a natural sweetness and lovely moisture, while the oats provide a satisfying chew. They’re wonderfully adaptable too, so feel free to mix in your favorite additions.
Ingredients:
- 2 cups rolled oats
- 1 1/3 cup mashed banana (about 2-3 medium bananas)
- 6 tbsp water
- 1/2 tsp salt
- 3 tbsp pure maple syrup, agave, or honey (or stevia equivalent for sugar-free)
- 3 tbsp oil (like vegetable, canola, or melted coconut oil), nut butter (peanut, almond, or cashew), or additional water for a lower-fat option
- 1 tsp pure vanilla extract
- Optional: handful of chocolate chips, chopped nuts, dried fruit, or seeds
Instructions:
Preparation and Mixing
- Preheat Oven and Prepare Pan: First things first, preheat your oven to 350 degrees Fahrenheit (175 degrees Celsius). This ensures your oven is at the right temperature when the bars are ready to bake, leading to even cooking. Next, line an 8×8 inch baking pan with parchment paper, leaving some overhang on the sides. This overhang will act as handles, making it super easy to lift the baked bars out of the pan once they’re done. You can also lightly grease the pan if you don’t have parchment paper, but parchment is highly recommended for effortless removal.
- Combine Wet Ingredients: In a large mixing bowl, add the mashed banana. Make sure your bananas are ripe and mashed well – this is where a lot of the sweetness and moisture comes from. To the mashed banana, add the 6 tablespoons of water, the 3 tablespoons of your chosen sweetener (maple syrup, agave, honey, or stevia), the 3 tablespoons of oil or nut butter (or water if you’re opting for that), and the 1 teaspoon of vanilla extract. Whisk these ingredients together thoroughly until everything is well combined and you have a relatively smooth mixture. If you’re using nut butter, it might take a little extra whisking to break it down completely into the liquid.
- Incorporate Dry Ingredients: Now, add the 2 cups of rolled oats and the 1/2 teaspoon of salt to the wet ingredients. Stir everything together until the oats are fully coated and there are no dry pockets of oats visible. The salt helps to enhance the other flavors in the bars and balances the sweetness. If you’re adding any optional mix-ins like chocolate chips, chopped nuts, dried cranberries, or sunflower seeds, now is the time to gently fold them into the mixture. Don’t overmix at this stage; just stir until they’re evenly distributed throughout the batter.
Baking the Bars
- Press into Pan: Pour the oatmeal mixture into your prepared baking pan. Use a spatula or the back of a spoon to spread it out evenly. Then, press the mixture down firmly and evenly into the pan. This step is important for ensuring the bars hold their shape and have a good, compact texture. You want a relatively flat, even surface so that they bake uniformly. A good press will prevent crumbly bars.
- Bake Until Golden: Place the pan in the preheated oven and bake for 25-30 minutes. You’re looking for the edges to be set and lightly golden brown. The center should appear set as well, not jiggly or wet. If you gently press the center, it should feel firm. Keep an eye on them during the last few minutes of baking, as oven temperatures can vary. If you find they’re browning too quickly on top but aren’t cooked through, you can loosely tent the pan with aluminum foil.
Cooling and Serving
- Cool Completely: Once baked, remove the pan from the oven and let it cool on a wire rack. It’s crucial to let them cool completely in the pan before attempting to cut them. This allows them to set up properly. Trying to cut them while they are still warm will likely result in them falling apart. This cooling process can take at least an hour, maybe longer, depending on your kitchen temperature. Be patient here; it’s worth it for perfectly formed bars.
- Cut and Store: Once completely cooled, use the parchment paper overhang to lift the entire block of baked oatmeal out of the pan. Place it on a cutting board and use a sharp knife to cut it into your desired bar sizes. You can make them thicker or thinner depending on your preference. Store the bars in an airtight container in the refrigerator for up to 4-5 days. They also freeze well; wrap individual bars or stacks in plastic wrap and then place them in a freezer-safe bag for up to 3 months. They’re delicious served cold or gently warmed up.
Conclusion:
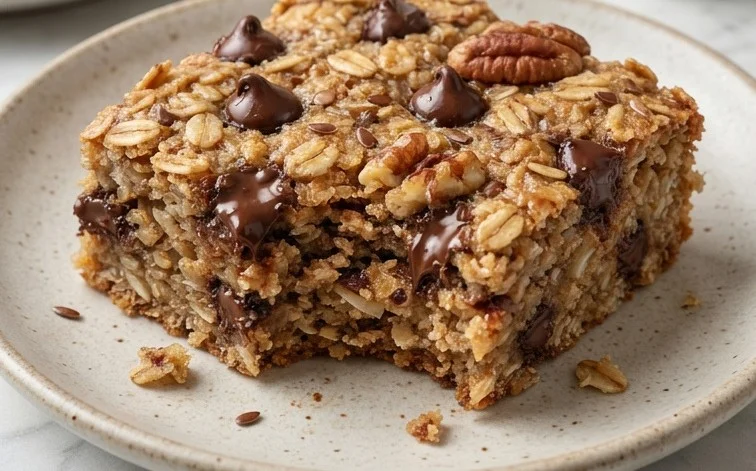
These baked oatmeal bars are a fantastic addition to any meal plan, especially when you need something quick, wholesome, and delicious. They are incredibly satisfying and come together with minimal fuss, making them a true weeknight hero. The natural sweetness from the banana means you can keep the added sweeteners to a minimum, or even omit them if you prefer. Enjoy these bars warm for a comforting breakfast or allow them to cool for a portable snack. Feel free to experiment with add-ins like fresh berries, a sprinkle of cinnamon, or a few dark chocolate chips for an extra treat. These baked oatmeal bars are sure to become a staple in your kitchen.
Frequently Asked Questions:
What can I use instead of bananas?
If you’re not a fan of bananas or need a substitute, unsweetened applesauce or pumpkin puree can work. You’ll likely need to adjust the liquid content slightly, perhaps adding a tablespoon or two more water or oil. The texture might be a little softer, so keep an eye on the baking time.
How should I store the baked oatmeal bars?
Store the cooled baked oatmeal bars in an airtight container at room temperature for up to 2 days. For longer storage, keep them in the refrigerator for up to a week, or freeze them for up to 3 months. Reheat gently in a toaster oven or microwave if you prefer them warm.
Can I make these gluten-free?
Yes, you can make these baked oatmeal bars gluten-free by using certified gluten-free rolled oats. Ensure all other ingredients, like any extracts or sweeteners, are also certified gluten-free if needed for strict dietary requirements.
Baked Oatmeal Bars
Chewy and satisfying baked oatmeal bars, perfect for breakfast or snacks. Easily customizable with your favorite add-ins.
Ingredients
-
2 cups rolled oats
-
1 1/3 cup mashed banana
-
6 tbsp water
-
1/2 tsp salt
-
3 tbsp pure maple syrup
-
3 tbsp oil
-
1 tsp pure vanilla extract
Instructions
-
Step 1
Preheat oven to 350°F (175°C) and grease an 8×8 inch baking pan or line with parchment paper. -
Step 2
In a large bowl, combine the rolled oats, mashed banana, water, salt, maple syrup, oil, and vanilla extract. Mix well until all ingredients are incorporated. -
Step 3
If using, stir in optional ingredients like chocolate chips or chopped nuts. -
Step 4
Press the mixture evenly into the prepared baking pan. -
Step 5
Bake for 25-30 minutes, or until golden brown and set. Allow to cool completely in the pan before cutting into bars.
Important Information
Nutrition Facts (Per Serving)
It is important to consider this information as approximate and not to use it as definitive health advice.
Allergy Information
Please check ingredients for potential allergens and consult a health professional if in doubt.

Leave a Comment