
Danish Butter Cookies are a classic for a reason. They have a delicate, crumbly texture that practically dissolves on your tongue, leaving behind the rich, pure flavor of butter. They’re not overly sweet, which makes them perfect for enjoying with a cup of coffee or tea, or simply as a satisfying treat any time of day. Making them at home is surprisingly straightforward, and the results are far superior to anything you’ll find in a tin. The secret lies in using good quality butter and paying attention to the dough’s consistency. This recipe ensures that your homemade Danish Butter Cookies live up to their name, offering that signature melt-in-your-mouth quality that brings a taste of European tradition right to your kitchen. You’ll love the aroma that fills your home as they bake, a comforting scent that promises pure butter goodness.
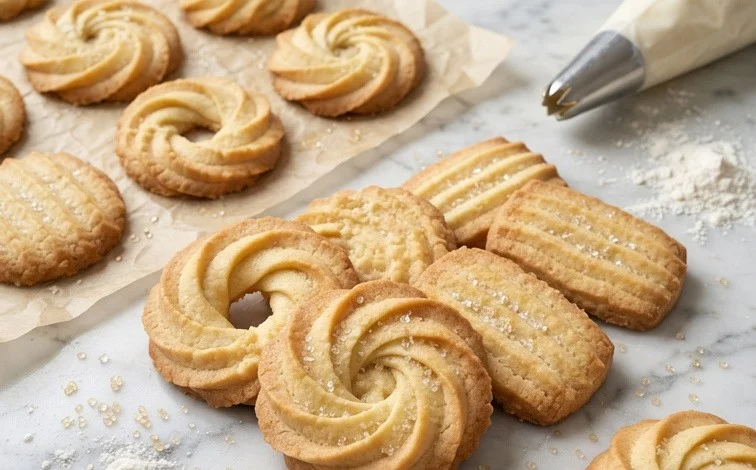
Danish Butter Cookies (Melt in your mouth)
These Danish Butter Cookies are a classic for a reason. They have a delicate, crumbly texture that practically dissolves on your tongue, leaving behind the rich, pure flavor of butter. They’re not overly sweet, which makes them perfect for enjoying with a cup of coffee or tea, or simply as a satisfying treat any time of day. Making them at home is surprisingly straightforward, and the results are far superior to anything you’ll find in a tin. The secret lies in using good quality butter and paying attention to the dough’s consistency.
Ingredients:
- 1 cup (227 g) European salted butter (room temperature)
- 1/2 cup (100 g) granulated sugar
- 1/8 teaspoon salt
- 2 egg yolks
- 2 teaspoons (10 g) vanilla extract
- 1 tablespoon (15 g) whole milk (or more to soften)
- 2 cups (220 g) all-purpose flour
- 1/2 cup (50 g) cake flour
- coarse sugar (for decorating)
Instructions:
- Cream the Butter and Sugar: In a large mixing bowl, or the bowl of your stand mixer fitted with the paddle attachment, cream together the softened European salted butter and granulated sugar. You want to beat these together until the mixture is light and fluffy, and pale yellow in color. This process can take about 3-5 minutes of continuous beating. Don’t rush this step, as it incorporates air into the dough, which contributes to the cookie’s tender texture. Scrape down the sides of the bowl occasionally to ensure everything is evenly mixed. Add the 1/8 teaspoon of salt and mix just until combined.
- Incorporate Wet Ingredients: Add the two egg yolks to the creamed butter and sugar mixture. Beat until well combined. Next, stir in the vanilla extract. The dough will look a little curdled at this point, which is perfectly normal. Now, add the 1 tablespoon of whole milk. Mix until just incorporated. If your dough seems very stiff and difficult to mix, you can add another teaspoon or two of milk, but be careful not to make it too wet. The goal is a cohesive, yet still firm, dough.
- Add the Flours: In a separate medium bowl, whisk together the all-purpose flour and the cake flour. This combination of flours helps create that characteristic tender crumb. Gradually add the flour mixture to the wet ingredients. Mix on low speed, or stir with a sturdy spatula, until just combined. Be careful not to overmix the dough once the flour is added. Overmixing can develop the gluten too much, resulting in tougher cookies. Stop mixing as soon as you no longer see streaks of dry flour. The dough will be quite soft and possibly sticky at this stage.
- Shape and Decorate the Cookies: At this point, the dough is ready to be shaped. You have a couple of options here. For a classic piped look, transfer the dough to a piping bag fitted with a large star tip (like a Wilton 1M or similar). Pipe your cookies onto baking sheets lined with parchment paper. You can pipe them in swirls, rounds, or any shape you prefer. Leave about 2 inches between each cookie as they will spread slightly. Alternatively, if you don’t have a piping bag or prefer a simpler shape, you can roll the dough into small balls and then flatten them slightly with your hand or the bottom of a glass. For a traditional touch and a delightful crunch, sprinkle the tops of your shaped cookies with coarse sugar. This is purely for decoration and a slight textural contrast.
- Bake and Cool: Preheat your oven to 350°F (175°C). Bake the cookies for 10-15 minutes, or until the edges are lightly golden brown. The baking time will vary depending on the size and thickness of your cookies, so keep a close eye on them. You want them to be set and just starting to color, not deeply browned. Once baked, let the cookies cool on the baking sheet for 5 minutes before carefully transferring them to a wire rack to cool completely. This initial cooling on the baking sheet helps them firm up enough to move without breaking.
Storage and Serving Suggestions:
Once completely cooled, these Danish Butter Cookies can be stored in an airtight container at room temperature for up to a week. They are wonderful enjoyed on their own, but they also pair beautifully with hot beverages like coffee or tea. For a more festive presentation, you can arrange them on a platter. If you’re feeling creative, a light drizzle of melted chocolate over half of the cookie can be a delightful addition. Their delicate nature means they are best handled gently.
Conclusion:
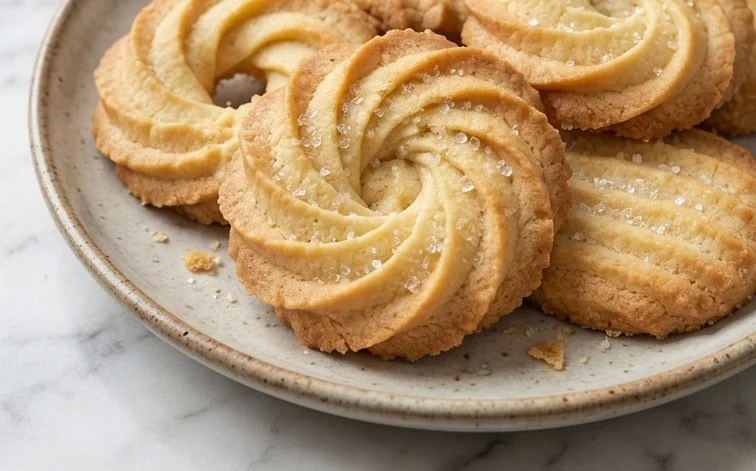
These Danish Butter Cookies truly live up to their ‘melt in your mouth’ promise, offering a delightful crumbly texture and rich butter flavor that’s hard to beat. They are perfect with your morning coffee or afternoon tea, but honestly, they’re wonderful any time you need a little sweet pick-me-up. Making them yourself is rewarding, and you’ll appreciate the superior taste and quality compared to store-bought versions. The simple ingredients and straightforward process make this a recipe worth trying, even for beginner bakers. Don’t be afraid to experiment with slight variations or simply enjoy them as they are. They are a testament to how a few quality ingredients can create something truly special.
Frequently Asked Questions:
Q: Can I use unsalted butter instead of salted?
Yes, you can. If you use unsalted butter, you’ll want to increase the salt slightly. For this recipe, I’d recommend adding about 1/4 teaspoon of salt when using unsalted butter, or even 1/3 teaspoon if you like a slightly more pronounced salty note to balance the sweetness.
Q: How should I store these cookies?
Once completely cooled, store your Danish Butter Cookies in an airtight container at room temperature. They should stay fresh and maintain their delightful texture for at least a week, possibly longer. It’s best to keep them away from humidity to prevent them from becoming soft. Stacking them with parchment paper in between can prevent sticking.
Q: Can I add other flavors to the dough?
Absolutely! While the classic vanilla is wonderful, you can certainly add other extracts or spices. A little almond extract, lemon zest, or even a pinch of cardamom can offer a lovely twist. Just be careful not to add too much liquid when adding zest, or adjust the flour slightly if needed.
Danish Butter Cookies (Melt in your mouth)
Classic melt-in-your-mouth Danish butter cookies, perfect for any occasion. These are incredibly tender and buttery.
Ingredients
-
1 cup (227 g) European salted butter, room temperature
-
1/2 cup (100 g) granulated sugar
-
1/8 teaspoon salt
-
2 egg yolks
-
2 teaspoons (10 g) vanilla extract
-
1 tablespoon (15 g) whole milk (or more to soften)
-
2 cups (220 g) all-purpose flour
-
1/2 cup (50 g) cake flour
-
Coarse sugar, for decorating
Instructions
-
Step 1
In a large bowl, cream together the softened butter, granulated sugar, and salt until light and fluffy. -
Step 2
Beat in the egg yolks one at a time, then stir in the vanilla extract. -
Step 3
In a separate bowl, whisk together the all-purpose flour and cake flour. -
Step 4
Gradually add the dry ingredients to the wet ingredients, mixing on low speed until just combined. If the dough is too stiff, add milk, one teaspoon at a time, until it reaches a soft, pipeable consistency. -
Step 5
Transfer the dough to a piping bag fitted with a star tip and pipe desired shapes onto baking sheets lined with parchment paper. -
Step 6
Sprinkle the cookies with coarse sugar. -
Step 7
Bake in a preheated oven at 350°F (175°C) for 10-12 minutes, or until the edges are lightly golden.
Important Information
Nutrition Facts (Per Serving)
It is important to consider this information as approximate and not to use it as definitive health advice.
Allergy Information
Please check ingredients for potential allergens and consult a health professional if in doubt.



Leave a Comment