
Danish Butter Cookies, often found in charming tins, truly live up to their name. They have a delicate crispness that gives way to an almost ethereal melt-in-your-mouth texture. The secret is in the quality of the butter and the simple, yet precise, ratios of ingredients. Making them at home is surprisingly straightforward and incredibly rewarding, especially when you’re greeted by that unmistakable buttery aroma filling your kitchen. This recipe focuses on creating that classic, delightful experience, perfect for enjoying with a cup of coffee or tea, or as a sweet treat any time of day.
Ingredients:
- 1 cup (227 g) European salted butter (room temperature)
- 1/2 cup (100 g) granulated sugar
- 1/8 teaspoon salt
- 2 egg yolks
- 2 teaspoons (10 g) vanilla extract
- 1 tablespoon (15 g) whole milk (or more to soften)
- 2 cups (220 g) all-purpose flour
- 1/2 cup (50 g) cake flour
- Coarse sugar (for decorating)
Preparing the Dough
The foundation of these cookies is the butter. Using European salted butter is recommended because it generally has a higher fat content and a richer flavor, which is essential for that signature Danish cookie taste. Ensure your butter is truly at room temperature – this means it should be soft and yielding when you press it, but not melted or greasy. This will allow it to cream properly with the sugar, creating a light and airy base for your cookies. Start by creaming the softened butter and granulated sugar together in a large bowl with an electric mixer on medium speed until pale and fluffy, about 3-5 minutes. This step incorporates air, which is vital for the cookies’ texture. Scrape down the sides of the bowl as needed to ensure everything is evenly mixed.
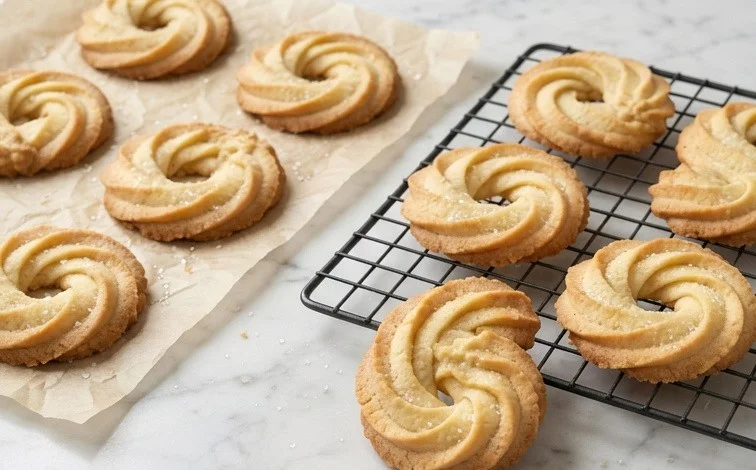
Danish Butter Cookies (Melt in your mouth)
These Danish Butter Cookies, often found in charming tins, truly live up to their name. They have a delicate crispness that gives way to an almost ethereal melt-in-your-mouth texture. The secret is in the quality of the butter and the simple, yet precise, ratios of ingredients. Making them at home is surprisingly straightforward and incredibly rewarding, especially when you’re greeted by that unmistakable buttery aroma filling your kitchen. This recipe focuses on creating that classic, delightful experience, perfect for enjoying with a cup of coffee or tea, or as a sweet treat any time of day.
Ingredients:
- 1 cup (227 g) European salted butter (room temperature)
- 1/2 cup (100 g) granulated sugar
- 1/8 teaspoon salt
- 2 egg yolks
- 2 teaspoons (10 g) vanilla extract
- 1 tablespoon (15 g) whole milk (or more to soften)
- 2 cups (220 g) all-purpose flour
- 1/2 cup (50 g) cake flour
- Coarse sugar (for decorating)
Preparing the Dough
The foundation of these cookies is the butter. Using European salted butter is recommended because it generally has a higher fat content and a richer flavor, which is essential for that signature Danish cookie taste. Ensure your butter is truly at room temperature – this means it should be soft and yielding when you press it, but not melted or greasy. This will allow it to cream properly with the sugar, creating a light and airy base for your cookies.
Start by creaming the softened butter and granulated sugar together in a large bowl. You can use an electric mixer (stand or hand) for this, or a sturdy whisk and some elbow grease. Beat them on medium speed until the mixture is pale yellow and fluffy, which usually takes about 3-5 minutes. This process incorporates air into the butter and sugar, which contributes to the cookie’s tender texture.
Next, add the 1/8 teaspoon of salt. Don’t be tempted to skip the salt, even though you’re using salted butter. The salt balances the sweetness and enhances the overall flavor profile of the cookie, making it more complex and delicious.
Now, it’s time to add the egg yolks and vanilla extract. Egg yolks contribute richness and tenderness to the cookies. Beat them into the butter and sugar mixture until they are fully incorporated and the mixture is smooth. Then, add the vanilla extract. The quality of your vanilla extract can make a difference, so use one you enjoy the aroma of.
Finally, we’ll add the milk. Start with just 1 tablespoon. The milk is primarily to help achieve the right consistency. If your dough feels very stiff after adding the flours, you might need to add a tiny bit more milk, maybe another half teaspoon, to make it pliable enough to pipe or shape. Add the milk and mix until just combined.
Incorporating the Flour
This is where the structure of the cookie comes together. In a separate medium bowl, whisk together the all-purpose flour and cake flour. Cake flour has a lower protein content than all-purpose flour, which results in a more tender crumb. Combining the two gives you the best of both worlds: structure from the all-purpose flour and tenderness from the cake flour.
Gradually add the flour mixture to the wet ingredients, mixing on low speed or by hand until just combined. Be careful not to overmix at this stage. Overmixing can develop the gluten in the flour, leading to tougher cookies. You want to mix just until you no longer see streaks of dry flour. The dough will be quite soft and may seem slightly sticky, but it should hold together.
Shaping and Baking the Cookies
Now comes the fun part: shaping your cookies. There are a few ways to do this, depending on your preference and equipment. The traditional method often involves a piping bag fitted with a star tip. Fill the piping bag with the dough and pipe small swirls or rosettes onto parchment-lined baking sheets. Leave about 1-2 inches of space between each cookie as they will spread slightly.
Alternatively, if you don’t have a piping bag, you can gently roll small portions of the dough into logs and then shape them into crescent moons, or even roll them into small balls and flatten them slightly with the bottom of a glass. You can also chill the dough for about 30 minutes, then roll it out and cut shapes with cookie cutters.
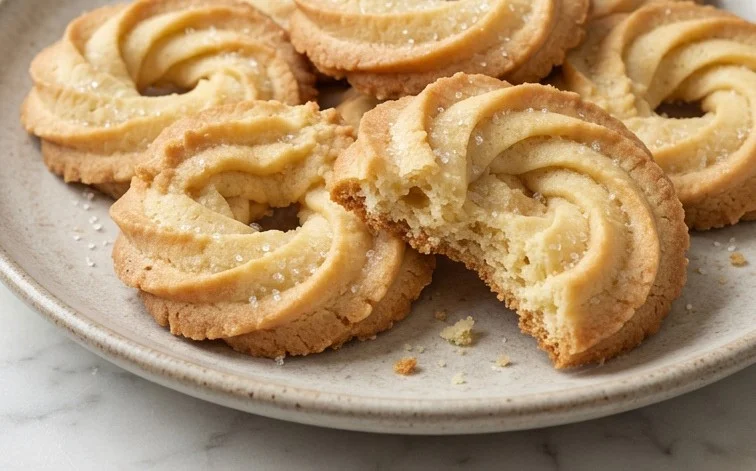
Once your cookies are shaped, sprinkle them generously with coarse sugar. This coarse sugar adds a lovely sparkle and a satisfying crunch to the finished cookies.
Preheat your oven to 350°F (175°C). Bake the cookies for 10-14 minutes, or until the edges are lightly golden brown. The centers should still be pale. Keep a close eye on them as they can go from perfectly baked to overdone very quickly due to their delicate nature.
Cooling and Storing
Let the cookies cool on the baking sheets for about 5 minutes. This allows them to firm up a little before you attempt to move them. Then, carefully transfer them to a wire rack to cool completely. They will become crisper as they cool.
Once completely cool, store the Danish Butter Cookies in an airtight container at room temperature. They are best enjoyed within a week to maintain their delicate texture, though they are so delicious, they rarely last that long! These cookies are a wonderful example of how simple, high-quality ingredients can create something truly special.
Conclusion:
Making Danish Butter Cookies at home brings a touch of old-world charm right into your kitchen. The satisfaction of biting into one of these delicate, buttery treats, knowing you made them yourself, is truly special. Their crisp exterior yielding to a tender, melt-in-your-mouth center is something everyone should experience. They are wonderful on their own, but also pair beautifully with a hot cup of coffee, tea, or even a glass of cold milk. For a slight variation, consider adding a pinch of cardamom to the dry ingredients for a subtle, warm spice note, or dipping half of a cooled cookie in good quality melted chocolate.
FAQs
What kind of butter is best for Danish Butter Cookies?
European salted butter is highly recommended. It typically has a higher fat content (around 82-84%) compared to American butter, which contributes to a richer flavor and a more tender cookie crumb. The salt in the butter also enhances the overall taste.
Can I use unsalted butter?
Yes, you can use unsalted butter. If you do, you’ll want to add a bit more salt to the dough, about 1/4 teaspoon, to balance the sweetness and bring out the butter flavor.
How should I store these cookies?
Store completely cooled cookies in an airtight container at room temperature. They will stay fresh and retain their melt-in-your-mouth texture for up to a week. Avoid storing them with very moist items, as this can soften their crispness.
Danish Butter Cookies (Melt in your mouth)
Delicate and buttery cookies that are incredibly easy to make and melt in your mouth. Perfect for any occasion.
Ingredients
-
1 cup (227 g) European salted butter, room temperature
-
1/2 cup (100 g) granulated sugar
-
1/8 teaspoon salt
-
2 egg yolks
-
2 teaspoons (10 g) vanilla extract
-
1 tablespoon (15 g) whole milk
-
2 cups (220 g) all-purpose flour
-
1/2 cup (50 g) cake flour
-
coarse sugar (for decorating)
Instructions
-
Step 1
In a large bowl, cream together the softened butter, granulated sugar, and salt until light and fluffy. -
Step 2
Beat in the egg yolks and vanilla extract until well combined. -
Step 3
Gradually add the all-purpose flour and cake flour, mixing on low speed until just combined. The dough will be stiff. If it’s too stiff to pipe, add another teaspoon of milk at a time until it’s pipeable. -
Step 4
Transfer the dough to a piping bag fitted with a star tip. Pipe desired shapes onto parchment-lined baking sheets, leaving about 1 inch between cookies. -
Step 5
Sprinkle the tops of the cookies with coarse sugar for decoration. -
Step 6
Bake in a preheated oven at 350°F (175°C) for 10-12 minutes, or until the edges are lightly golden brown. Do not overbake. -
Step 7
Let the cookies cool on the baking sheets for a few minutes before transferring them to a wire rack to cool completely.
Important Information
Nutrition Facts (Per Serving)
It is important to consider this information as approximate and not to use it as definitive health advice.
Allergy Information
Please check ingredients for potential allergens and consult a health professional if in doubt.



Leave a Comment