
The aroma of cinnamon, ginger, and cloves filling the kitchen is a sure sign that fall has arrived, and for me, that means pumpkin pie. This pumpkin pie recipe makes a classic dessert with a tender, flaky crust and a creamy, smooth filling that’s just right – not too sweet, not too spiced. It’s the kind of pie that tastes like a warm hug and is perfect for Thanksgiving, Halloween, or any crisp autumn evening. While store-bought crusts are convenient, there’s something deeply satisfying about making your own from scratch. The process is straightforward, and the difference in flavor and texture is truly noticeable. This recipe breaks down making the pie crust and the filling into simple steps, ensuring a beautiful result every time. You’ll love how the ingredients come together to create a pie that’s both comforting and impressive.
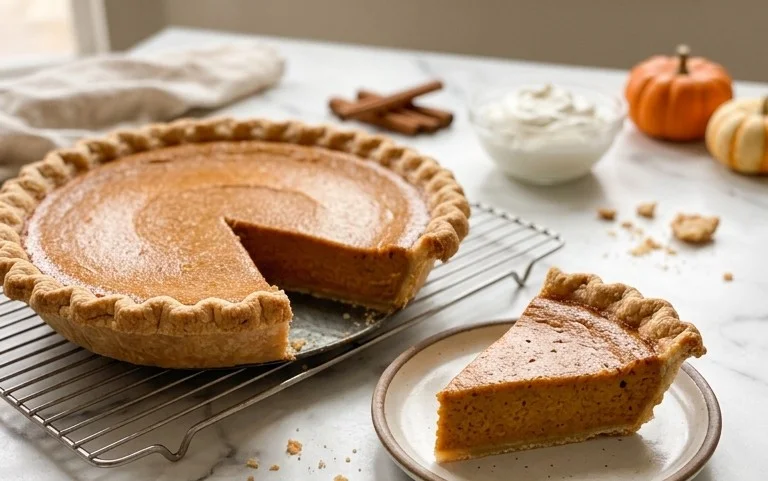
Ingredients:
- 1 ¼ cups all-purpose flour
- 2 teaspoons granulated sugar
- ¼ teaspoon salt
- 8 tablespoons (1 stick) cold, unsalted butter (cut into cubes)
- 4 tablespoons ice-cold water
- 15 ounce can pure pumpkin puree (1 ¾ cups)
- 3 large eggs
- ¾ cup packed light brown sugar
- ¾ cup heavy cream
- ½ cup whole milk
- 1 tablespoon cornstarch
- 1 ½ teaspoons ground cinnamon
- ½ teaspoon ground ginger
- ¼ teaspoon ground cloves
- ¼ teaspoon allspice
Pumpkin Pie Recipe
This recipe makes a classic pumpkin pie with a flaky crust and a creamy, warmly spiced filling. Making it from scratch is incredibly rewarding, and the aroma that fills your kitchen while it bakes is simply wonderful. It’s the kind of pie that feels like home, perfect for any fall gathering or just a cozy afternoon treat. We’ll start by making a simple, reliable pie crust that bakes up beautifully, then move on to the smooth, flavorful pumpkin filling.
Making the Pie Crust
The key to a tender and flaky pie crust is using cold ingredients and not overworking the dough. I like to use butter for its rich flavor, but you can substitute shortening if you prefer.
Step 1: Combine Dry Ingredients and Cut in Butter
In a medium bowl, whisk together the 1 ¼ cups of all-purpose flour, 2 teaspoons of granulated sugar, and ¼ teaspoon of salt. Add the 8 tablespoons of cold, unsalted butter that has been cut into small cubes. Using a pastry blender, a fork, or your fingertips, work the butter into the flour mixture until it resembles coarse crumbs with some pea-sized pieces of butter still visible. These little pockets of butter are what create the flakiness in the crust as they melt during baking.
Step 2: Add Ice Water and Form Dough
Gradually add the 4 tablespoons of ice-cold water, one tablespoon at a time, mixing gently with a fork after each addition, just until the dough starts to come together. You might not need all of the water, or you might need a tiny bit more depending on your flour and the humidity. The dough should hold together when squeezed, but not be sticky. Be careful not to overmix, as this can develop the gluten too much and make your crust tough.
Step 3: Chill and Roll the Dough
Gather the dough into a ball, flatten it slightly into a disc, wrap it tightly in plastic wrap, and refrigerate for at least 30 minutes. This chilling time is essential; it allows the gluten to relax and the butter to firm up again, making the dough easier to roll and preventing it from shrinking too much in the oven. Once chilled, place the dough on a lightly floured surface and roll it out into a 12-inch circle, about ⅛ inch thick. Carefully transfer the rolled dough to a 9-inch pie plate. Trim and crimp the edges decoratively. If you have time, chill the crust in the pie plate for another 15-20 minutes before filling. This helps prevent the edges from slumping during baking.
Preparing the Pumpkin Filling
This filling is simple, rich, and bursting with classic pumpkin pie spices. Using pure pumpkin puree is important here; canned pumpkin pie filling usually contains added sugar and spices, which will alter the flavor and sweetness of your pie.
Step 4: Mix the Pumpkin Filling Ingredients
In a large bowl, combine the 15 ounce can of pure pumpkin puree (which is about 1 ¾ cups), the 3 large eggs, ¾ cup of packed light brown sugar, ¾ cup of heavy cream, and ½ cup of whole milk. Whisk everything together until it is smooth and well combined. In a small separate bowl, whisk together the 1 tablespoon of cornstarch with the 1 ½ teaspoons of ground cinnamon, ½ teaspoon of ground ginger, ¼ teaspoon of ground cloves, and ¼ teaspoon of allspice. Adding the cornstarch and spices to a small amount of liquid (or just whisking them together) helps prevent clumps in the filling. Add this spice and cornstarch mixture to the pumpkin mixture and whisk until thoroughly incorporated and smooth. The cornstarch acts as a binder, helping the filling set up nicely.
Baking the Pumpkin Pie
Baking a pumpkin pie requires a bit of attention to ensure the filling is set and the crust is golden.
Step 5: Bake the Pie
Preheat your oven to 425°F (220°C). Pour the prepared pumpkin filling into the chilled pie crust. Place the pie on a baking sheet (this catches any potential drips and makes it easier to handle). Bake for 15 minutes at 425°F (220°C). Then, reduce the oven temperature to 350°F (175°C) and continue baking for another 35-45 minutes, or until the edges of the filling are set and slightly puffed, and the center is mostly set but still has a slight jiggle. You can test for doneness by inserting a knife near the center; it should come out mostly clean. If the crust edges start to brown too quickly, you can loosely cover them with aluminum foil.
Step 6: Cool and Serve
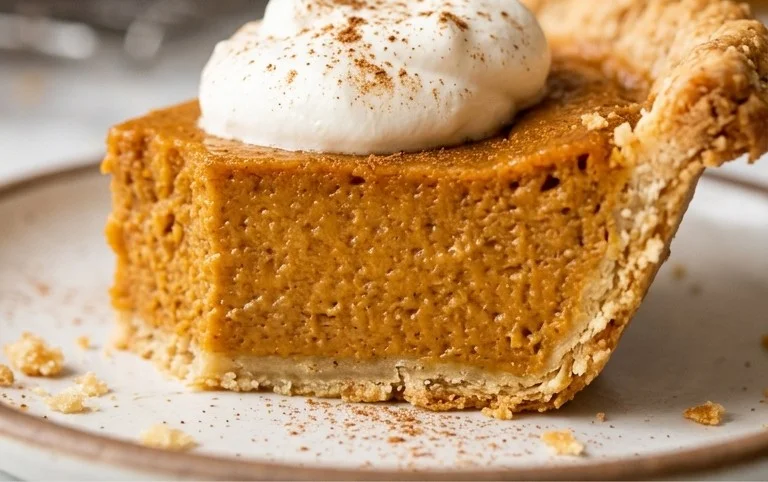
Once baked, carefully remove the pie from the oven and place it on a wire rack to cool completely. This cooling process is crucial for the filling to set properly. It can take several hours. For the best flavor and texture, I like to let it cool for at least 2-3 hours. Once cooled, you can slice and serve. It’s wonderful on its own, but even better with a dollop of freshly whipped cream or a scoop of vanilla ice cream. Leftover pie can be covered and stored in the refrigerator for up to 3 days.
Conclusion:
Making this pumpkin pie recipe from scratch is a rewarding way to bring a classic dessert to your table. The combination of the buttery, flaky crust and the smooth, warmly spiced pumpkin filling is a comfort that never gets old. It’s a dessert that truly embodies the flavors of fall. Serve it warm with a dollop of whipped cream or a scoop of vanilla ice cream for an extra special touch. For variations, consider adding a splash of vanilla extract to the filling for a grown-up twist, or experiment with a pecan streusel topping for added crunch. If you’re feeling adventurous, try different pie spices like cardamom or a pinch of black pepper for a subtle kick. Don’t be intimidated by making your own crust; the steps are clear and the results are worth it. This pumpkin pie is guaranteed to become a favorite, perfect for holidays and cozy gatherings alike.
Frequently Asked Questions
Why is my pumpkin pie filling cracking?
Pie filling often cracks if it’s overbaked or if the oven temperature is too high. Try baking at a slightly lower temperature, like 325°F (160°C), and watch for the edges to set while the center is still slightly jiggly. A sudden change in temperature when removing from the oven can also cause cracks.
Can I make the pie crust ahead of time?
Yes, you can definitely make the pie dough ahead of time. After making the dough and forming it into a disc, wrap it tightly in plastic wrap and refrigerate for up to 2 days. You can also freeze the dough disc for up to a month; just thaw it in the refrigerator overnight before rolling.
What’s the best way to store leftover pumpkin pie?
Leftover pumpkin pie should be covered and refrigerated. It will keep well in the refrigerator for about 3 to 4 days. Reheat slices gently in a low oven or microwave if you prefer it warm.
Classic Pumpkin Pie
A timeless and delicious pumpkin pie recipe perfect for any occasion.
Ingredients
-
1 ¼ cups all-purpose flour
-
2 teaspoons granulated sugar
-
¼ teaspoon salt
-
8 tablespoons (1 stick) cold, unsalted butter (cut into cubes)
-
4 tablespoons ice-cold water
-
15 ounce can pure pumpkin puree
-
3 large eggs
-
¾ cup packed light brown sugar
-
¾ cup heavy cream
-
½ cup whole milk
-
1 tablespoon cornstarch
-
1 ½ teaspoons ground cinnamon
-
½ teaspoon ground ginger
-
¼ teaspoon ground cloves
-
¼ teaspoon allspice
Instructions
-
Step 1
For the crust: In a bowl, whisk together flour, sugar, and salt. Cut in cold butter with a pastry blender or your fingers until the mixture resembles coarse crumbs. Gradually add ice water, one tablespoon at a time, mixing until the dough just comes together. -
Step 2
Shape the dough into a disc, wrap in plastic, and refrigerate for at least 30 minutes. On a lightly floured surface, roll out the dough to fit a 9-inch pie plate. Crimp the edges and refrigerate again. -
Step 3
For the filling: In a large bowl, whisk together pumpkin puree, eggs, brown sugar, heavy cream, and milk until smooth. -
Step 4
In a small bowl, whisk together cornstarch, cinnamon, ginger, cloves, and allspice. Add this spice mixture to the pumpkin filling and whisk until well combined. -
Step 5
Pour the filling into the chilled pie crust. Bake in a preheated oven at 425°F (220°C) for 15 minutes. Reduce the oven temperature to 350°F (175°C) and continue baking for 40-50 minutes more, or until a knife inserted near the center comes out clean. -
Step 6
Let the pie cool completely on a wire rack before serving. Serve chilled or at room temperature.
Important Information
Nutrition Facts (Per Serving)
It is important to consider this information as approximate and not to use it as definitive health advice.
Allergy Information
Please check ingredients for potential allergens and consult a health professional if in doubt.



Leave a Comment