
Classic Peanut Butter Blossoms are a holiday staple in my home, and they’re so simple to make that they’re perfect for baking with kids or for a quick, delicious treat any time of year. The combination of chewy peanut butter cookie with the melt-in-your-mouth chocolate kiss is just classic. The secret to their signature look and taste is pressing the Hershey’s Kiss into the warm cookie right after it comes out of the oven, allowing it to soften beautifully. Ingredients: 1 3/4 cup All-Purpose Flour 1 tsp Baking Soda 1/2 tsp Salt 1/2 cup Creamy Peanut Butter 1/2 cup Unsalted Butter (room temperature) 1/2 cup Granulated Sugar 1/2 cup Light Brown Sugar (lightly packed) 1 Large Egg 2 tbsp Milk 1 tsp Vanilla Extract 1 tsp Vanilla Extract 1/2 cup Granulated Sugar (additional amount for coating cookies) 11 oz Bag of Hershey Kisses Getting Started: Preparing Your Dough and Oven Before you begin mixing the cookie dough, it’s a good idea to preheat your oven and prepare your baking sheets. This ensures that as soon as your cookies are formed, they can go straight into the oven for baking. Preheat your oven to 375°F (190°C). Line your baking sheets with parchment paper. Parchment paper not only prevents the cookies from sticking but also makes for easier cleanup. Having everything ready before you start mixing will make the process smoother and help ensure consistent baking results. Mixing the Cookie Dough In a medium bowl, whisk together the all-purpose flour, baking soda, and salt. This dry mixture ensures that the leavening agents and salt are evenly distributed throughout the flour, which is key for consistent cookie texture and rise. Set this bowl aside for now. In a separate large bowl, cream together the softened butter, granulated sugar, and light brown sugar until the mixture is light and fluffy. This creaming process incorporates air into the dough, which contributes to the cookie’s tender texture and prevents them from spreading too much. Add the peanut butter and beat until well combined. Then, beat in the egg, milk, and vanilla extract until everything is smooth. Make sure the egg is fully incorporated before moving on to the next step.
Classic Peanut Butter Blossoms
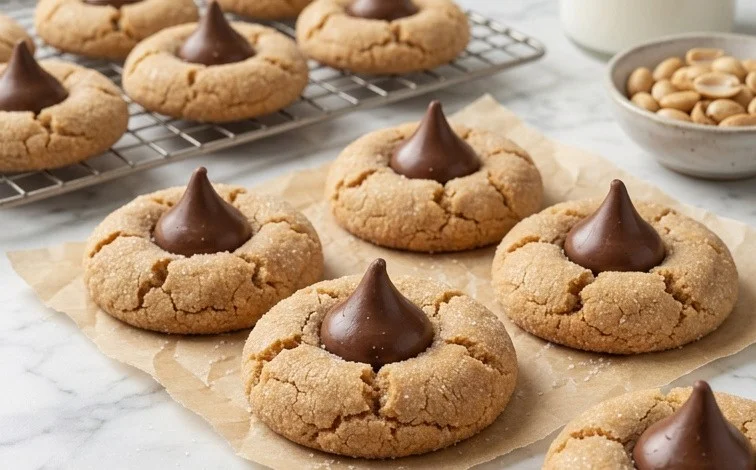
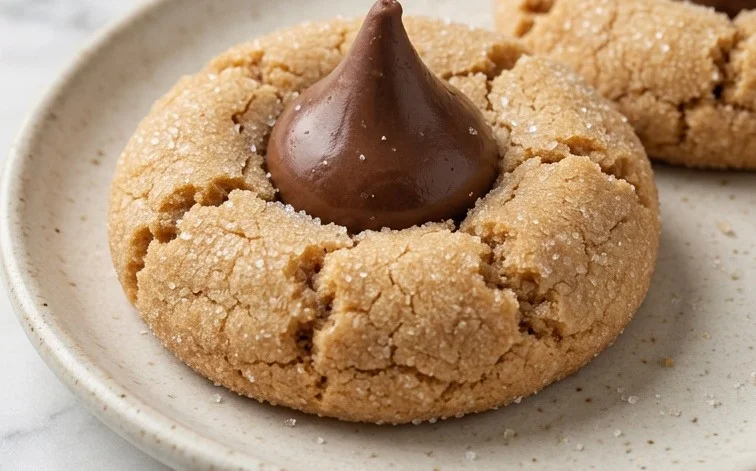
These cookies are a holiday staple in my home, and they’re so simple to make that they’re perfect for baking with kids or for a quick, delicious treat any time of year. The combination of chewy peanut butter cookie with the melt-in-your-mouth chocolate kiss is just classic. The secret to their signature look and taste is pressing the Hershey’s Kiss into the warm cookie right after it comes out of the oven, allowing it to soften beautifully.
Ingredients:
- 1 3/4 cup All-Purpose Flour
- 1 tsp Baking Soda
- 1/2 tsp Salt
- 1/2 cup Creamy Peanut Butter
- 1/2 cup Unsalted Butter (room temperature)
- 1/2 cup Granulated Sugar
- 1/2 cup Light Brown Sugar (lightly packed)
- 1 Large Egg
- 2 tbsp Milk
- 1 tsp Vanilla Extract
- 1/2 cup Granulated Sugar (additional amount for coating cookies)
- 11 oz Bag of Hershey Kisses
Getting Started: Preparing Your Dough and Oven
Before you begin mixing the cookie dough, it’s a good idea to preheat your oven and prepare your baking sheets. This ensures that as soon as your cookies are formed, they can go straight into the oven for baking. Preheat your oven to 375°F (190°C). Line your baking sheets with parchment paper. Parchment paper not only prevents the cookies from sticking but also makes for easier cleanup. Having everything ready before you start mixing will make the process smoother and help ensure consistent baking results.
Mixing the Cookie Dough
- In a medium bowl, whisk together the all-purpose flour, baking soda, and salt. This dry mixture will be added to the wet ingredients later. Whisking ensures that the leavening agent (baking soda) and salt are evenly distributed throughout the flour, which helps the cookies rise evenly and prevents pockets of saltiness. Set this bowl aside.
- In a large bowl, cream together the softened unsalted butter, creamy peanut butter, granulated sugar, and light brown sugar. You can use an electric mixer for this step, or a sturdy whisk and some elbow grease. Creaming means beating the butter and sugars until the mixture is light and fluffy. This process incorporates air into the dough, which contributes to the cookie’s tender texture and helps it spread properly during baking. Make sure the butter is truly at room temperature – it should be soft enough to indent easily with your finger but not melted. If it’s too cold, it won’t cream well; if it’s too warm, the dough can become greasy.
- Beat in the large egg, milk, and vanilla extract into the creamed butter and sugar mixture. Mix until everything is well combined and smooth. The egg adds richness and helps bind the ingredients together. The milk adds a touch of moisture, and the vanilla extract provides that classic comforting aroma and flavor that pairs so well with peanut butter and chocolate. Be sure to scrape down the sides of the bowl a few times to ensure all ingredients are incorporated.
- Gradually add the dry ingredients to the wet ingredients. Mix on low speed or by hand until just combined. Be careful not to overmix the dough at this stage. Overmixing can develop the gluten in the flour too much, resulting in tougher cookies. You want to mix until you no longer see streaks of dry flour. The dough will be soft and slightly sticky, which is exactly what we’re looking for.
Shaping and Baking the Cookies
- Prepare for rolling the cookie dough balls. Place the additional 1/2 cup of granulated sugar into a shallow bowl or plate. This sugar coating gives the cookies a lovely subtle crunch and sparkle. Scoop about 1-inch balls of cookie dough. You can use a cookie scoop for uniform size, which helps with even baking. Roll each ball between your palms to form a smooth sphere. Then, roll each dough ball generously in the prepared granulated sugar, coating all sides. This sugar coating is important for both appearance and texture.
- Place the sugar-coated dough balls onto the prepared baking sheets, spacing them about 2 inches apart. This spacing allows the cookies room to spread slightly as they bake. Bake in the preheated oven for 9 to 11 minutes. The edges of the cookies should look set and lightly golden brown, but the centers might still appear a little soft. It’s important not to overbake them, as they will continue to cook slightly on the baking sheet after being removed from the oven.
The Finishing Touch: Adding the Kisses
- This is the most iconic step for Peanut Butter Blossoms! As soon as the cookies come out of the oven, while they are still warm and soft, gently press one Hershey’s Kiss into the center of each cookie. The residual heat from the cookie will start to soften the chocolate kiss, making it easy to press in and eventually melt slightly around the edges. You want the kiss to stand upright. If the cookies have spread a lot and the kiss sinks too deep, you can gently pull the cookie dough up around the base of the kiss to secure it.
- Let the cookies cool on the baking sheets for about 5 minutes. During this time, the chocolate kisses will soften further, and the cookies will set up a bit more. After 5 minutes, carefully transfer the cookies to a wire rack to cool completely. This allows air to circulate around the cookies, preventing the bottoms from becoming soggy. If you try to move them too soon, they might fall apart. The chocolate will firm up as the cookies cool.
Storage and Enjoyment
Once completely cooled, these Peanut Butter Blossoms are ready to be enjoyed! Store them in an airtight container at room temperature for up to 3-4 days. They are wonderful with a glass of cold milk. If you want to get ahead, you can freeze the unbaked cookie dough balls (rolled in sugar but without the Hershey’s Kiss attached) on a baking sheet until firm, then transfer them to a freezer bag. When ready to bake, add the kiss to the cookie immediately after it comes out of the oven. Enjoy these classic, comforting treats!
Conclusion:
These Classic Peanut Butter Blossoms are more than just a cookie; they’re a comforting hug in edible form, perfect for sharing with loved ones or enjoying during a quiet moment. The delightful contrast between the rich, nutty cookie and the smooth, melting chocolate kiss is truly special. They bring a touch of homemade goodness to any occasion, from holiday gatherings to simple afternoon treats. The process is straightforward, making it a joy to bake them, especially with little helpers. For serving, they are wonderful on their own, but can also be paired with a glass of cold milk or a warm cup of tea. If you’re feeling adventurous, consider a drizzle of melted chocolate over the top after the kiss has set, or even a sprinkle of sea salt on the cookie dough before baking for a sweet and salty twist. Don’t be afraid to experiment with different types of chocolate kisses for a unique look and flavor. Store them in an airtight container at room temperature for up to 3 days, though they rarely last that long!
What is the best way to store Peanut Butter Blossoms?
Store cooled cookies in an airtight container at room temperature for up to 3-4 days. If they are layered, place parchment paper between layers to prevent sticking.
Can I make the dough ahead of time?
Yes, you can prepare the dough up to 2 days in advance and store it in the refrigerator. Just let it sit at room temperature for about 15-20 minutes before scooping, and roll it into balls as usual. You might need to add a touch more flour if the dough seems too sticky.
Why do my cookies spread too much?
Spreading can happen if your butter is too soft or if you overmix the dough after adding the flour. Ensure your butter is softened, not melted, and mix the flour just until combined. Chilling the dough for 30 minutes before baking can also help prevent excessive spreading.
Classic Peanut Butter Blossoms
A classic cookie recipe featuring soft peanut butter cookies topped with a Hershey Kiss.
Ingredients
-
1 3/4 cup All-Purpose Flour
-
1 tsp Baking Soda
-
1/2 tsp Salt
-
1/2 cup Creamy Peanut Butter
-
1/2 cup Unsalted Butter (room temperature)
-
1/2 cup Granulated Sugar
-
1/2 cup Light Brown Sugar (lightly packed)
-
1 Large Egg
-
2 tbsp Milk
-
1 tsp Vanilla Extract
-
1/2 cup Granulated Sugar (additional amount for coating cookies)
-
11 oz Bag of Hershey Kisses
Instructions
-
Step 1
Preheat oven to 375°F (190°C). Line baking sheets with parchment paper. -
Step 2
In a medium bowl, whisk together the flour, baking soda, and salt. -
Step 3
In a large bowl, cream together the peanut butter, butter, granulated sugar, and brown sugar until light and fluffy. -
Step 4
Beat in the egg, milk, and vanilla extract until well combined. -
Step 5
Gradually add the dry ingredients to the wet ingredients, mixing until just combined. -
Step 6
Roll dough into 1-inch balls and coat each ball in the additional granulated sugar. -
Step 7
Place cookie balls about 2 inches apart on prepared baking sheets. -
Step 8
Bake for 9-11 minutes, or until edges are lightly golden. -
Step 9
Immediately after removing from oven, press one Hershey Kiss into the center of each cookie. The heat from the cookie will soften the chocolate. -
Step 10
Let cookies cool on baking sheets for a few minutes before transferring to wire racks to cool completely.
Important Information
Nutrition Facts (Per Serving)
It is important to consider this information as approximate and not to use it as definitive health advice.
Allergy Information
Please check ingredients for potential allergens and consult a health professional if in doubt.

Leave a Comment