
Classic Peanut Butter Blossoms are one of those cookies that just feel like home. That sweet, nutty aroma as they bake, followed by the undeniable scent of melting chocolate – it’s pure comfort. These cookies have a way of taking you back, a simple treat that’s been a favorite for generations. What makes them so enduringly popular is the perfect balance: a tender, slightly chewy peanut butter cookie with that signature Hershey’s Kiss pressed right into the center. It’s a simple construction, but the combination is magic. You get that satisfying peanut butter flavor with a sweet chocolate pop in every bite. They are remarkably forgiving for beginners, and the ingredients are pantry staples for most home bakers, making them an accessible holiday bake or a anytime treat that always brings smiles. This recipe focuses on getting that cookie dough just right.
The Key to the Cookie Dough
This recipe is all about achieving that ideal texture. You want a cookie that’s soft enough to be chewy but firm enough to hold its shape and the weight of the chocolate kiss. The ingredients list is straightforward, but the technique is where the magic happens. Proper creaming of butter and sugar, and not overmixing the flour, are essential steps. We’ll walk through each part to ensure your peanut butter blossoms turn out perfectly every time, just like Grandma used to make, but perhaps even better. Get ready to fill your kitchen with the comforting smell of baking.
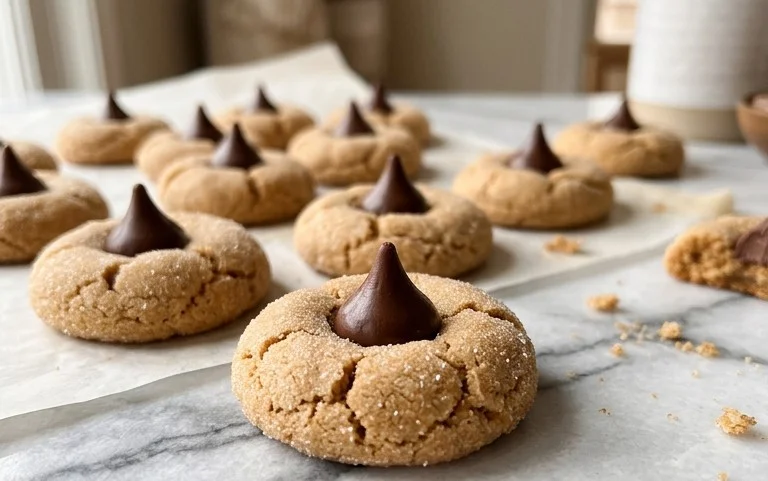
Classic Peanut Butter Blossoms
These cookies are a holiday classic for a reason. That perfect combination of chewy peanut butter cookie and a melty chocolate kiss right on top. They bring back memories of childhood kitchens and the smell of baking filling the house. The beauty of this recipe is its simplicity. You likely have most of the ingredients in your pantry already, and the steps are straightforward enough for even novice bakers. The key is getting the cookie dough just right so it bakes up soft and slightly chewy, providing the perfect base for that iconic Hershey’s Kiss.
Ingredients:
- 1 3/4 cup All-Purpose Flour
- 1 tsp Baking Soda
- 1/2 tsp Salt
- 1/2 cup Creamy Peanut Butter
- 1/2 cup Unsalted Butter (room temperature)
- 1/2 cup Granulated Sugar
- 1/2 cup Light Brown Sugar (lightly packed)
- 1 Large Egg
- 2 tbsp Milk
- 1 tsp Vanilla Extract
- 1/2 cup Granulated Sugar (additional amount for coating cookies)
- 11 oz Bag of Hershey Kisses
Cookie Dough Preparation
The first step is always to get your dry ingredients together. In a medium bowl, whisk together the 1 3/4 cups of all-purpose flour, the 1 teaspoon of baking soda, and the 1/2 teaspoon of salt. Whisking them well ensures that the leavening agent (baking soda) and the salt are evenly distributed throughout the flour. This prevents pockets of saltiness or uneven rising in your finished cookies. Set this mixture aside for now.
Next, in a large mixing bowl, you’ll cream together the softened butter and the sugars. Make sure your butter is truly at room temperature; it should yield slightly when pressed but not be melted. This is crucial for achieving a light and airy cookie dough. Add the 1/2 cup of granulated sugar and the 1/2 cup of light brown sugar (make sure it’s lightly packed so you don’t have too much sugar). Beat these together with an electric mixer on medium speed until the mixture is light and fluffy, which usually takes about 2 to 3 minutes. You’re looking for a pale, creamy consistency.
Now it’s time to incorporate the peanut butter. Add the 1/2 cup of creamy peanut butter to the creamed butter and sugar mixture. Beat again until everything is well combined and smooth. Don’t worry if it looks a little grainy at this stage; it will smooth out.
In a small bowl, whisk together the 1 large egg, the 2 tablespoons of milk, and the 1 teaspoon of vanilla extract. Vanilla extract is important for adding depth of flavor to the cookies, so don’t skip it. Pour this wet mixture into the large bowl with the peanut butter mixture. Beat on low speed until just combined. Overmixing here can lead to tougher cookies, so stop as soon as you don’t see any more streaks of egg.
Gradually add the dry ingredients (the flour mixture) to the wet ingredients. Mix on low speed until just combined. It’s important not to overmix the dough once the flour is added. You want to mix only until you no longer see any dry streaks of flour. A few small lumps are okay; they’ll work themselves out during baking. The dough will be soft and slightly sticky.
Chilling and Shaping the Cookies
It’s a good idea to chill the dough for at least 30 minutes, or even up to 2 hours. This makes the dough easier to handle and helps prevent the cookies from spreading too much in the oven, ensuring they keep their classic shape. You can cover the bowl with plastic wrap and refrigerate it.
While the dough is chilling, prepare your baking sheets by lining them with parchment paper. This makes cleanup a breeze and ensures the cookies won’t stick. Also, unwrap your Hershey’s Kisses. It’s handy to have them all ready to go before you start shaping the cookies. You will need one Kiss for each cookie.
Preheat your oven to 375 degrees Fahrenheit (190 degrees Celsius).
Once the dough has chilled sufficiently, you’ll roll it into balls. Scoop out about 1-inch portions of dough. You can use a cookie scoop for consistency. Roll each portion into a smooth ball between your palms.
In a shallow bowl or plate, pour the additional 1/2 cup of granulated sugar. Roll each dough ball in the sugar until it’s evenly coated. This sugar coating gives the cookies a slightly crisp exterior and adds a lovely sweetness. Place the sugar-coated dough balls about 2 inches apart on your prepared baking sheets. This spacing allows room for them to spread slightly as they bake.
Baking and the Chocolate Kiss
Now it’s time for the baking. Bake the cookies for 8 to 10 minutes, or until the edges are lightly golden brown. You want the centers to still look slightly soft and underbaked; they will continue to cook on the hot baking sheet after they come out of the oven. Overbaking will result in dry, crumbly cookies.
As soon as the cookies come out of the oven, it’s time for the signature touch. Immediately unwrap a Hershey’s Kiss and gently press one into the center of each warm cookie. The residual heat from the cookie will soften the Kiss just enough to create that perfect, melty chocolate topping without it completely melting into a puddle. If your cookies have spread a lot, you might need to gently nudge the edges back towards the center before pressing in the Kiss to create a more uniform shape.
Let the cookies cool on the baking sheets for about 5 minutes. This allows them to set up a bit more. Then, carefully transfer them to a wire rack to cool completely. This is where the magic really happens, as the chocolate Kiss solidifies into that beautiful, iconic blossom shape.
These cookies are best enjoyed at room temperature. Store any leftovers in an airtight container at room temperature for up to 3-4 days. They also freeze beautifully, either baked or unbaked. For unbaked dough, freeze the rolled balls on a baking sheet until firm, then transfer to a freezer bag. You can bake them directly from frozen, adding a minute or two to the baking time. Enjoy your delicious homemade Peanut Butter Blossoms!
Conclusion:
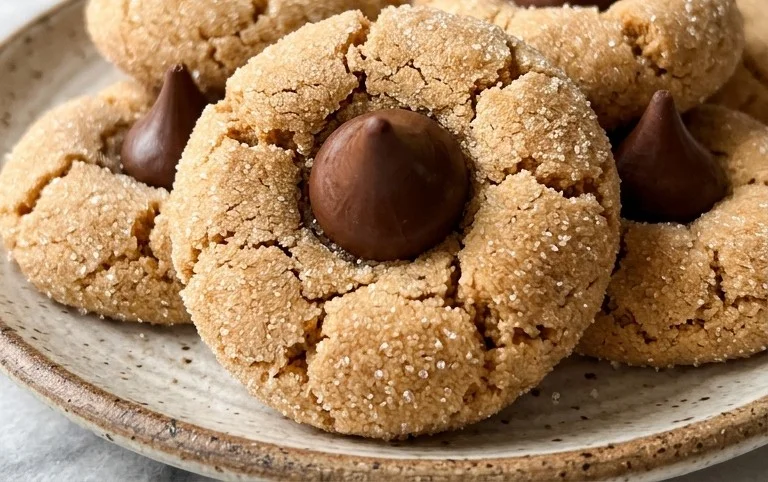
These Classic Peanut Butter Blossoms are more than just a cookie; they’re a little piece of nostalgia baked with simple, wholesome ingredients. The beauty of this recipe lies in its straightforward approach, delivering that iconic chewy peanut butter cookie topped with a perfectly melted chocolate kiss. They’re wonderfully adaptable, making them a consistent crowd-pleaser for holidays, bake sales, or just a Tuesday afternoon treat. Don’t be afraid to experiment with different types of chocolate kisses if you’re feeling adventurous, but the classic Hershey’s Kiss is tough to beat. They bring joy with every bite, embodying the simple pleasure of homemade baking.
Tips for Perfect Peanut Butter Blossoms
To ensure your cookies spread just right and the chocolate melts without burning, keep an eye on them during the last few minutes of baking. For an extra touch, you can lightly toast your peanuts before making peanut butter if you’re feeling ambitious, though creamy peanut butter works perfectly well. Rolling the dough balls in extra sugar before baking gives them a lovely slight crunch and sparkle.
Serving and Storage
Let the cookies cool on the baking sheet for a few minutes after they come out of the oven; this helps the chocolate set. Then, transfer them to a wire rack to cool completely. Store them in an airtight container at room temperature for up to 3-4 days. They also freeze well before or after baking.
Frequently Asked Questions
Can I use crunchy peanut butter?
Absolutely! Using crunchy peanut butter will add a pleasant texture to the cookies. Just be aware that the nuts might make the dough slightly drier, so you may need a tiny splash more milk if it seems too crumbly.
Why do my Hershey’s Kisses melt off?
This usually happens if the cookies are overbaked. The chocolate kiss should soften and melt into the cookie, not become completely liquid and slide off. Try reducing the baking time by a minute or two, and make sure the cookies are slightly underbaked in the center when you take them out; they’ll continue to cook on the hot baking sheet.
How do I prevent the peanut butter cookie from spreading too much?
Ensure your butter is at room temperature, not melted. Over-creaming the butter and sugar can also contribute to excessive spreading. Chilling the dough balls for about 15-20 minutes before baking can also help them hold their shape better.
Classic Peanut Butter Blossoms
A timeless favorite, these peanut butter cookies are soft, chewy, and topped with a festive Hershey’s Kiss.
Ingredients
-
1 3/4 cup All-Purpose Flour
-
1 tsp Baking Soda
-
1/2 tsp Salt
-
1/2 cup Creamy Peanut Butter
-
1/2 cup Unsalted Butter (room temperature)
-
1/2 cup Granulated Sugar
-
1/2 cup Light Brown Sugar (lightly packed)
-
1 Large Egg
-
2 tbsp Milk
-
1 tsp Vanilla Extract
-
1/2 cup Granulated Sugar (additional amount for coating cookies)
-
11 oz Bag of Hershey Kisses
Instructions
-
Step 1
Preheat oven to 375°F (190°C). Line baking sheets with parchment paper. -
Step 2
In a small bowl, whisk together the flour, baking soda, and salt. Set aside. -
Step 3
In a large bowl, cream together the peanut butter, softened butter, granulated sugar, and light brown sugar until light and fluffy. -
Step 4
Beat in the egg and vanilla extract until well combined. Stir in the milk. -
Step 5
Gradually add the dry ingredients to the wet ingredients, mixing until just combined. Do not overmix. -
Step 6
Roll dough into 1-inch balls. Roll each ball in the additional granulated sugar. Place dough balls about 2 inches apart on prepared baking sheets. -
Step 7
Bake for 8 to 10 minutes, or until edges are lightly golden. Remove from oven. -
Step 8
Immediately press one Hershey’s Kiss into the center of each warm cookie, allowing it to soften and slightly melt. Let cookies cool on baking sheets for a few minutes before transferring to a wire rack to cool completely.
Important Information
Nutrition Facts (Per Serving)
It is important to consider this information as approximate and not to use it as definitive health advice.
Allergy Information
Please check ingredients for potential allergens and consult a health professional if in doubt.

Leave a Comment