
Chocolate Crinkle Cookie Recipe These Chocolate Crinkle Cookies are pure magic. They start as a rich, deep chocolate dough and transform in the oven into beautiful, crackled little orbs dusted with powdery snow. The contrast between the slightly chewy, fudgy interior and the crisp, crackled exterior is just wonderful. I love making these during the cooler months, but honestly, they’re a hit any time of year. The intense cocoa flavor comes from using Dutch-processed cocoa powder, which is alkalized to give it a smoother, less acidic taste and a darker color. Don’t skip this for the best results. Making the Cookie Dough The first step to achieving these delightful cookies is to get your dry ingredients together. In a medium bowl, whisk together the all-purpose flour, baking powder, and kosher salt. Whisking helps to aerate the flour and distribute the leavening agent and salt evenly, which is important for consistent cookie texture. Set this bowl aside. In a separate, larger bowl, combine the granulated sugar and brown sugar. Using both types of sugar contributes to the cookie’s texture and moisture. Granulated sugar helps with crispness, while brown sugar, with its molasses content, adds chewiness and a subt
Ingredients:
- 2¼ cups all-purpose flour
- 2½ teaspoons baking powder
- ½ teaspoon kosher salt
- 1 cup unsweetened Dutch-processed cocoa powder
- 1¼ cups granulated sugar
- ½ cup brown sugar
- ½ cup vegetable oil or canola oil
- 4 large eggs
- 1 teaspoon vanilla extract
- ⅔ cup powdered sugar
Chocolate Crinkle Cookie Recipe
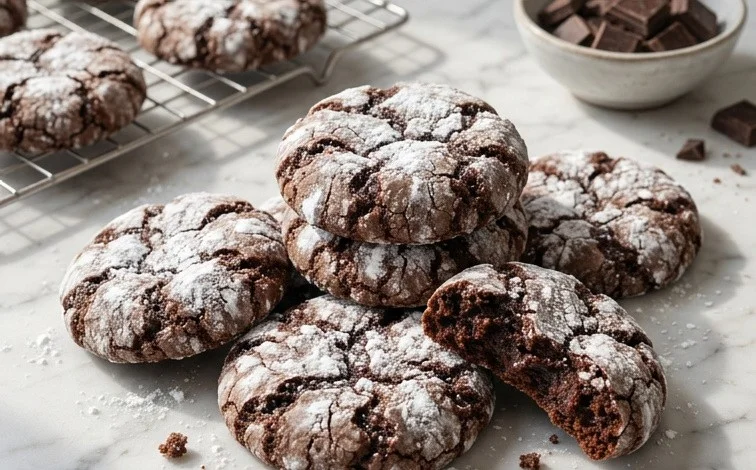
These Chocolate Crinkle Cookies are pure magic. They start as a rich, deep chocolate dough and transform in the oven into beautiful, crackled little orbs dusted with powdery snow. The contrast between the slightly chewy, fudgy interior and the crisp, crackled exterior is just wonderful. I love making these during the cooler months, but honestly, they’re a hit any time of year. The intense cocoa flavor comes from using Dutch-processed cocoa powder, which is alkalized to give it a smoother, less acidic taste and a darker color. Don’t skip this for the best results.
Making the Cookie Dough
The first step to achieving these delightful cookies is to get your dry ingredients together. In a medium bowl, whisk together the all-purpose flour, baking powder, and kosher salt. Whisking helps to aerate the flour and distribute the leavening agent and salt evenly, which is important for consistent cookie texture. Set this bowl aside.
In a separate, larger bowl, combine the granulated sugar and brown sugar. Using both types of sugar contributes to the cookie’s texture and moisture. Granulated sugar helps with crispness, while brown sugar, with its molasses content, adds chewiness and a subtle caramel note. Add the vegetable oil or canola oil to the sugars. Make sure you use a neutral-flavored oil like vegetable or canola; olive oil would impart too strong a flavor. Stir these together until they are well combined.
Now, it’s time to add the eggs and vanilla extract. Add the 4 large eggs, one at a time, mixing well after each addition. This ensures the eggs are fully incorporated into the sugar and oil mixture. Then, stir in the teaspoon of vanilla extract. Vanilla enhances the chocolate flavor and adds a lovely aroma. The mixture at this point should be smooth and slightly thickened.
Next, gradually add the dry ingredients to the wet ingredients. Add about a third of the flour mixture at a time, mixing until just combined after each addition. Be careful not to overmix once the flour is added. Overmixing can develop the gluten in the flour too much, leading to tough cookies. You want to mix just until you no longer see streaks of dry flour.
Finally, stir in the unsweetened Dutch-processed cocoa powder. Make sure it’s fully incorporated into the dough. The dough will become very thick and fudgy, almost like a brownie batter. This is exactly what you want. Because the dough is so soft and sticky, it’s best to chill it before forming the cookies. Cover the bowl tightly with plastic wrap and refrigerate for at least 2 hours, or until firm enough to roll. Chilling is a critical step that makes the dough much easier to handle and prevents the cookies from spreading too much in the oven.
Shaping and Baking the Crinkle Cookies
Once the dough has chilled and is firm enough to work with, it’s time to shape the cookies. You’ll need to prepare a shallow bowl with the ⅔ cup of powdered sugar for rolling. Scoop out rounded tablespoons of the chilled dough and roll them into smooth balls, about 1 to 1.5 inches in diameter. The size of the ball will determine the size of your finished cookie, so try to keep them consistent for even baking.
After rolling a dough ball, gently roll it in the powdered sugar, ensuring it’s completely coated on all sides. This sugar coating is what gives the cookies their signature crackled, snow-dusted appearance as they bake. Don’t be shy with the powdered sugar; a good coating is key to the look.
Place the coated dough balls onto baking sheets lined with parchment paper. Leave about 2 inches of space between each cookie, as they will spread a little during baking. I usually get about 12 cookies per standard baking sheet.
Preheat your oven to 350°F (175°C). Make sure your oven rack is positioned in the center. Bake the cookies for 10-12 minutes. You’re looking for the edges to be set and slightly firm, and the tops to start showing those beautiful cracks. They should still look a little soft in the center; they will continue to cook on the baking sheet as they cool. Avoid overbaking, as this will result in dry cookies.
Cooling and Storing Your Crinkle Cookies
Once the cookies are done baking, remove the baking sheets from the oven. Let the cookies cool on the baking sheets for about 5-10 minutes. This allows them to firm up a bit more before you move them. If you try to move them too soon, they might break or lose their shape.
After they’ve cooled slightly on the baking sheet, carefully transfer the cookies to a wire rack to cool completely. As they cool, you’ll notice the crackled pattern becomes more pronounced. You can even give them an extra light dusting of powdered sugar once they are fully cooled if you want them to look extra snowy.
Store the cooled Chocolate Crinkle Cookies in an airtight container at room temperature. They are best enjoyed within 3-4 days. If you find they start to lose their softness before then, you can place a slice of bread in the container with them, which helps to maintain moisture. These cookies are perfect with a glass of cold milk, a cup of coffee, or just on their own for a chocolate fix.
Conclusion:
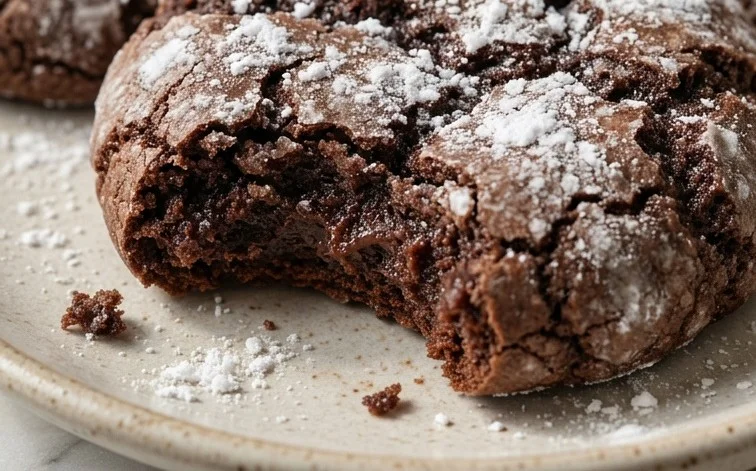
These Chocolate Crinkle Cookies really are a joy to make and to eat. The delightful contrast between that crisp, snowy exterior and the soft, fudgy center is something special. They look impressive with their signature cracks, but the process is straightforward, making them accessible for most home bakers. The intense chocolate flavor, thanks to the Dutch-processed cocoa, means these cookies satisfy any chocolate craving. Don’t be afraid to roll them generously in powdered sugar – that’s key to their look and taste.
For serving, they are wonderful on their own with a glass of cold milk, or alongside a cup of hot coffee or tea. They also make a beautiful addition to a cookie platter during the holidays or for any celebration. If you want to try a variation, you could add a pinch of espresso powder to the dough to deepen the chocolate flavor even more, or a sprinkle of sea salt on top before baking for a salty-sweet kick.
Frequently Asked Questions:
Why are my crinkle cookies not cracking?
This usually happens if the dough is too dry, or if the cookies spread too much in the oven. Make sure you measure your flour correctly – spooning it into the cup and leveling off is best. Chilling the dough can also help prevent over-spreading and encourage cracking. Rolling the dough balls firmly before coating them in powdered sugar is also important.
Can I use regular cocoa powder instead of Dutch-processed?
You can, but the flavor and color won’t be as intense. Dutch-processed cocoa powder is treated to be less acidic and has a smoother, darker chocolate flavor that really makes these Chocolate Crinkle Cookies shine. If you only have natural cocoa, your cookies might be a bit lighter in color and have a slightly different taste profile.
How should I store Chocolate Crinkle Cookies?
Store them in an airtight container at room temperature for up to 5 days. It’s best to place parchment paper between layers if stacking them, to prevent the powdered sugar coating from sticking too much.
Chocolate Crinkle Cookie Recipe
A classic chocolate crinkle cookie recipe for delightfully rich and chewy cookies with a beautiful cracked appearance.
Ingredients
-
2¼ cups all-purpose flour
-
2½ teaspoons baking powder
-
½ teaspoon kosher salt
-
1 cup unsweetened Dutch-processed cocoa powder
-
1¼ cups granulated sugar
-
½ cup brown sugar
-
½ cup vegetable oil
-
4 large eggs
-
1 teaspoon vanilla extract
-
⅔ cup powdered sugar
Instructions
-
Step 1
In a medium bowl, whisk together the flour, baking powder, and salt. Set aside. -
Step 2
In a large bowl, beat together the cocoa powder, granulated sugar, and brown sugar. Add the vegetable oil and mix until well combined. -
Step 3
Add the eggs one at a time, beating well after each addition. Stir in the vanilla extract. -
Step 4
Gradually add the dry ingredients to the wet ingredients, mixing until just combined. The dough will be soft and sticky. Cover and refrigerate for at least 2 hours, or until firm enough to roll. -
Step 5
Preheat oven to 350°F (175°C). Line baking sheets with parchment paper. Place the powdered sugar in a shallow bowl. -
Step 6
Roll the chilled dough into 1-inch balls. Roll each ball generously in the powdered sugar, ensuring it’s fully coated. Place the balls 2 inches apart on the prepared baking sheets. -
Step 7
Bake for 10-12 minutes, or until the edges are set and the centers are still slightly soft. The cookies will crack as they bake. -
Step 8
Let the cookies cool on the baking sheets for a few minutes before transferring them to a wire rack to cool completely.
Important Information
Nutrition Facts (Per Serving)
It is important to consider this information as approximate and not to use it as definitive health advice.
Allergy Information
Please check ingredients for potential allergens and consult a health professional if in doubt.


Leave a Comment