
Caramel Apple Dessert Cups start with a crunchy vanilla wafer base that crumbles just right with every spoonful. These individual desserts are a smart way to serve up the classic flavors of caramel apples without any fuss. They pack layers of spiced apple filling, smooth vanilla pudding, and that essential caramel drizzle, all in one cup. People love them because they feel special but are surprisingly simple to put together. You can make them ahead of time, which is a big win when you’re hosting. They’re like a deconstructed apple pie but served in a more elegant, portable way. The combination of warm spices in the apples with the cool pudding and sweet caramel is what really makes these Caramel Apple Dessert Cups a hit, no matter the occasion.
Ingredients:
- 4 cups apples (peeled and chopped into roughly ½-inch pieces)
- ½ cup light brown sugar
- 1 tsp cinnamon
- 2 cups vanilla wafer crumbs (about 45-50 vanilla wafers, crushed)
- ¼ cup salted or unsalted butter (melted)
- 1 pkg instant vanilla pudding mix (3.4 ounces)
- 1 cup milk
- ⅓ cup salted caramel sauce (homemade or store bought)
- 1 ½ cups heavy cream
- additional caramel sauce for garnish
Preparing the Apple Filling
Sautéing the Apples
The first step to these delightful cups is preparing the spiced apple filling. You’ll want to start with about 4 cups of chopped apples. I prefer using a mix of apples like Honeycrisp and Granny Smith for a good balance of sweetness and tartness, but feel free to use your favorite baking apples. Peel them and chop them into pieces that are roughly ½-inch in size. This ensures they cook down nicely without turning to mush. Add the chopped apples to a medium saucepan along with the light brown sugar and cinnamon. Stir everything together to coat the apples evenly. Cook over medium heat, stirring occasionally, for about 8-10 minutes, or until the apples are tender but still hold their shape. You don’t want them to be completely soft. Remove the pan from the heat and let the apple mixture cool slightly. This gives the flavors time to meld and prevents the hot apples from melting your pudding mixture later.
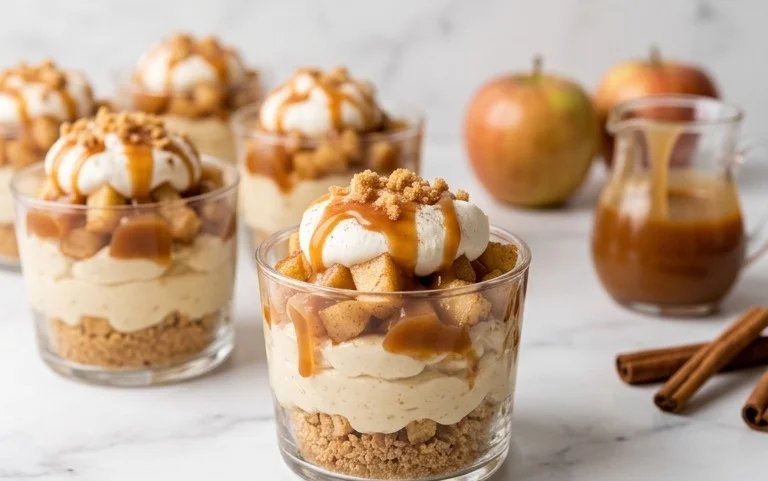
Caramel Apple Dessert Cups
These Caramel Apple Dessert Cups are a fantastic way to enjoy the classic flavors of caramel apples in an easy-to-serve, individual dessert. They combine a sweet, spiced apple filling with a creamy vanilla pudding layer and a crunchy vanilla wafer crust, all drizzled with luscious caramel sauce. They’re perfect for potlucks, holiday gatherings, or just a special weeknight treat when you want something a little bit decadent. The beauty of this dessert is its simplicity and how forgiving it is. You can easily adjust the spices in the apples or even swap out the wafer crumbs for graham crackers if that’s what you have on hand.
Ingredients:
- 4 cups apples (peeled and chopped into roughly ½-inch pieces)
- ½ cup light brown sugar
- 1 tsp cinnamon
- 2 cups vanilla wafer crumbs (about 45-50 vanilla wafers, crushed)
- ¼ cup salted or unsalted butter (melted)
- 1 pkg instant vanilla pudding mix (3.4 ounces)
- 1 cup milk
- ⅓ cup salted caramel sauce (homemade or store bought)
- 1 ½ cups heavy cream
- additional caramel sauce for garnish
Preparing the Apple Filling
Sautéing the Apples
The first step to these delightful cups is preparing the spiced apple filling. You’ll want to start with about 4 cups of chopped apples. I prefer using a mix of apples like Honeycrisp and Granny Smith for a good balance of sweetness and tartness, but feel free to use your favorite baking apples. Peel them and chop them into pieces that are roughly ½-inch in size. This ensures they cook down nicely without becoming mushy. In a medium saucepan, combine the chopped apples with ½ cup of light brown sugar and 1 teaspoon of cinnamon. Stir everything together so the apples are evenly coated.
Now, place the saucepan over medium heat. Cook the apples, stirring occasionally, for about 10-15 minutes. You’re looking for the apples to soften slightly, but they should still hold their shape. They will release some of their juices, and the brown sugar will melt into a light syrup with the cinnamon. Don’t overcook them to the point where they turn to applesauce; a little bit of tender bite is just perfect. Once they’ve reached the desired tenderness, remove the saucepan from the heat and let the apple mixture cool while you prepare the other components. This cooling step is important because adding hot apples to the pudding layer could affect its texture.
Building the Base
Creating the Vanilla Wafer Crust
Next, we’ll make the delicious crust. You’ll need about 2 cups of vanilla wafer crumbs. The easiest way to get these is to put your vanilla wafers into a zip-top bag and then crush them with a rolling pin until they are fine crumbs. Alternatively, you can pulse them in a food processor until you have the desired consistency. In a medium bowl, combine the vanilla wafer crumbs with ¼ cup of melted butter. Stir this together until all the crumbs are moistened and resemble wet sand. This mixture will hold together when pressed.
Now, you’ll want to get your serving cups ready. Small glasses, ramekins, or even clear plastic cups work beautifully. Divide about two-thirds of the vanilla wafer crumb mixture evenly among the bottoms of your serving cups. Press the crumbs down firmly with the back of a spoon or your fingers to create a compact, even base. This base will provide a delightful crunch with every bite. Reserve the remaining crumb mixture for topping later, if you like. Make sure to press it down well so it doesn’t crumble apart too easily when you’re eating the dessert.
Assembling the Layers
Making the Creamy Pudding
For the creamy layer, we’re going to use instant vanilla pudding. In a medium bowl, whisk together 1 package (3.4 ounces) of instant vanilla pudding mix with 1 cup of milk. Whisk vigorously for about 2 minutes, or until the pudding begins to thicken. It’s important to follow the package directions for your specific pudding mix, as some may have slightly different whisking times or milk amounts. Once it’s thickened, set it aside. This pudding will continue to set up as it sits.
Now, in a separate, larger bowl, whip the 1 ½ cups of heavy cream. You can use an electric mixer or a whisk for this. Start on low speed and gradually increase to medium-high. Whip the cream until it forms stiff peaks. This means that when you lift the whisk or beaters out, the cream will hold its shape without drooping. Be careful not to over-whip, or you’ll end up with butter. Once the heavy cream is whipped, gently fold the thickened instant vanilla pudding into the whipped cream. Use a spatula and a folding motion, scooping from the bottom of the bowl and bringing it up and over. You want to incorporate the pudding without deflating the whipped cream too much. This will create a light and airy mousse-like texture.
Layering the Dessert Cups
With all our components ready, it’s time to assemble these beautiful dessert cups. First, spoon a layer of the apple mixture over the vanilla wafer crust in each cup. You want to distribute the apples and their syrupy juices evenly. Next, carefully spoon a generous layer of the vanilla pudding and whipped cream mixture over the apples. Try to get an even amount in each cup. Don’t worry if it’s not perfectly smooth; a slightly rustic look is part of the charm.
Now comes the real caramel magic. Drizzle about ⅓ cup of salted caramel sauce over the pudding layer in each cup. You don’t need to be too precise here; a lovely swirl or a simple drizzle will do. This caramel sauce will seep down slightly into the pudding, adding wonderful pockets of rich, sweet flavor. If you saved some of the vanilla wafer crumbs, you can sprinkle a little on top at this stage for added texture, though it’s entirely optional. For the final touch, drizzle a bit more caramel sauce over the top of each dessert cup as a garnish. This extra drizzle adds visual appeal and an immediate hit of caramel goodness. These cups are best served chilled, so cover them and refrigerate them for at least 30 minutes before serving to allow the flavors to meld and the layers to set up.
Conclusion:
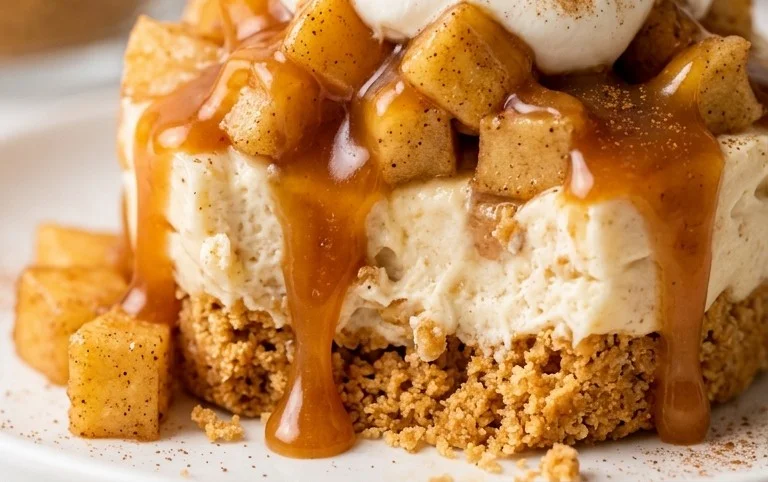
These Caramel Apple Dessert Cups are a truly satisfying treat that brings together familiar, comforting flavors in a neat individual package. The balance of tender spiced apples, creamy vanilla pudding, crisp wafer crumbs, and that sweet caramel sauce makes every bite a delight. They are perfect for serving at gatherings because everyone gets their own serving, and they look so pretty lined up on a dessert table. Plus, you can assemble most of the components ahead of time, making your hosting duties much simpler. Consider adding a sprinkle of toasted pecans over the caramel for an extra layer of crunch and nutty flavor, or even a dash of nutmeg with the cinnamon for a warmer spice profile. These cups are a wonderful way to enjoy the taste of fall, no matter the season.
Frequently Asked Questions
Can I make these dessert cups ahead of time?
Yes, you absolutely can. You can prepare the apple filling and the wafer crust a day in advance and store them separately. The pudding can also be made ahead. However, for the best texture, I recommend assembling the cups a few hours before serving, or at least not more than a day in advance. This helps keep the wafer crust from getting too soggy from the pudding and apple layers.
What kind of apples work best for the filling?
A mix of sweet and tart apples works wonderfully. Honeycrisp, Granny Smith, Fuji, or Gala are all good choices. Using a combination gives the filling a more complex flavor and a good texture after cooking. Avoid apples that are too soft or mealy, as they will break down too much during cooking.
Can I use a different kind of cookie crumb for the base?
Certainly. If you don’t have vanilla wafers, graham crackers are an excellent substitute and offer a slightly different, but equally delicious, crumb base. Shortbread cookies or even gingersnap cookies would also be interesting variations that would complement the apple and caramel flavors.
Caramel Apple Dessert Cups
Individual no-bake dessert cups layered with spiced apples, crunchy wafer crust, creamy pudding, and rich caramel sauce. A delightful treat for any occasion.
Ingredients
-
4 cups apples (peeled and chopped)
-
½ cup light brown sugar
-
1 tsp cinnamon
-
2 cups vanilla wafer crumbs
-
¼ cup salted or unsalted butter (melted)
-
1 pkg instant vanilla pudding mix (3.4 ounces)
-
1 cup milk
-
⅓ cup salted caramel sauce (homemade or store bought)
-
1 ½ cups heavy cream
-
additional caramel sauce for garnish
Instructions
-
Step 1
In a medium saucepan, combine chopped apples, brown sugar, and cinnamon. Cook over medium heat, stirring occasionally, until apples are tender and slightly softened, about 8-10 minutes. Let cool. -
Step 2
In a small bowl, combine vanilla wafer crumbs and melted butter. Mix until well combined. Press about 1-2 tablespoons of the crumb mixture into the bottom of individual serving cups or glasses. -
Step 3
In a separate bowl, whisk together the instant vanilla pudding mix and milk according to package directions until thickened. Stir in ⅓ cup of caramel sauce until evenly incorporated. -
Step 4
In another bowl, whip the heavy cream until stiff peaks form. Gently fold the whipped cream into the caramel pudding mixture. -
Step 5
Layer the cooled apple mixture over the wafer crumb base in each cup. Spoon or pipe the caramel pudding mixture over the apples. -
Step 6
Chill the dessert cups for at least 30 minutes to allow them to set. Garnish with additional caramel sauce before serving.
Important Information
Nutrition Facts (Per Serving)
It is important to consider this information as approximate and not to use it as definitive health advice.
Allergy Information
Please check ingredients for potential allergens and consult a health professional if in doubt.


Leave a Comment