
Butter cookies are a classic for a reason. They’re that perfect balance of rich, buttery flavor and a tender crumb that just melts in your mouth. These aren’t your average store-bought cookies; they have a depth of flavor that comes from simple, quality ingredients and a little bit of care. I love making these because they feel special without being complicated. You can whip up a batch with ingredients you probably already have in your pantry, and the process itself is quite rewarding. The delicate texture and comforting aroma as they bake make any afternoon feel a bit more cozy. Forget fancy gadgets, the magic here is in the butter and the technique. This Easy Homemade Butter Cookies recipe is designed for home bakers who want a reliable, delicious result every time.
Why You’ll Love This Recipe
These butter cookies are a testament to the joy of simple baking. They’re incredibly versatile, working just as well for a casual tea break as they do for festive occasions. The texture is spot-on: crisp around the edges with a delightful chewiness towards the center, and that unmistakable pure butter taste. They also hold their shape beautifully, making them ideal for decorating if you’re feeling artistic, or simply perfect enjoyed plain.
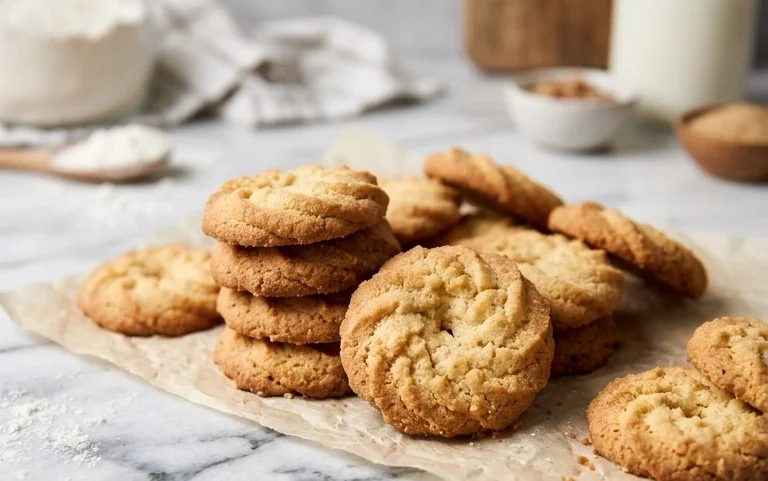
Easy Homemade Butter Cookies
These butter cookies are a simple pleasure, perfect for a quiet afternoon with a cup of tea or as a sweet treat to share. The recipe is straightforward, relying on basic pantry staples to create a melt-in-your-mouth cookie with a delicate buttery flavor. You don’t need fancy equipment or complicated techniques to achieve delicious results. The key is good quality butter and taking your time during the mixing and baking process. They have a wonderful crumb that isn’t too dense, nor are they overly delicate.
Ingredients:
- 4 cups All-Purpose Flour
- 1 tsp Baking Powder
- 1/2 tsp Salt
- 1 cup Unsalted Butter (room temperature)
- 2 cups Granulated Sugar
- 2 Large Eggs (room temperature)
- 2 tsp Vanilla Extract
Instructions:
Preparing the Dry Ingredients
The first step in making these wonderful butter cookies is to combine our dry ingredients. In a medium-sized bowl, whisk together the 4 cups of all-purpose flour, 1 teaspoon of baking powder, and 1/2 teaspoon of salt. Whisking them together ensures that the baking powder and salt are evenly distributed throughout the flour. This is important for consistent leavening and flavor in the final cookies. Once combined, set this bowl aside. Having this prepped and ready means you can move quickly to the next stage of creaming the butter and sugar. It’s a small step, but it contributes to a smoother overall baking process.
Creaming the Butter and Sugar
Now for the heart of the cookie: the butter and sugar. In a large mixing bowl, or the bowl of a stand mixer fitted with the paddle attachment, cream together 1 cup of unsalted butter, softened to room temperature, and 2 cups of granulated sugar. You want to cream these until the mixture is light and fluffy. This process incorporates air into the butter and sugar, which helps with the texture of the cookies. It can take several minutes, so be patient. Scrape down the sides of the bowl occasionally to make sure all the butter and sugar are incorporated evenly. The mixture should be pale yellow and significantly increased in volume. Don’t rush this step; it’s crucial for tenderness and a good spread. If your butter is too cold, it won’t cream properly, and if it’s too warm, it can become greasy. Room temperature butter is key here, meaning it’s soft enough to indent with your finger but not melted.
Incorporating the Wet Ingredients
Once the butter and sugar are beautifully creamed, it’s time to add the eggs and vanilla. Add the 2 large eggs, one at a time, beating well after each addition. Make sure each egg is fully incorporated before adding the next. Scrape down the sides of the bowl again after adding the eggs to ensure everything is well combined. Next, stir in the 2 teaspoons of vanilla extract. The vanilla adds a lovely aroma and a classic flavor to our butter cookies. Beat until everything is smooth and well blended. At this point, the mixture should look thick and custardy.
Combining Wet and Dry Ingredients
Now, we’ll gradually add the dry ingredients to the wet ingredients. With the mixer on low speed, add the flour mixture in three additions, mixing until just combined after each addition. Be careful not to overmix the dough once the flour is added. Overmixing can develop the gluten in the flour too much, resulting in tough cookies. You want to mix just until you no longer see streaks of dry flour. The dough will become quite thick. Sometimes, the dough can be a bit crumbly at this stage, which is perfectly normal. If it seems extremely dry, you can add a teaspoon of milk or water, but usually, it comes together fine with continued mixing.
Shaping and Chilling the Dough
Once the dough is combined, it’s important to chill it. This dough is quite soft, and chilling helps it firm up, making it much easier to handle and shape. Turn the dough out onto a lightly floured surface and gently bring it together. You can shape the dough into logs about 1.5 to 2 inches in diameter. Wrap these logs tightly in plastic wrap. For best results, chill the dough in the refrigerator for at least 1 hour, or up to 2 days. Chilling allows the fats to solidify, which prevents the cookies from spreading too much during baking and makes them easier to slice neatly. If you’re short on time, a 30-minute freeze can also work, but it will be harder to slice.
Baking the Cookies
When you’re ready to bake, preheat your oven to 350 degrees Fahrenheit (175 degrees Celsius). Line baking sheets with parchment paper to prevent sticking. Take one chilled dough log and unwrap it. Using a sharp knife, slice the log into rounds about 1/4 inch thick. Arrange the cookie slices on the prepared baking sheets, leaving about 1 inch of space between them as they will spread slightly. Place the baking sheets in the preheated oven and bake for 10 to 12 minutes, or until the edges are lightly golden brown. The centers should still look slightly soft; they will continue to set as they cool. Do not overbake them, as they can become hard.
Cooling and Storing
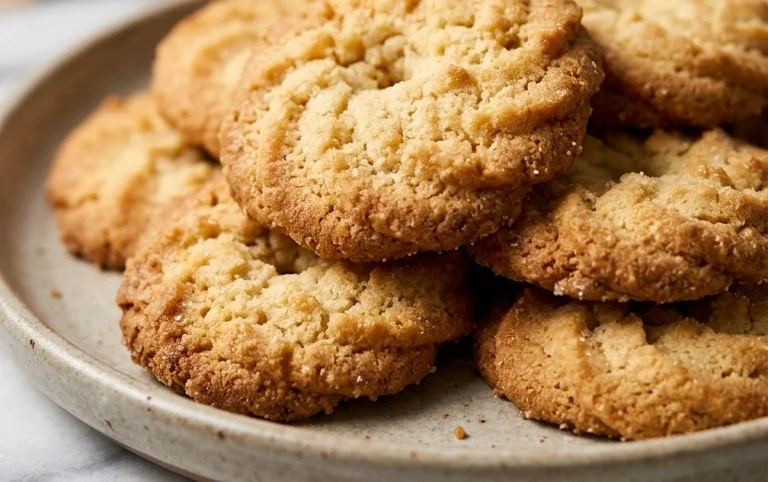
Once baked, let the cookies cool on the baking sheets for about 5 minutes. This allows them to firm up enough to be moved without breaking. Then, carefully transfer the cookies to a wire rack to cool completely. They are wonderfully delicate when warm. Once fully cooled, you can store these easy homemade butter cookies in an airtight container at room temperature for up to a week. They also freeze beautifully, so you can make a big batch and enjoy them for longer. These cookies are delightful on their own, but they also make a lovely base for simple decorations like a light glaze or a sprinkle of colored sugar after baking. Enjoy this simple, satisfying treat!
Conclusion:
There you have it – a straightforward path to creating wonderfully tender and flavorful butter cookies right in your own kitchen. These Easy Homemade Butter Cookies are a delightful reminder that the most satisfying treats often come from the simplest ingredients and methods. The melt-in-your-mouth texture and rich buttery taste are truly addictive, making them a go-to for any occasion, from casual get-togethers to holiday cookie platters. Don’t hesitate to give them a try; you’ll be amazed at how easy it is to achieve professional-quality results.
Serving Suggestions: These cookies are fantastic on their own with a glass of milk or a warm cup of tea. They also pair beautifully with coffee. For a more indulgent treat, consider dipping half of the cooled cookie in melted chocolate or drizzling it with a simple icing.
Variations: Feel free to add a hint of lemon or almond extract along with the vanilla for a flavor twist. You could also roll the dough into logs and chill them before slicing for perfectly uniform rounds, or even press them into decorative molds before baking.
Frequently Asked Questions:
Can I make these cookies ahead of time?
Absolutely. Once completely cooled, store the butter cookies in an airtight container at room temperature for up to 5 days. They often taste even better on the second day as the flavors meld.
My cookies spread too much. What went wrong?
This can happen if your butter was too soft when creaming, or if you overmixed the dough after adding the flour. Ensure your butter is softened but not melted, and mix the dry ingredients in just until combined. Chilling the dough for about 30 minutes before baking can also help prevent excessive spreading.
How do I get that perfect buttery flavor?
Using high-quality unsalted butter is key. Since butter is the star ingredient, its flavor really shines through. Also, make sure you’re not skipping the salt, as it balances the sweetness and enhances the overall butteriness of the cookie.
Easy Homemade Butter Cookies
Classic and simple butter cookies, perfect for any occasion. Crispy on the edges and soft in the center, these are a delight.
Ingredients
-
4 cups All-Purpose Flour
-
1 tsp Baking Powder
-
1/2 tsp Salt
-
1 cup Unsalted Butter, room temperature
-
2 cups Granulated Sugar
-
2 Large Eggs, room temperature
-
2 tsp Vanilla Extract
Instructions
-
Step 1
In a medium bowl, whisk together the flour, baking powder, and salt. Set aside. -
Step 2
In a large bowl, cream together the softened butter and granulated sugar until light and fluffy. -
Step 3
Beat in the eggs one at a time, then stir in the vanilla extract. -
Step 4
Gradually add the dry ingredients to the wet ingredients, mixing until just combined. Do not overmix. -
Step 5
Cover the dough and chill for at least 30 minutes. Preheat oven to 350°F (175°C). Line baking sheets with parchment paper. -
Step 6
Roll dough into 1-inch balls and place on prepared baking sheets, about 2 inches apart. -
Step 7
Bake for 8-10 minutes, or until the edges are lightly golden. Let cool on the baking sheets for a few minutes before transferring to a wire rack to cool completely.
Important Information
Nutrition Facts (Per Serving)
It is important to consider this information as approximate and not to use it as definitive health advice.
Allergy Information
Please check ingredients for potential allergens and consult a health professional if in doubt.


Leave a Comment