
These Cranberry Bars are a delightful treat, perfect for holidays or just because. They have a lovely sweet-tart flavor with a tender, crumbly base and topping. The bright red of the cranberries makes them look as good as they taste, and the simple preparation means you can whip them up without much fuss. I often make a double batch around Thanksgiving and Christmas because they disappear so quickly. The balance of sweetness from the sugar and the natural tang of the cranberries is what makes these bars so irresistible. Ingredients: 1 12 oz package of fresh cranberries 1 cup sugar (for the cranberry filling) 3/4 cup water (for the cranberry filling) 2 cups all-purpose flour (for the crust and topping) 1 cup sugar (for the crust and topping) 2 tsp baking powder 1/2 tsp salt 3/4 cup unsalted butter, softened to room temperature 1 large egg, beaten Making the Cranberry Filling The first step to creating these delicious cranberry bars is to prepare the sweet-tart cranberry filling. This is where the star ingredient, the cranberries, really shines. Cook the Cranberries In a medium saucepan, combine the fresh cranberries, 1 cup of sugar, and 3/4 cup of water. This mixture will seem quite liquidy at first, but don’t worry, it will thicken as it cooks. Place the saucepan over medium heat and bring the mixture to a gentle boil, stirring occasionally to ensure the sugar dissolves and the cranberries begin to soften. Once boiling, reduce the heat to low and let it simmer for about 8-10 minutes, or until the cranberries have popped and the sauce has thickened slightly. You want a jam-like consistency, but it shouldn’t be too stiff. Remove from heat and let it cool completely. This cooling step is important; adding hot filling to the crust will make it soggy. While the filling cools, you can start on the crust and topping.
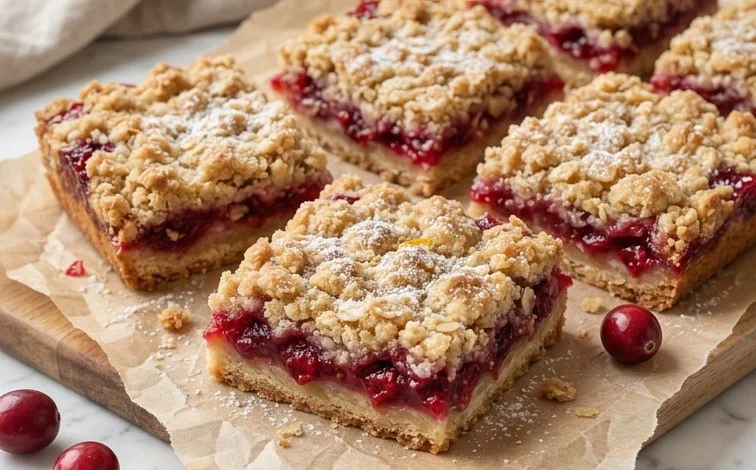
Cranberry Bars
These Cranberry Bars are a delightful treat, perfect for holidays or just because. They have a lovely sweet-tart flavor with a tender, crumbly base and topping. The bright red of the cranberries makes them look as good as they taste, and the simple preparation means you can whip them up without much fuss. I often make a double batch around Thanksgiving and Christmas because they disappear so quickly. The balance of sweetness from the sugar and the natural tang of the cranberries is what makes these bars so irresistible.
Ingredients:
- 1 12 oz package of fresh cranberries
- 1 cup sugar (for the cranberry filling)
- 3/4 cup water (for the cranberry filling)
- 2 cups all-purpose flour (for the crust and topping)
- 1 cup sugar (for the crust and topping)
- 2 tsp baking powder
- 1/2 tsp salt
- 3/4 cup unsalted butter, softened to room temperature
- 1 large egg, beaten
Making the Cranberry Filling
The first step to creating these delicious cranberry bars is to prepare the sweet-tart cranberry filling. This is where the star ingredient, the cranberries, really shines.
Cook the Cranberries
- In a medium saucepan, combine the fresh cranberries, 1 cup of sugar, and 3/4 cup of water. This mixture will seem quite liquidy at first, but don’t worry, it will thicken as it cooks.
- Place the saucepan over medium heat and bring the mixture to a gentle boil, stirring occasionally to ensure the sugar dissolves and the cranberries begin to soften.
- Once boiling, reduce the heat to low and let it simmer for about 10-15 minutes. You’ll notice the cranberries start to burst and release their juices. The mixture should thicken into a jam-like consistency. You’re looking for it to coat the back of a spoon. If it seems too thin, let it simmer for a few more minutes. Be careful not to overcook it, as it will thicken more as it cools.
- Remove the saucepan from the heat and let the cranberry filling cool completely. It’s important that it’s fully cooled before you assemble the bars, otherwise, it can make the crust soggy. You can speed up this process by placing the saucepan in an ice bath or transferring the filling to a bowl and refrigerating it.
Assembling the Cranberry Bars
While the cranberry filling is cooling, you can prepare the buttery crust and topping. This part of the recipe uses a simple press-in dough that’s both easy to make and provides a wonderful texture.
Prepare the Crust and Topping
- Preheat your oven to 350 degrees Fahrenheit (175 degrees Celsius). Lightly grease an 8×8 inch baking pan or line it with parchment paper, leaving an overhang on the sides to help lift the bars out later.
- In a large mixing bowl, whisk together the flour, 1 cup of sugar, baking powder, and salt. Make sure these dry ingredients are well combined so the leavening and salt are distributed evenly.
- Add the softened butter to the dry ingredients. You can use your fingers, a pastry blender, or an electric mixer on low speed to cut the butter into the dry ingredients until the mixture resembles coarse crumbs. You want some small pea-sized pieces of butter to remain; this helps create a tender texture.
- Pour in the beaten egg and mix until just combined. The dough will be crumbly and may not seem like it’s coming together like a traditional cookie dough. That’s exactly what you want for this type of bar.
- Take about two-thirds of the dough mixture and press it evenly into the bottom of the prepared baking pan to form the crust. Use the bottom of a glass or your hands to create a firm, even layer.
Baking the Cranberry Bars
Now it’s time to bring everything together and bake these delicious treats. The baking process will cook the crust and topping to a golden brown and set the cranberry filling.
Bake the Bars
- Spread the cooled cranberry filling evenly over the pressed crust. Make sure to cover the entire surface of the crust.
- Crumble the remaining one-third of the dough mixture evenly over the cranberry filling. You can break off small pieces and scatter them across the top, or gently press them together to form a more cohesive topping. Don’t worry if it’s not perfectly uniform; the rustic look is part of its charm.
- Bake in the preheated oven for 30-35 minutes, or until the topping is golden brown and the filling is bubbly around the edges. Keep an eye on it in the last few minutes to prevent the topping from burning.
- Once baked, remove the pan from the oven and let the bars cool completely in the pan on a wire rack. This is a critical step for them to set properly and for easy cutting. Trying to cut them while they are hot will result in a messy, crumbly situation.
Cooling and Serving
Patience is key here to get clean slices and the best texture. Once cooled, these bars are ready to be enjoyed.
Cool and Cut
- Allow the bars to cool entirely in the pan. This might take a couple of hours, depending on your room temperature. Resist the urge to cut them too soon!
- Once completely cool, use the parchment paper overhang to lift the entire block of bars out of the pan onto a cutting board.
- Use a sharp knife to cut the bars into squares or rectangles. For cleaner cuts, you can wipe the knife blade with a damp cloth between slices.
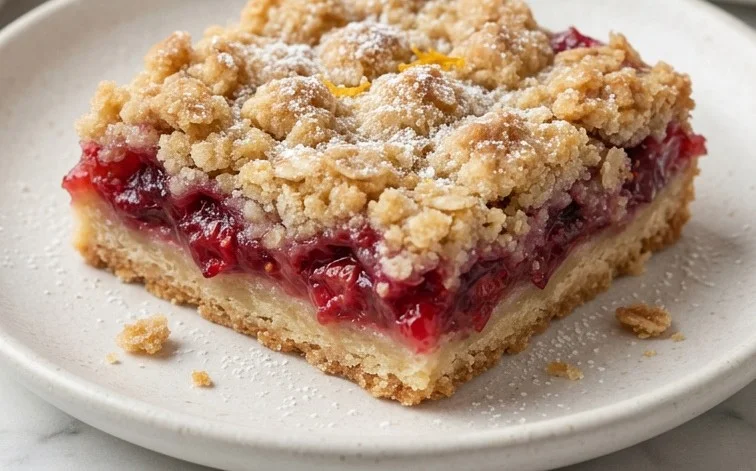
- These cranberry bars are wonderful on their own, or you can serve them with a dusting of powdered sugar, a dollop of whipped cream, or a scoop of vanilla ice cream. They are also fantastic for gifting, perhaps wrapped individually in parchment paper. They store well at room temperature in an airtight container for up to 3 days, or can be refrigerated for longer storage.
Conclusion:
These Cranberry Bars are a wonderfully satisfying bake, offering a beautiful balance of tart fruit and sweet, crumbly goodness. The buttery base and topping complement the vibrant cranberry filling perfectly, making them a go-to dessert for gatherings or a comforting treat with your afternoon tea. They are so simple to make that even beginner bakers can achieve fantastic results. The cheerful red color also makes them a festive addition to any table. Don’t hesitate to try them for your next special occasion or just when you need a little something sweet. Cranberry Bars are sure to become a favorite.
Frequently Asked Questions:
Q1: Can I use frozen cranberries instead of fresh?
Yes, you can absolutely use frozen cranberries. There’s no need to thaw them first. Just add them directly to the saucepan with the sugar and water. You might need to simmer them for a few minutes longer to ensure they soften and pop.
Q2: How should I store leftover Cranberry Bars?
Store leftover bars in an airtight container at room temperature for up to 3 days, or in the refrigerator for up to a week. They tend to become a bit softer at room temperature over time. For longer storage, you can wrap individual bars tightly and freeze them for up to 3 months.
Q3: Can I add nuts or spices to the topping?
Certainly! For added texture and flavor, you can mix in about 1/2 cup of chopped pecans or walnuts into the topping mixture before crumbling it over the filling. A pinch of cinnamon or nutmeg in the crust/topping can also add a warm spice note that pairs well with cranberries.
Cranberry Bars
Sweet and tart cranberry bars with a buttery shortbread-like crust and topping.
Ingredients
-
1 12 oz package of cranberries
-
1 cup sugar
-
3/4 cup water
-
2 cups flour
-
1 cup sugar
-
2 tsp baking powder
-
1/2 tsp salt
-
3/4 cup butter; room temp.
-
1 egg; beaten.
Instructions
-
Step 1
Preheat oven to 350°F (175°C). Grease and flour an 8×8 inch baking pan. -
Step 2
In a saucepan, combine cranberries, 1 cup sugar, and 3/4 cup water. Cook over medium heat, stirring occasionally, until cranberries burst and the mixture thickens (about 10-15 minutes). Remove from heat and let cool. -
Step 3
In a large bowl, whisk together flour, 1 cup sugar, baking powder, and salt. -
Step 4
Cut in the softened butter using a pastry blender or your fingers until the mixture resembles coarse crumbs. -
Step 5
Reserve about 1 1/2 cups of the crumb mixture for the topping. Stir the beaten egg into the remaining crumb mixture until just combined. -
Step 6
Press the dough evenly into the prepared baking pan to form the crust. -
Step 7
Spread the cooled cranberry mixture evenly over the crust. -
Step 8
Sprinkle the reserved crumb mixture evenly over the cranberry layer. -
Step 9
Bake for 30-35 minutes, or until the topping is golden brown and the filling is bubbly. -
Step 10
Let cool completely before cutting into bars.
Important Information
Nutrition Facts (Per Serving)
It is important to consider this information as approximate and not to use it as definitive health advice.
Allergy Information
Please check ingredients for potential allergens and consult a health professional if in doubt.


Leave a Comment