
The aroma of spiced apples and creamy cheesecake is pure autumn comfort. This Apple Cider Cheesecake captures that feeling perfectly. It takes the classic richness of cheesecake and infuses it with the warm, sweet flavors of reduced apple cider, giving it a gentle tang and a hint of spice that you won’t find in a regular cheesecake. What makes this dessert so special is the way the apple cider is concentrated; reducing it intensifies its flavor, making it a deep, caramel-like essence that complements the cream cheese beautifully. It’s like a cozy sweater for your taste buds, ideal for holiday gatherings or just a special weekend treat. The spiced graham cracker crust adds another layer of warmth and texture, making each bite a delightful experience.
The Filling
Now for the cheesecake filling. Make sure your cream cheese, sour cream, and eggs are all at room temperature. This is really important for a smooth, lump-free batter. In a large bowl, beat the 24 ounces of cream cheese with an electric mixer on medium speed until it’s completely smooth, scraping down the sides as needed. Gradually beat in the 3/4 cup of white granulated sugar until well combined and smooth. Add the 1/2 cup of sour cream and 1 tsp of vanilla extract, and mix until just combined. Don’t overmix. Next, add the 4 large eggs, one at a time, mixing on low speed just until each egg is incorporated. Scrape down the sides of the bowl after adding the last egg. Be careful not to overbeat the batter once the eggs are in; this can lead to cracks in the finished cheesecake. Then, gently fold in the 1/2 cup of reduced apple cider. You’ll want to mix this in just until it’s streaked through. Don’t aim for a perfectly uniform color; some streaks are fine and can add visual appeal. Pour this creamy filling over the prepared crust in the springform pan. Smooth the top with a spatula.
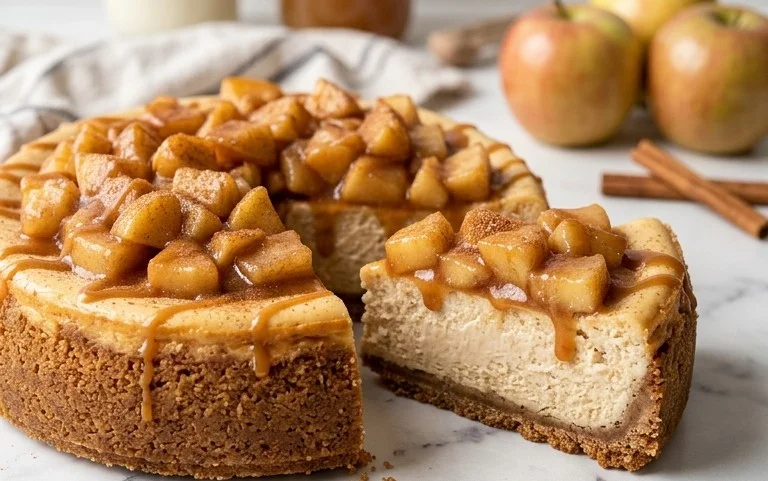
Ingredients:
- 2 1/2 cups Graham cracker crumbs (fine crumbs. 2 sleeves of graham crackers)
- 1/8 cup Brown sugar (packed light or dark)
- 10 TBSP Unsalted butter (melted)
- 2 cups Apple cider (reduced down to 1/2 cup)
- 24 oz Cream cheese (room temperature)
- 3/4 cup White granulated sugar
- 1/2 cup Sour cream (room temperature)
- 1 tsp Pure vanilla extract
- 4 Large eggs (room temperature)
- 1/4 cup Brown sugar (packed light or dark)
- 1/3 cup All-purpose flour
- 1/4 tsp Ground cinnamon
- 1 TBSP Melted butter
- 1 TBSP Apple Cider
- 1 TBSP Unsalted butter (melted)
Crust
We’re going to start with the crust, which gives our cheesecake a nice sturdy base and a hint of sweetness. First, take your 2 sleeves of graham crackers and crush them into fine crumbs. You can do this in a food processor for the quickest and most consistent result, or put them in a sturdy zip-top bag and use a rolling pin to break them down. You want them to be fine, almost like sand. In a medium bowl, combine these 2 1/2 cups of graham cracker crumbs with 1/8 cup of packed brown sugar. The brown sugar adds a subtle caramel note that complements the apple. Now, pour in 10 tablespoons of melted unsalted butter. Stir everything together until all the crumbs are moistened and the mixture holds together when you pinch it. This is your crust mixture. Press this firmly and evenly into the bottom and slightly up the sides of a 9-inch springform pan. A tart tamper works great for this, or you can use the bottom of a flat glass. Make sure it’s compacted well so it doesn’t crumble apart when you slice the cheesecake later. Pop this into the freezer for about 10-15 minutes while we prepare the filling. This helps the crust set up and become nice and firm.
Apple Cider Reduction
The star flavor of this cheesecake is the apple cider, but we need to concentrate its taste. Pour 2 cups of good quality apple cider into a small saucepan. Bring it to a simmer over medium heat, then reduce the heat to low and let it gently bubble away. You want to reduce it down to about 1/2 cup. This process takes some time, likely 15-20 minutes, and it concentrates the apple flavor significantly, making it more intense and less watery. Stir it occasionally to prevent scorching. Once it has reduced to a syrupy consistency, remove it from the heat and let it cool completely. This cooled, reduced apple cider is what will give our cheesecake that authentic, comforting apple cider taste without making the filling too wet.
Cheesecake Filling
Now for the main event: the cheesecake filling! Make sure your 24 ounces of cream cheese, 1/2 cup of sour cream, and 4 large eggs are all at room temperature. This is really important for a smooth, lump-free cheesecake. Cold ingredients will not blend well. In a large bowl, beat the room-temperature cream cheese with an electric mixer on medium speed until it’s completely smooth and creamy, with no lumps. Scrape down the sides and bottom of the bowl often. Add 3/4 cup of white granulated sugar and continue beating until well combined and smooth. Then, stir in the 1/2 cup of room-temperature sour cream and 1 teaspoon of pure vanilla extract. Mix until just incorporated. Next, add the 4 large eggs, one at a time, beating on low speed just until each egg is incorporated before adding the next. Do not overmix at this stage, as overbeating can introduce too much air, which can cause cracks in your cheesecake. Once all the eggs are in, gently fold in the cooled, reduced apple cider. You’ll notice the mixture might look a little bit lighter in color. The final filling should be smooth and thick.
Flour Mixture
In a separate small bowl, whisk together 1/4 cup of packed brown sugar, 1/3 cup of all-purpose flour, and 1/4 teaspoon of ground cinnamon. The flour acts as a binder, helping to stabilize the cheesecake and prevent it from becoming too soft. The cinnamon adds a warm spice note that pairs beautifully with apple. Once this dry mixture is well combined, gently fold it into the cream cheese filling until just combined. Be careful not to overmix. You want to evenly distribute the dry ingredients without developing the gluten in the flour, which can toughen the cheesecake.
Assembly and Baking
- Preheat your oven to 325 degrees Fahrenheit (160 degrees Celsius). Retrieve your springform pan with the chilled crust from the freezer. Gently pour the cheesecake filling over the prepared crust. Tap the pan on the counter a few times to release any large air bubbles.
- Prepare a water bath. This is a crucial step for baking cheesecakes, as it provides gentle, even heat and helps prevent cracking. Wrap the outside of your springform pan securely with heavy-duty aluminum foil, making sure it’s completely sealed to prevent water from seeping in. Place the wrapped springform pan inside a larger baking pan, like a roasting pan. Carefully pour hot water into the larger pan, so it comes about halfway up the sides of the springform pan.
- Carefully place the entire water bath setup into the preheated oven. Bake for 60 to 75 minutes. The edges of the cheesecake should be set, but the center will still be slightly jiggly when you gently shake the pan. This is exactly what you want. Overbaking will lead to a dry, cracked cheesecake.
- Once the baking time is complete, turn off the oven, but leave the cheesecake inside with the oven door cracked open slightly. Let it cool in the oven for another hour. This gradual cooling process further helps prevent cracking. After an hour in the turned-off oven, remove the cheesecake from the water bath, remove the foil, and let it cool completely on a wire rack at room temperature.
- Once the cheesecake is fully cooled, cover it loosely with plastic wrap and refrigerate for at least 6 hours, or preferably overnight. This chilling time is essential for the cheesecake to fully set and for the flavors to meld.
Apple Cider Glaze
For a final touch that enhances the apple flavor and adds a beautiful sheen, we’ll make a simple glaze. In a small saucepan, combine 1 tablespoon of melted butter with 1 tablespoon of apple cider. Heat gently over low heat until just warmed through. Once the cheesecake has chilled sufficiently, carefully remove the sides of the springform pan. Drizzle or brush this warm apple cider glaze over the top of the cheesecake. It will create a lovely, slightly sticky, apple-kissed finish. Slice and serve chilled. This cheesecake is wonderful on its own, or you can serve it with a dollop of whipped cream or a sprinkle of cinnamon.
Conclusion:
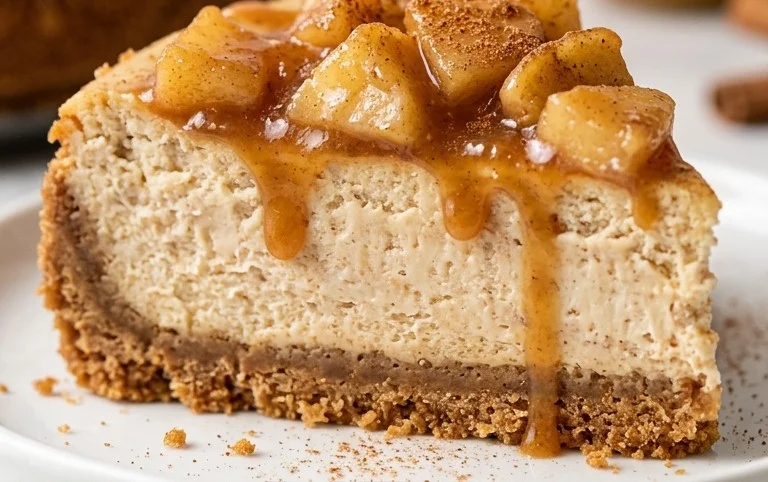
This Apple Cider Cheesecake is a wonderful way to bring the comforting flavors of autumn into your home. The balance of creamy cheesecake with the concentrated sweetness and slight tang of apple cider, all nestled in a spiced graham cracker crust, makes it a standout dessert. It’s not overly complicated, and the resulting flavor is sophisticated yet deeply satisfying. Serve it slightly chilled or at room temperature. A dollop of whipped cream or a drizzle of caramel sauce makes it even more decadent. For a variation, try adding a teaspoon of ground ginger or nutmeg to the filling for an extra spice kick, or swap out half the graham crackers for gingersnaps for a different crust flavor. Baking this cheesecake is an act of love that your friends and family will surely appreciate. Don’t be intimidated by cheesecakes; just follow the steps carefully, especially regarding room temperature ingredients and not overmixing, and you’ll achieve fantastic results.
Frequently Asked Questions
Why did my cheesecake crack?
Cheesecake cracks often happen from overbeating the batter, especially after adding the eggs, which incorporates too much air. Another common cause is baking at too high a temperature or cooling the cheesecake too quickly. Using a water bath during baking can also help maintain consistent moisture and temperature, reducing the risk of cracking. Ensure your oven temperature is accurate and let the cheesecake cool gradually inside the turned-off oven with the door slightly ajar.
Can I make this Apple Cider Cheesecake ahead of time?
Absolutely. Cheesecakes are best made a day in advance. This allows the cheesecake to chill completely and the flavors to meld. Once cooled, cover it tightly with plastic wrap and refrigerate for at least 6 hours, or preferably overnight. It will keep well in the refrigerator for up to 3-4 days.
What does it mean to reduce apple cider?
Reducing apple cider means simmering it in a pot over medium-low heat until a significant amount of the liquid evaporates. This concentrates the apple flavor, making it much more intense and slightly sweeter with a hint of caramelization. You’ll know it’s reduced enough when it thickens to about one-quarter of its original volume and coats the back of a spoon.
Apple Cider Cheesecake
A rich and creamy cheesecake infused with the warm flavors of reduced apple cider, perfect for any occasion.
Ingredients
-
2 1/2 cups Graham cracker crumbs
-
1/8 cup Brown sugar
-
10 tbsp Unsalted butter, melted
-
2 cups Apple cider, reduced down to 1/2 cup
-
24 oz Cream cheese, room temperature
-
3/4 cup White granulated sugar
-
1/2 cup Sour cream, room temperature
-
1 tsp Pure vanilla extract
-
4 Large eggs, room temperature
-
1/4 cup Brown sugar
-
1/3 cup All-purpose flour
-
1/4 tsp Ground cinnamon
-
1 tbsp Melted butter
-
1 tbsp Apple Cider
-
1 tbsp Unsalted butter, melted
Instructions
-
Step 1
Preheat oven to 350°F (175°C). In a medium bowl, combine graham cracker crumbs, 1/8 cup brown sugar, and 10 tablespoons melted butter. Press mixture firmly into the bottom of a 9-inch springform pan. -
Step 2
In a large bowl, beat cream cheese until smooth. Gradually beat in 3/4 cup white granulated sugar until well combined. -
Step 3
Beat in sour cream and vanilla extract. Then, slowly beat in the reduced apple cider until just combined. -
Step 4
Add eggs one at a time, beating on low speed after each addition until just incorporated. In a small bowl, whisk together 1/4 cup brown sugar, flour, and cinnamon. Sprinkle over the cream cheese mixture and gently fold until just combined. -
Step 5
Pour the filling over the prepared crust. In a small saucepan, combine 1 tablespoon melted butter, 1 tablespoon apple cider, and 1 tablespoon unsalted butter. Drizzle this mixture over the top of the cheesecake. -
Step 6
Bake for 60 minutes, or until the edges are set and the center is slightly jiggly. Turn off the oven, leaving the cheesecake inside with the door ajar for 1 hour to cool slowly. Remove from oven and let cool completely on a wire rack before refrigerating.
Important Information
Nutrition Facts (Per Serving)
It is important to consider this information as approximate and not to use it as definitive health advice.
Allergy Information
Please check ingredients for potential allergens and consult a health professional if in doubt.


Leave a Comment