
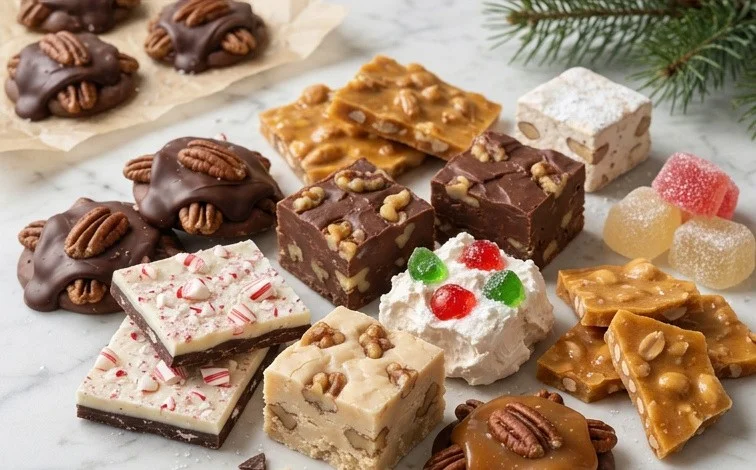
The scent of sugar and spice filling the air signals the start of my favorite season. There’s something magical about hand-making Christmas candies, bringing back cherished memories and creating new ones. This collection of 58 old-fashioned Christmas candies focuses on traditional flavors and textures that have been loved for generations. From creamy fudges to crisp brittle and chewy caramels, these recipes are perfect for gifting, decorating your holiday table, or simply enjoying with a warm cup of tea. We’ll stick to simple ingredients you likely already have in your pantry or can easily find at the store. Making Old-Fashioned Chocolate Fudge is a classic for a reason. It’s rich, creamy, and so satisfying. Prepare your pan: Lightly grease an 8×8 inch baking pan with butter or line it with parchment paper, leaving an overhang on the sides to make lifting the fudge out easier. This step is crucial to prevent sticking. Combine ingredients: In a heavy-bottomed saucepan, combine 2 cups granulated sugar, 1 cup evaporated milk, and 2 tablespoons butter. Stir constantly over medium heat until the butter is melted and everything is combined. Continue cooking without stirring, but swirling the pan occasionally, until the mixture reaches 238°F (114°C) on a candy thermometer. This temperature is key for the right fudge texture. Remove from heat immediately and stir in 1 teaspoon vanilla extract and a pinch of salt. Let it cool undisturbed until it reaches 110°F (43°C). This cooling period is important for the fudge’s structure. Beat the mixture with a wooden spoon or an electric mixer until it loses its gloss and starts to thicken, about 5 to 10 minutes. This is where the magic happens, transforming the liquid into creamy fudge. Pour into the prepared pan and spread evenly. Let it sit at room temperature for at least 4 hours, or preferably overnight, to set completely. Once set, lift the fudge out using the parchment paper overhang and cut into squares. Store fudge in an airtight container at room temperature for up to a week. Old-fashioned Christmas candies are all about nostalgia and simple pleasures.
58 Old-Fashioned Christmas Candies
The scent of sugar and spice filling the air signals the start of my favorite season. There’s something magical about hand-making Christmas candies, bringing back cherished memories and creating new ones. This collection of 58 old-fashioned Christmas candies focuses on traditional flavors and textures that have been loved for generations. From creamy fudges to crisp brittle and chewy caramels, these recipes are perfect for gifting, decorating your holiday table, or simply enjoying with a warm cup of tea. We’ll stick to simple ingredients you likely already have in your pantry or can easily find at the store.
Ingredients:
- Granulated sugar
- Brown sugar
- Corn syrup
- Butter
- Milk
- Heavy cream
- Evaporated milk
- Vanilla extract
- Salt
- Chocolate chips (milk, semi-sweet, dark)
- Nuts (pecans, walnuts, peanuts)
- Powdered sugar
- Shortening
- Water
- Molasses
- Cream of tartar
- Peppermint extract
- Cinnamon
- Ginger
- Nutmeg
- Cloves
- Maraschino cherries
- Coconut flakes
- Marshmallows
- Halal Gelatin
- Food coloring (red, green, yellow)
Making Old-Fashioned Chocolate Fudge
This is a classic for a reason. It’s rich, creamy, and so satisfying.
- Prepare your pan: Lightly grease an 8×8 inch baking pan with butter or line it with parchment paper, leaving an overhang on the sides to make lifting the fudge out easier. This step is crucial to prevent sticking.
- Combine ingredients: In a heavy-bottomed saucepan, combine 2 cups granulated sugar, 1 cup evaporated milk, and 2 tablespoons butter. Stir constantly over medium heat until the sugar is dissolved and the mixture comes to a boil.
- Boil to soft-ball stage: Once boiling, stop stirring. Clip a candy thermometer to the side of the pan, ensuring it doesn’t touch the bottom. Cook the mixture, without stirring, until it reaches 238°F (114°C) on the thermometer. This is the soft-ball stage, and it typically takes about 8-12 minutes. Be patient; this stage is key to the fudge’s texture.
- Cool and add flavor: Remove the saucepan from the heat and let it sit undisturbed for 5 minutes. This allows the temperature to equalize and helps create a smoother fudge. Stir in 1 teaspoon vanilla extract and ½ cup of chocolate chips.
- Beat until creamy: Now, begin stirring the mixture vigorously with a wooden spoon or a sturdy spatula. Continue stirring until the fudge starts to lose its gloss and thickens considerably. You’ll notice it becoming harder to stir. This beating process incorporates air and develops the creamy texture. This can take anywhere from 5 to 10 minutes, depending on how quickly it cools.
- Pour and set: Quickly pour the fudge into your prepared pan and spread it evenly. Let it cool completely at room temperature, which will take about 2-3 hours. Once firm, cut it into 1-inch squares. Store in an airtight container at room temperature for up to a week.
Peanut Brittle Perfection
The sweet crunch of peanut brittle is irresistible.
- Prepare for pouring: Lightly grease a baking sheet with butter or line it with parchment paper. Have 1 ½ cups of roasted peanuts ready.
- Melt sugar and corn syrup: In a large, heavy-bottomed saucepan, combine 2 cups granulated sugar, ½ cup light corn syrup, and 1 cup water. Stir over medium-high heat until the sugar is dissolved.
- Cook to hard-crack stage: Clip a candy thermometer to the side of the pan. Bring the mixture to a boil and cook, stirring occasionally, until it reaches 300°F (150°C), the hard-crack stage. This will take approximately 15-20 minutes. Watch closely as the color will deepen to a rich amber.
- Add peanuts and butter: Once it reaches the correct temperature, quickly stir in 2 tablespoons of butter and 1 teaspoon of vanilla extract. Then, immediately stir in the roasted peanuts, ensuring they are evenly distributed.
- Add baking soda: Remove the pan from the heat and quickly stir in 1 teaspoon of baking soda. The mixture will foam up dramatically. This is normal and creates the airy, brittle texture.
- Pour and spread: Immediately pour the hot mixture onto the prepared baking sheet. Working quickly and carefully (as the candy is extremely hot), spread it out as thinly as possible using a greased spatula or the back of a spoon. If it hardens too quickly, you can gently reheat it for a few seconds.
- Cool and break: Let the brittle cool completely at room temperature until it’s firm and crisp. Once cooled, break it into pieces. Store in an airtight container at room temperature. If it feels sticky, add a small piece of parchment paper between layers.
Chewy Caramel Squares
These soft, buttery caramels melt in your mouth.
- Prepare your pan: Lightly grease an 8×8 inch baking pan.
- Combine sugar and liquids: In a heavy-bottomed saucepan, combine 2 cups granulated sugar, 1 cup corn syrup, 1 cup evaporated milk, and 1 cup heavy cream. Stir over medium heat until the sugar dissolves.
- Cook to firm-ball stage: Clip a candy thermometer to the side of the pan. Bring the mixture to a boil and cook, stirring frequently to prevent scorching, until it reaches 245°F (118°C) on the thermometer. This is the firm-ball stage.
- Add butter and vanilla: Remove from heat and stir in ½ cup of butter and 1 teaspoon of vanilla extract until the butter is melted and incorporated.
- Continue cooking: Return the pan to medium heat and continue to cook, stirring constantly, until the mixture reaches 248°F (120°C). This further cooking develops the chewy texture. This can take an additional 10-15 minutes.
- Pour and cool: Pour the caramel into the prepared pan. Let it cool completely at room temperature for at least 4 hours, or preferably overnight.
- Cut and wrap: Once cooled and firm, lift the caramel out of the pan using the parchment paper overhang. Cut into 1-inch squares using a sharp knife. For individual servings, wrap each caramel in wax paper. Store in an airtight container at room temperature.
Old-Fashioned Divinity
This ethereal candy is light, fluffy, and melts in your mouth.
- Prepare the syrup: In a heavy-bottomed saucepan, combine 2 cups granulated sugar, ½ cup light corn syrup, and ¼ cup water. Stir over medium heat until the sugar is dissolved.
- Boil syrup: Clip a candy thermometer to the side of the pan. Bring the mixture to a boil and cook, without stirring, until it reaches 260°F (127°C) on the thermometer. This is the hard-ball stage.
- Whip egg whites: While the syrup is cooking, beat 2 large egg whites in a clean, dry bowl of a stand mixer until stiff peaks form.
- Combine and beat: Once the syrup reaches 260°F, carefully and slowly drizzle the hot syrup in a thin stream into the whipped egg whites while the mixer is running on medium-high speed. Be sure to pour it down the side of the bowl to avoid cooking the egg whites.
- Add flavor and nuts: Continue beating the mixture until it becomes thick, glossy, and holds its shape, which can take 10-15 minutes. Beat in 1 teaspoon vanilla extract and ½ cup chopped pecans or walnuts, if desired.
- Drop and set: Quickly drop spoonfuls of the divinity onto parchment paper. Allow the divinity to set at room temperature for at least 4 hours until firm. Store in an airtight container.
Spiced Christmas Nougat
A delightful chew with warm spices and a nutty finish.
- Prepare the base: In a heavy saucepan, combine 2 cups granulated sugar, ½ cup corn syrup, and ¼ cup water. Stir over medium heat until the sugar dissolves.
- Cook to temperature: Clip a candy thermometer to the side of the pan. Bring the mixture to a boil and cook until it reaches 250°F (121°C).
- Whip egg whites: In a separate bowl, beat 2 egg whites until stiff peaks form.
- Combine and beat: Slowly drizzle the hot sugar syrup into the whipped egg whites while the mixer is running. Beat until the mixture is very thick and glossy.
- Add flavorings and nuts: Beat in 1 teaspoon vanilla extract, ½ teaspoon ground cinnamon, ¼ teaspoon ground nutmeg, and ½ cup chopped almonds or pistachios.
- Pour and set: Spread the nougat into a greased 8×8 inch pan lined with parchment paper. Press it down firmly. Allow to cool completely at room temperature for several hours.
- Cut and store: Once firm, cut into squares. Wrap individually in wax paper for best results and store in an airtight container.
Exploring these old-fashioned Christmas candies is a sweet journey back in time. Each recipe, when made with care and attention, offers a taste of tradition and a generous dose of holiday cheer. Enjoy the process, share the joy, and savor the delicious results!
Conclusion:
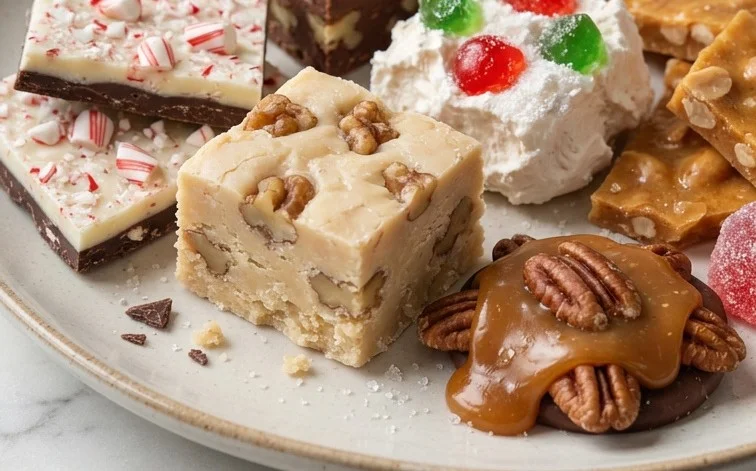
Making these 58 old-fashioned Christmas candies is a rewarding way to embrace the holiday spirit. They bring a sense of tradition and homemade warmth to your celebrations. The joy of sharing these treats, whether given as gifts or enjoyed around a festive table, is immense. From the smooth, melt-in-your-mouth fudge to the satisfying crunch of brittle, there’s a candy here for everyone. Don’t be afraid to get a little flour on your apron; these recipes are designed for home cooks, and the process is part of the fun. Consider adding a few drops of food coloring to your fudge for a festive touch or experimenting with different nut combinations. For variations, try adding chopped candied fruit to the fruitcake cookies or substituting a different extract like almond in the caramels. These candies also store beautifully, making them perfect for making ahead of time. Package them in decorative tins or cellophane bags for easy gifting.
Frequently Asked Questions:
Q: How do I get my fudge to be smooth and not grainy?
A: Ensure you are using a candy thermometer and cooking the sugar mixture to the correct temperature (238°F or 114°C for standard fudge). Also, allow the mixture to cool undisturbed to 110°F (43°C) before beating. Over-stirring during the initial cooking can also contribute to graininess. Proper cooling and controlled beating are key to achieving a smooth texture in your old-fashioned Christmas candies.
Q: Can I make these candies ahead of time?
A: Many of these old-fashioned Christmas candies can be made several days or even a week or two in advance, depending on the type. Hard candies and fudge tend to store well. Candies with fresh fruit or cream fillings might have a shorter shelf life. Store them in airtight containers in a cool, dry place to maintain their freshness.
Q: What if I don’t have a candy thermometer?
A: While a candy thermometer is highly recommended for accuracy, you can use the ‘cold water test’ for some recipes. For fudge, when you drop a bit of the mixture into cold water, it should form a soft ball. However, for precise results with recipes like brittle or caramels, a thermometer is best for ensuring the correct sugar stages are reached.
58 Old-Fashioned Christmas Candies
A delightful collection of 58 classic Christmas candy recipes for a nostalgic holiday season.
Ingredients
-
Sugar
-
Butter
-
Corn Syrup
-
Evaporated Milk
-
Chocolate Chips
-
Peanut Butter
-
Vanilla Extract
-
Powdered Sugar
-
Cream Cheese
-
Nuts
-
Marshmallows
Instructions
-
Step 1
Prepare all necessary ingredients and equipment according to individual recipe requirements. -
Step 2
Follow the specific instructions for each of the 58 candy recipes, paying attention to temperatures and cooking times. -
Step 3
Stir and mix ingredients as directed for each confection. -
Step 4
Shape or pour the candies into their desired forms, such as molds or flat surfaces. -
Step 5
Allow candies to cool and set completely before storing or serving. -
Step 6
Decorate or finish candies as per individual recipe instructions for the final presentation.
Important Information
Nutrition Facts (Per Serving)
It is important to consider this information as approximate and not to use it as definitive health advice.
Allergy Information
Please check ingredients for potential allergens and consult a health professional if in doubt.

Leave a Comment