
No-Bake Chocolate Peppermint Squares are a wonderful treat, especially when you need something festive without turning on the oven. They have a rich chocolatey base with a delightful hint of peppermint, all topped with a creamy, airy layer. They remind me of the classic peppermint bark, but in an easier, no-bake format that’s perfect for making ahead of time. The texture is just fantastic – a firm, cookie-like crust, a smooth, creamy filling, and a light, fluffy topping. They come together quite quickly, making them ideal for last-minute gatherings or just a sweet craving. Whether you’re decorating for holidays or simply satisfying a sweet tooth, these squares deliver on flavor and ease. The combination of cool peppermint and deep chocolate is always a winner, and the fact that you don’t need to heat up your kitchen is a huge bonus during busy seasons. Get ready to impress your friends and family with this simple yet elegant dessert.
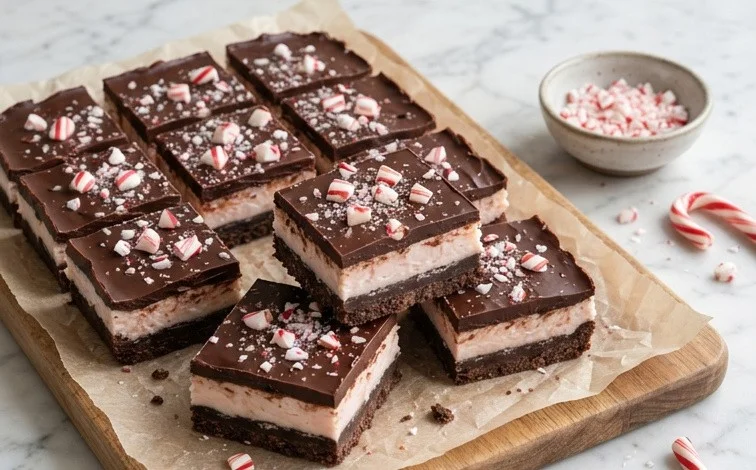
No-Bake Chocolate Peppermint Squares
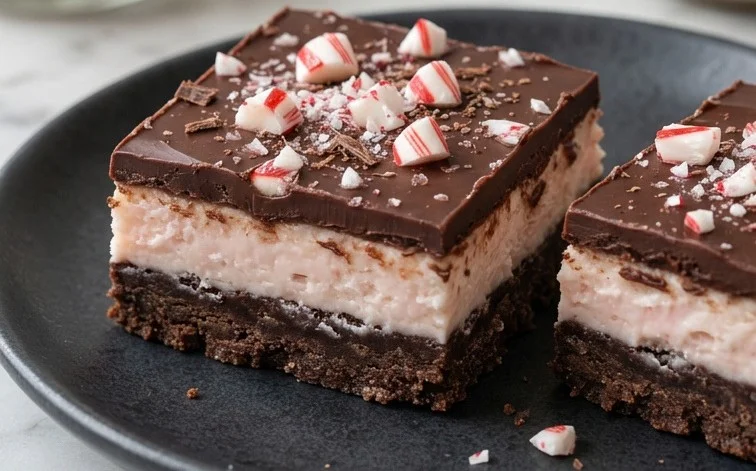
These No-Bake Chocolate Peppermint Squares are a wonderful treat, especially when you need something festive without turning on the oven. They have a rich chocolatey base with a delightful hint of peppermint, all topped with a creamy, airy layer. They remind me of the classic peppermint bark, but in an easier, no-bake format that’s perfect for making ahead of time. The texture is just fantastic – a firm, cookie-like crust, a smooth, creamy filling, and a light, fluffy topping. They come together quite quickly, making them ideal for last-minute gatherings or just a sweet craving.
Ingredients:
- 1 1/2 cups vanilla wafer crumbs
- 1/4 cup 1/2 stick unsalted butter
- 2 tbs sugar
- 8 oz cream cheese (softened)
- 1/2 cup finely crushed peppermint candy cane -OR- starlight mints
- 2 tbs milk
- 1/3 cup sugar
- 1 1/4 cup whipped topping
- 1 pkg 4-serving size instant chocolate pudding
- 1 3/4 cups milk
- 8 oz 1 tub whipped topping
- 1/4 cup coarsely chopped peppermint candy cane
Making the Base
First, we need to create a sturdy and flavorful base for our squares. In a medium bowl, combine the vanilla wafer crumbs and the softened unsalted butter. The butter should be melted so it coats the crumbs evenly, which helps them stick together. Add the 2 tablespoons of sugar to this mixture. This sugar not only adds a touch of sweetness but also helps the base firm up nicely. Stir everything together until the crumbs are thoroughly moistened and look like wet sand. You can do this with a fork or your hands. Press this mixture firmly into the bottom of an 8×8 inch baking dish. Using the back of a spoon or the bottom of a small glass can help you get an even, compact layer. This firm base is essential to prevent the finished squares from crumbling apart when you cut them. Ensure you press it all the way to the edges for a clean finish.
Preparing the Creamy Filling
Now, let’s move on to the luscious filling. In a separate large bowl, beat the softened cream cheese until it’s smooth and creamy. This step is important to avoid any lumps in your filling. Add the finely crushed peppermint candy cane or starlight mints to the cream cheese. The fine crush ensures the peppermint flavor is distributed evenly throughout the filling. Next, stir in the 2 tablespoons of milk and the 1/3 cup of sugar. Mix well until everything is combined. Finally, gently fold in the 1 1/4 cups of whipped topping. You want to fold it in carefully to keep the mixture light and airy. Avoid overmixing at this stage; you’re aiming for a smooth, creamy, and slightly fluffy filling. Spread this delicious mixture evenly over the prepared vanilla wafer base in the baking dish. Make sure to get it right to the edges of the crust.
Creating the Chocolate Pudding Layer
This layer brings the classic chocolate flavor to our no-bake creation. In a medium bowl, whisk together the contents of the 4-serving size instant chocolate pudding package with the 1 3/4 cups of milk. It’s important to use instant pudding here, as it sets up quickly without needing to be cooked. Whisk vigorously for about 2 minutes, or until the pudding begins to thicken. Don’t use too much milk, or the pudding layer might end up too soft. Once the pudding has thickened, spoon it carefully over the cream cheese and peppermint layer. Spread it out gently with a spatula to cover the entire surface evenly. This step requires a little finesse to avoid disturbing the layer beneath it, so take your time and be gentle.
Adding the Whipped Topping and Peppermint Crunch
For the final decorative and flavorful touch, we add more whipped topping and a sprinkle of peppermint. Take the remaining 8 ounces of whipped topping and spread it evenly over the chocolate pudding layer. Again, use a spatula to create a smooth, even surface. This topping provides a light and creamy contrast to the denser layers below. Now for the best part – the extra peppermint! Sprinkle the coarsely chopped peppermint candy cane over the top of the whipped topping. The coarser pieces will provide a delightful crunch and a more intense burst of peppermint flavor with every bite. This also adds a beautiful visual appeal, making the squares look extra festive.
Chilling and Serving
Once everything is assembled, cover the baking dish tightly with plastic wrap or a lid. It’s essential to chill these squares thoroughly to allow all the layers to set properly. Place the dish in the refrigerator for at least 4 hours, but overnight is even better for the best texture and firmness. This chilling time allows the cream cheese to firm up, the pudding to set completely, and the flavors to meld together. When you’re ready to serve, use a sharp knife to cut the chilled squares into individual portions. For cleaner cuts, you can dip your knife in hot water and wipe it dry between each cut. These squares are best served cold and can be stored in an airtight container in the refrigerator for up to 3 days. Enjoy this easy, no-bake treat!
Conclusion:
These No-Bake Chocolate Peppermint Squares really are a fantastic dessert, offering that classic chocolate and peppermint flavor without any fuss. The creamy layers and crumbly base create a wonderful contrast in textures that everyone enjoys. They are so simple to make, perfect for busy schedules, and always a hit at parties or family gatherings. Because they don’t require baking, you can prepare them a day or two in advance, making holiday entertaining much less stressful. Consider adding a drizzle of melted dark chocolate over the top for an extra touch of indulgence, or even some finely chopped candy canes for added crunch and visual appeal before serving. They store well in the refrigerator, keeping them fresh and ready to be enjoyed. Give these No-Bake Chocolate Peppermint Squares a try; you’ll be amazed at how easy and satisfying they are to make!
Can I make these ahead of time?
Absolutely! These squares are best made at least a few hours or even a day in advance to allow the layers to set properly. Store them in an airtight container in the refrigerator.
Can I substitute the vanilla wafers?
Yes, you can use graham cracker crumbs or chocolate wafer crumbs as a substitute for vanilla wafers in the base. Adjust the sugar slightly if needed depending on the sweetness of your chosen crumbs.
How do I store leftovers?
Leftover No-Bake Chocolate Peppermint Squares should be stored in an airtight container in the refrigerator. They will keep well for up to 4-5 days.
No-Bake Chocolate Peppermint Squares
A delightful no-bake dessert featuring layers of chocolate, peppermint, and a creamy filling, perfect for the holidays or any time.
Ingredients
-
1 1/2 cups vanilla wafer crumbs
-
1/4 cup unsalted butter, melted
-
2 tbs sugar
-
8 oz cream cheese, softened
-
1/2 cup finely crushed peppermint candy cane
-
2 tbs milk
-
1/3 cup sugar
-
1 1/4 cup whipped topping
-
1 pkg 4-serving size instant chocolate pudding
-
1 3/4 cups milk
-
8 oz 1 tub whipped topping
-
1/4 cup coarsely chopped peppermint candy cane
Instructions
-
Step 1
In a small bowl, combine vanilla wafer crumbs, melted butter, and 2 tablespoons sugar. Press firmly into the bottom of an 8×8 inch baking dish. -
Step 2
In a medium bowl, beat softened cream cheese until smooth. Gradually beat in 1/2 cup crushed peppermint candy cane, 2 tablespoons milk, 1/3 cup sugar, and 1 1/4 cups whipped topping until well combined. -
Step 3
In a separate bowl, whisk together instant chocolate pudding and 1 3/4 cups milk until thickened. Fold in the remaining 8 oz whipped topping. -
Step 4
Spread the cream cheese mixture evenly over the crust. Then, carefully spread the chocolate pudding mixture over the cream cheese layer. -
Step 5
Sprinkle the top with 1/4 cup coarsely chopped peppermint candy cane. Refrigerate for at least 2 hours, or until firm.
Important Information
Nutrition Facts (Per Serving)
It is important to consider this information as approximate and not to use it as definitive health advice.
Allergy Information
Please check ingredients for potential allergens and consult a health professional if in doubt.


Leave a Comment