
Traditional Puerto Rican Coquito is a creamy, spiced coconut-based drink that’s a holiday staple. This rich, milky concoction is more than just a beverage; it’s a symbol of celebration and togetherness, especially during the festive season in Puerto Rico. The smooth texture and warm spices are incredibly comforting, making it a beloved treat. Making it at home is straightforward and yields a delicious result that’s perfect for sharing with family and friends. This recipe focuses on the classic, non-alcoholic version, which is just as delightful and can be enjoyed by everyone. Its signature thick and creamy consistency comes from the careful combination of various milks and creams, creating a luscious base that’s truly irresistible. We’ll guide you through each step to ensure your coquito turns out perfectly, just like Abuela used to make.
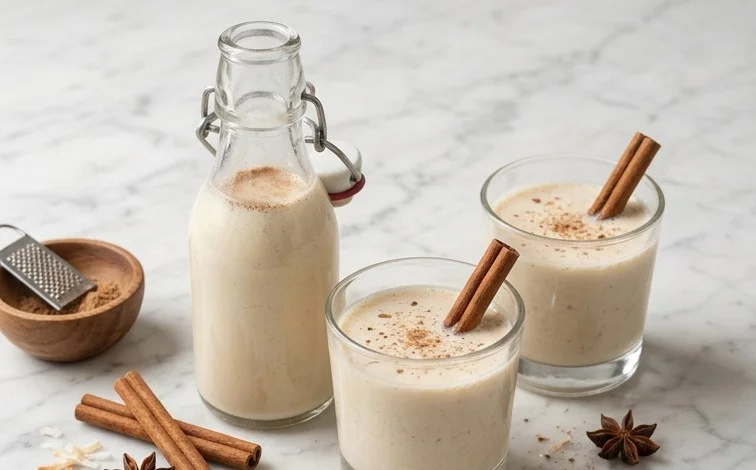
Ingredients:
- 13.5 ounces coconut milk (1 can)
- 13.2 ounces cream of coconut (1 can)
- 12 ounces evaporated milk (1 can)
- 7 ounces sweetened condensed milk (about half of a standard can)
- 1 teaspoon vanilla extract
- 1 1/2 teaspoon ground cinnamon
- 1/2 teaspoon ground nutmeg
- 1 cup white apple juice (Don Q) (or to taste)
- Cinnamon sticks for garnish (optional)
Making Traditional Puerto Rican Coquito
Coquito is more than just a drink; it’s a symbol of celebration and togetherness, especially during the holidays in Puerto Rico. The creamy texture and warm spices are incredibly comforting. Making it at home is straightforward and yields a delicious result that’s perfect for sharing. This recipe focuses on the classic, non-alcoholic version, which is just as delightful and can be enjoyed by everyone.
Step-by-Step Instructions
1. Combining the Milks
Start by gathering all your canned goods. You’ll need coconut milk, cream of coconut, evaporated milk, and sweetened condensed milk. Open the cans and pour them into a large bowl or directly into your blender. It’s important to get all the goodness out of each can; a spatula can help scrape the sides and bottom to ensure you don’t waste any of that rich flavor. The combination of these milks forms the luscious base of the coquito, giving it that signature thick and creamy consistency. Make sure your cream of coconut is well-stirred if it has separated; this typically happens with some brands.
2. Adding the Spices and Extract
Next, add the flavorings that make coquito so distinctive. Measure out your vanilla extract, ground cinnamon, and ground nutmeg. Vanilla extract adds a subtle sweetness and depth, while cinnamon and nutmeg provide that warm, aromatic spice profile that is so characteristic of this festive drink. For the best flavor, use freshly ground nutmeg if possible, as its aroma is much more potent. However, pre-ground nutmeg is perfectly fine and convenient. Sprinkle these directly into the milk mixture.
3. Incorporating the Apple Juice
Now, it’s time to add the liquid that will help adjust the consistency and add a touch of brightness. Pour in the 1 cup of white apple juice. The apple juice is a key ingredient in this non-alcoholic version, providing a bit of sweetness and a thinning agent to balance the richness of the milks. If you prefer a thicker coquito, you can start with a little less juice and add more later, tasting as you go. Some people also enjoy using a clear sparkling juice for a slight effervescence, though traditional recipes often stick to still juices like apple or even a simple water.
4. Blending to Perfection
This is where everything comes together. If you’re using a blender, pour the entire mixture from your bowl into the blender jar. Blend on high speed for about 1 to 2 minutes. You’re looking for a completely smooth and homogenous mixture. You should see no streaks of spices or separated milk. If you don’t have a blender, you can achieve a similar result by whisking very vigorously in a large bowl for several minutes. Ensure all the ingredients are thoroughly combined. A blender is highly recommended for the smoothest texture.
5. Chilling and Serving
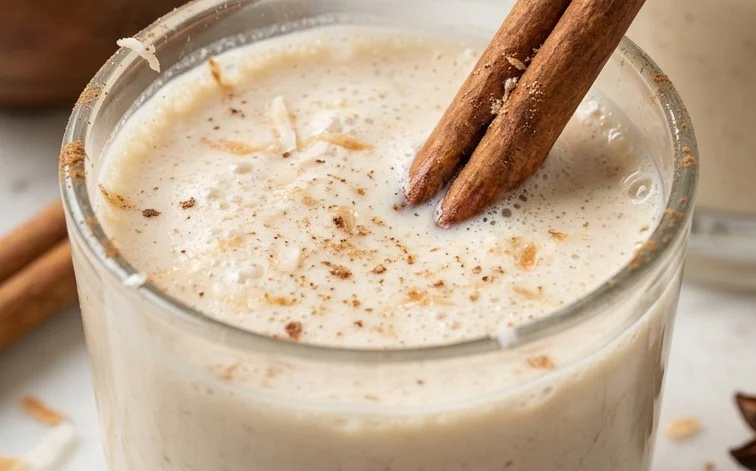
Once blended, the coquito needs time to chill and allow the flavors to meld. Pour the mixture into airtight bottles or jars. We usually store ours in repurposed non-alcoholic liquor bottles or nice glass jars with tight-fitting lids. Refrigerate for at least 4 hours, but overnight is even better. The longer it chills, the richer the flavor will become. When you’re ready to serve, give the bottle a good shake before pouring. Coquito is traditionally served cold. Pour it into small glasses. For an extra touch, you can garnish each glass with a sprinkle of ground cinnamon or a cinnamon stick. Enjoy this delightful, creamy beverage as a special treat!
Storage and Variations
Store leftover coquito in the refrigerator for up to a week. The flavors will continue to develop over time. If the coquito separates slightly in the fridge (which is normal due to the natural fats in coconut milk), just give it a good shake before serving. While this recipe is delicious on its own, you can experiment with additions like a pinch of ground cloves or a tiny amount of almond extract for a different aromatic profile. The amount of apple juice can also be adjusted to your preference for thickness and sweetness. Some people like it thicker, almost like a pudding, while others prefer it more drinkable. This recipe provides a good balance that works well for most people. The key is always to taste and adjust to your liking. Remember to use good quality ingredients; the better the coconut milk and cream of coconut, the richer your coquito will be.
Conclusion:
Making traditional Puerto Rican Coquito at home is a rewarding experience that brings the spirit of the holidays right into your kitchen. The satisfyingly thick and creamy texture, combined with the gentle warmth of cinnamon and nutmeg, makes this non-alcoholic beverage a joy to prepare and share. It’s a wonderful way to bring a taste of Puerto Rican tradition to your gatherings, no matter the occasion. Serve it chilled in small glasses for a delightful treat after a meal, or simply enjoy it on a cozy evening. Remember, the key to its signature consistency is the careful layering and blending of the different milks and creams. Don’t be afraid to adjust the spices to your personal preference. This coquito is truly a celebration in a glass.
Frequently Asked Questions:
Can I make coquito ahead of time?
Absolutely. Coquito can be made up to 3 days in advance and stored in an airtight container in the refrigerator. The flavors often meld and deepen overnight, making it even more delicious. Just give it a good shake before serving.
How should I store leftover coquito?
Store any leftover coquito in a sealed bottle or container in the refrigerator. It will keep well for about 3 to 5 days. Ensure the container is tightly closed to maintain its freshness and creamy texture.
Can I add non-alcoholic alternative to this recipe?
This recipe is specifically designed to be a delicious non-alcoholic version for everyone to enjoy. If you wish to add non-alcoholic alternative, a common addition in some variations is white apple juice, added after blending. However, our focus here is on the pure, traditional flavors that are delightful on their own.
Traditional Puerto Rican Coquito
A creamy and festive coconut-based holiday beverage, perfect for celebrations.
Ingredients
-
13.5 ounces coconut milk ((1 can))
-
13.2 ounces cream of coconut ((1 can))
-
12 ounces evaporated milk ((1 can))
-
7 ounces sweetened condensed milk ((1/2 of a can))
-
1 teaspoon vanilla extract
-
1 1/2 teaspoon ground cinnamon
-
1/2 teaspoon ground nutmeg
-
1 cup white apple juice (Don Q) (or to taste)
Instructions
-
Step 1
Combine coconut milk, cream of coconut, evaporated milk, and sweetened condensed milk in a blender. -
Step 2
Add vanilla extract, ground cinnamon, and ground nutmeg to the blender. -
Step 3
Blend all ingredients until smooth and well combined. -
Step 4
Gradually add white apple juice, blending until desired consistency and sweetness are reached. -
Step 5
Pour the coquito into a pitcher or bottles, cover, and refrigerate for at least 2 hours to allow flavors to meld. -
Step 6
Serve chilled. Garnish with cinnamon sticks if desired.
Important Information
Nutrition Facts (Per Serving)
It is important to consider this information as approximate and not to use it as definitive health advice.
Allergy Information
Please check ingredients for potential allergens and consult a health professional if in doubt.

Leave a Comment