
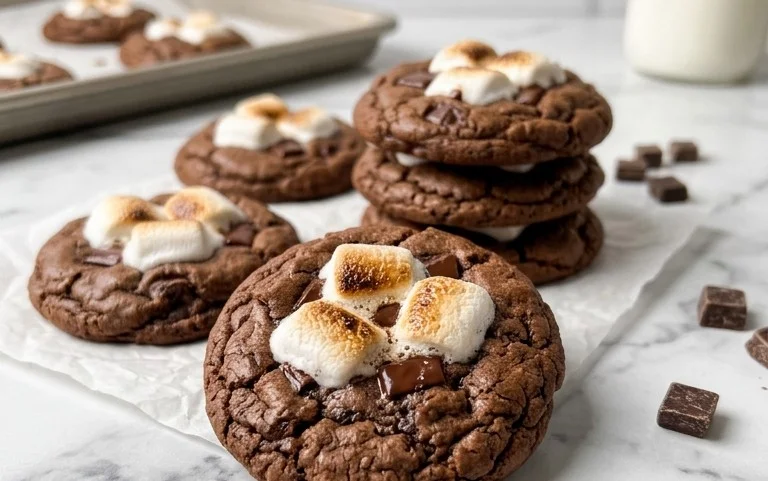
Hot Chocolate Cookies are pure comfort in cookie form. They taste just like a warm mug of hot cocoa, but with a delightful chewy texture. Imagine a rich, fudgy cookie that melts in your mouth, packed with deep chocolate flavor. The magic behind these treats comes from a combination of both powdered hot cocoa mix and unsweetened cocoa powder, creating an intense chocolate experience. We add mini marshmallows and extra chocolate chips right into the dough, making every bite a chocolatey surprise. These are fantastic for a cozy afternoon treat, a holiday bake, or whenever you need a little chocolate pick-me-up. They come together surprisingly quickly, making them perfect for last-minute cravings or when you want to impress friends and family with minimal fuss. The smell alone when they are baking is incredible!
Hot Chocolate Cookies
These cookies taste exactly like a warm mug of hot chocolate, but in cookie form. They’re soft, fudgy, and loaded with chocolatey goodness. I love making these on a chilly afternoon, and they disappear in minutes. The secret to their intense chocolate flavor is using both powdered hot cocoa mix and unsweetened cocoa powder. And of course, the marshmallows and chocolate chips make them extra special.
Ingredients:
- 1/2 cup butter (softened)
- 1/4 cup granulated sugar
- 1/4 cup packed brown sugar
- 1 large egg
- 2 tablespoons milk
- 1 teaspoon pure vanilla extract
- 1 1/8 cups all-purpose flour (which is 1 cup plus 2 tablespoons)
- 1/3 cup powdered hot cocoa mix (the kind you’d use to make a drink)
- 1/3 cup unsweetened cocoa powder (use a good quality one for the best flavor)*
- 1/2 teaspoon baking soda
- 1/4 teaspoon salt
- 1/2 cup miniature marshmallow bits (plus a few extra for topping the cookies before baking)
- 1/2 cup semi-sweet chocolate chips (plus a few extra for topping the cookies before baking)
Instructions
Creaming the Butter and Sugars
Start by preheating your oven to 350 degrees Fahrenheit (175 degrees Celsius). Line baking sheets with parchment paper. This makes cleanup a breeze and prevents the cookies from sticking. In a large bowl, cream together the softened butter, granulated sugar, and packed brown sugar. Use an electric mixer on medium speed for about 2-3 minutes until the mixture is light and fluffy. Scrape down the sides of the bowl with a spatula a couple of times to make sure everything is incorporated evenly. This creaming process is important because it incorporates air into the dough, which helps the cookies spread and become tender.
Adding Wet Ingredients and Dry Ingredients
Next, beat in the egg until it’s well combined. Then, add the milk and vanilla extract. Mix until just combined. In a separate medium bowl, whisk together the flour, powdered hot cocoa mix, unsweetened cocoa powder, baking soda, and salt. Whisking the dry ingredients together ensures that the baking soda and salt are evenly distributed throughout the flour, which leads to consistent rising and flavor in your cookies. If you don’t whisk them, you might end up with pockets of leavening or salt.
Combining Wet and Dry Ingredients
Gradually add the dry ingredients to the wet ingredients. Mix on low speed until just combined. Be careful not to overmix the dough at this stage. Overmixing can develop the gluten in the flour too much, resulting in tougher cookies. Stop mixing as soon as you no longer see streaks of dry flour. The dough will be quite soft and sticky, which is exactly what we want for a fudgy cookie.
Incorporating the Chocolate Chips and Marshmallows
Now for the best part: folding in the chocolate chips and marshmallow bits. Gently stir them into the dough with a spatula until they are evenly distributed. Make sure to reserve a few extra chocolate chips and marshmallow bits to press onto the tops of the cookies before they go into the oven. This gives them a beautiful, chocolatey, marshmallowy finish and makes them look extra appealing.
Shaping and Baking the Cookies
Drop rounded tablespoons of dough onto the prepared baking sheets, leaving about 2 inches between each cookie to allow for spreading. If you want the extra chocolate chips and marshmallows on top to be visible after baking, press a few onto the surface of each dough ball. Bake for 9-12 minutes, or until the edges are set and the centers look slightly underbaked. They will continue to cook on the baking sheet after you remove them from the oven, so pulling them out when they still look a little soft in the middle is key to a chewy texture.
Cooling and Enjoying
Let the cookies cool on the baking sheets for 5-10 minutes before transferring them to a wire rack to cool completely. This allows them to firm up enough so they don’t fall apart. These cookies are best enjoyed warm, perhaps with an actual mug of hot chocolate. They also store well in an airtight container at room temperature for a few days. If you want to make them even more decadent, you can drizzle them with a little melted chocolate or some melted white chocolate.
*Note on Unsweetened Cocoa Powder: Using unsweetened cocoa powder is important for controlling the sweetness of the cookies. It provides a deep, rich chocolate flavor. If you are unable to find unsweetened cocoa powder, you can use Dutch-processed cocoa powder, which has a milder flavor and a darker color, but unsweetened is preferred for this recipe’s balance.
Conclusion:
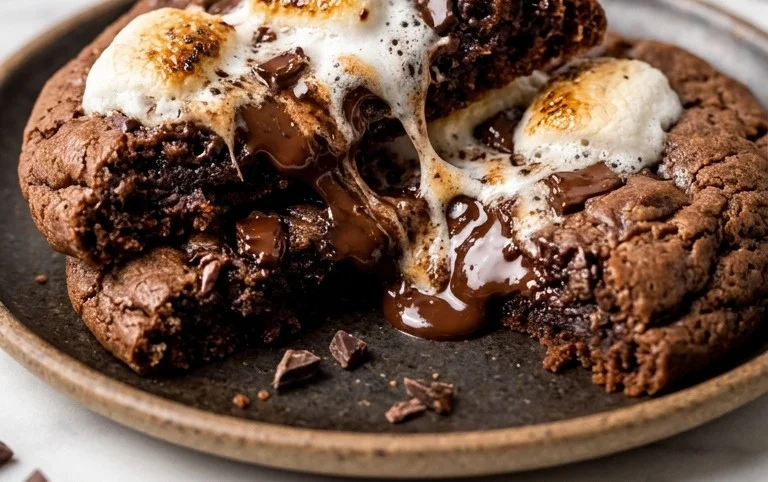
These Hot Chocolate Cookies truly capture the essence of a warm mug of cocoa in a wonderfully chewy cookie. The double dose of chocolate from cocoa powder and mix, combined with melty marshmallows and chocolate chips, makes them an irresistible treat. They are perfect for sharing with family, bringing to a potluck, or simply enjoying with a cold glass of milk or another hot chocolate. For a twist, you could add a pinch of cinnamon to the dough for a spicy mocha flavor, or even a swirl of peppermint extract for a mint-chocolate experience. They also store well, staying soft in an airtight container for several days, though they rarely last that long! Give these Hot Chocolate Cookies a try; you won’t be disappointed by their rich, comforting flavor.
Can I make these cookies ahead of time?
Yes, the dough can be refrigerated for up to 3 days before baking. Shape into balls and bake as directed, adding a couple of extra minutes to the baking time if needed.
How should I store these cookies?
Store the cooled cookies in an airtight container at room temperature for up to 5 days. They tend to stay soft and fudgy this way.
What kind of cocoa powder is best?
Using a good quality unsweetened cocoa powder will give you the best chocolate flavor. Dutch-processed cocoa powder will yield a darker color and a smoother flavor profile, while natural unsweetened cocoa powder is also a great option.
Hot Chocolate Cookies
Indulge in the rich, comforting flavors of hot chocolate with these decadent cookies, packed with chocolate chips and marshmallows.
Ingredients
-
1/2 cup butter, softened
-
1/4 cup sugar
-
1/4 cup brown sugar
-
1 egg
-
2 tablespoons milk
-
1 teaspoon vanilla extract
-
1 1/8 cups all-purpose flour
-
1/3 cup powdered hot cocoa mix
-
1/3 cup unsweetened cocoa powder
-
1/2 teaspoon baking soda
-
1/4 teaspoon salt
-
1/2 cup mini marshmallows
-
1/2 cup semi-sweet chocolate chips
Instructions
-
Step 1
Preheat oven to 350°F (175°C) and line baking sheets with parchment paper. -
Step 2
In a large bowl, cream together softened butter, sugar, and brown sugar until light and fluffy. -
Step 3
Beat in the egg, milk, and vanilla extract until well combined. -
Step 4
In a separate bowl, whisk together the flour, powdered hot cocoa mix, unsweetened cocoa powder, baking soda, and salt. -
Step 5
Gradually add the dry ingredients to the wet ingredients, mixing until just combined. Do not overmix. -
Step 6
Stir in the mini marshmallows and semi-sweet chocolate chips. -
Step 7
Drop rounded tablespoons of dough onto the prepared baking sheets, spacing them about 2 inches apart. Press a few extra marshmallow bits and chocolate chips onto the tops if desired. -
Step 8
Bake for 9-12 minutes, or until the edges are set and the centers are still slightly soft. -
Step 9
Let the cookies cool on the baking sheets for a few minutes before transferring them to a wire rack to cool completely.
Important Information
Nutrition Facts (Per Serving)
It is important to consider this information as approximate and not to use it as definitive health advice.
Allergy Information
Please check ingredients for potential allergens and consult a health professional if in doubt.


Leave a Comment