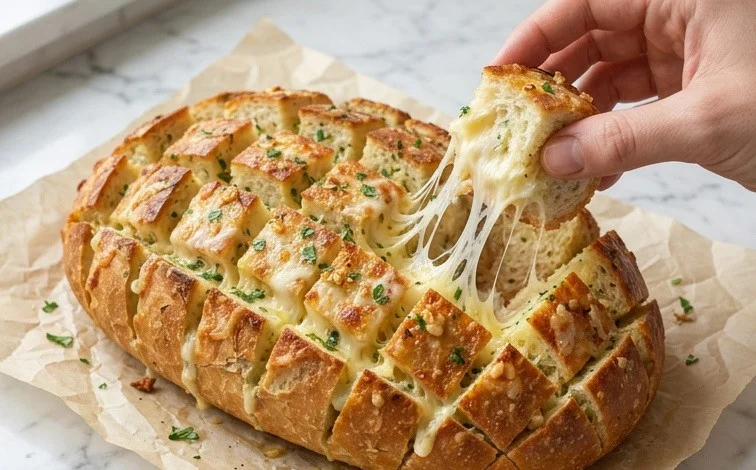
Cheesy Pull-Apart Garlic Bread is the kind of bread that makes people gather around the table. It’s that warm, fragrant loaf, baked to golden perfection, with strings of melted cheese that stretch with every pull. I love making this for casual dinners or game nights because everyone can just grab a piece. It’s incredibly satisfying to watch it disappear. The magic happens when a buttery, garlicky mixture with fresh herbs seeps into all those cuts we make in the bread. Then, piles of mozzarella, cheddar, and parmesan cheese get tucked in, melting into gooey deliciousness in the oven. It smells amazing while it bakes, filling your kitchen with the comforting aroma of garlic and toasted cheese. This isn’t just bread; it’s an experience in sharing and simple, satisfying flavors.
Cheesy Pull-Apart Garlic Bread
This Cheesy Pull-Apart Garlic Bread is the ultimate crowd-pleaser. Imagine a whole loaf of crusty bread, slathered with a garlicky, buttery spread, oozing with melted cheese, and baked until golden brown. It’s perfect for dipping into soup, serving alongside pasta, or just enjoying on its own. The best part is how easy it is to make, and the way everyone can just pull off a piece. It’s the kind of bread that disappears fast.
Ingredients:
- 1 Boule / Loaf Crusty Rustic Bread
- 1 Stick Salted Butter (melted)
- 6 Cloves Garlic (minced)
- 2 Tablespoons Parsley (chopped)
- 1 Cup Mozzarella Cheese (shredded)
- 1 1/2 Cups Cheddar Cheese (shredded)
- 1/4 Cup Parmesan Cheese (grated)
- 1 Bunch Chives (finely chopped)
Instructions:
-
Prepare the Bread:
Start with a good quality crusty rustic bread. A boule or a round loaf works beautifully because it holds its shape well. You want a bread that has a good crust and a soft, airy interior. We’re going to cut this bread in a specific way to make it easy to pull apart later. Place the loaf on a cutting board. Using a serrated knife, cut the bread about three-quarters of the way down, creating a grid pattern. Make cuts lengthwise and then widthwise, ensuring you don’t cut all the way through to the bottom. Aim for about 1-inch cubes. The idea is to create pockets for our cheesy garlic butter to seep into. Once you have your grid cut, gently open up the loaf a bit to help the butter and cheese get into all those nooks and crannies. -
Make the Garlic Butter Mixture:
In a medium bowl, combine the melted salted butter, minced garlic, and chopped parsley. Give it a good stir to ensure the garlic and parsley are evenly distributed throughout the butter. The amount of garlic can be adjusted to your preference, but 6 cloves provides a nice, strong garlic flavor that complements the cheese. Fresh parsley adds a lovely bit of color and a fresh, herbaceous note that cuts through the richness of the butter and cheese. If you don’t have fresh parsley, dried parsley can be used, but you’ll want to use a little less, about 2 teaspoons, as it’s more concentrated. -
Assemble the Bread:
Now comes the fun part – filling the bread. Carefully spoon the garlic butter mixture over the cut bread, making sure to get it into as many of the cuts as possible. You can use a brush or a spoon for this. Try to coat all the surfaces. Next, we’ll add the cheese. In a separate bowl, gently toss together the shredded mozzarella, shredded cheddar, and grated Parmesan cheese. The combination of mozzarella provides that classic, stretchy cheese pull, while cheddar adds a sharper, more complex flavor. Parmesan contributes a salty, nutty depth. Sprinkle this cheese mixture generously all over the bread, again trying to push some of it down into the cuts you made. Don’t be shy with the cheese; more is definitely better here. -
Bake the Bread:
Preheat your oven to 375°F (190°C). Once the oven is preheated, place the assembled bread onto a baking sheet. This is important to catch any potential drips of melted butter or cheese. Bake for 15 to 20 minutes, or until the bread is golden brown around the edges and the cheese is fully melted and bubbly. You want to achieve that beautiful, golden-brown crust on the bread and perfectly melted, slightly browned cheese on top. Keep an eye on it towards the end of the baking time to prevent it from burning. The aroma that will fill your kitchen during this stage is absolutely incredible. -
Finish and Serve:
Once the bread is out of the oven, let it cool for just a few minutes before finishing. This allows the cheese to set up slightly, making it easier to pull apart. While it’s still warm, sprinkle the finely chopped fresh chives over the top. Chives add a mild oniony flavor and a vibrant green color that looks fantastic against the golden bread and melted cheese. To serve, simply pull apart a section of the bread. The gooey, cheesy strands are irresistible. This bread is best served warm. If you have any leftovers, you can store them in an airtight container at room temperature for a day, or refrigerate for up to two days. To reheat, place in a moderate oven for a few minutes until warmed through and the cheese is melty again.
Conclusion:
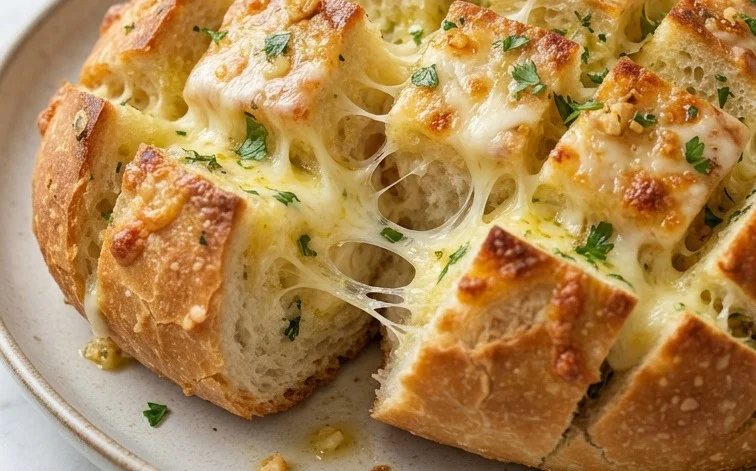
This Cheesy Pull-Apart Garlic Bread truly is a showstopper, incredibly satisfying to make and even more fun to share. The combination of crusty bread, aromatic garlic butter, and that generous layer of melted cheese makes it a guaranteed hit at any gathering. Serve it warm, straight from the oven, for the best melty, gooey experience. It’s fantastic alongside soups, pasta dishes, or as a star appetizer all on its own. For a slight twist, you could add a pinch of red pepper flakes to the butter mixture for a hint of heat, or mix in some sun-dried tomatoes for extra flavor. Don’t be afraid to experiment with different cheeses too; Gruyere or Monterey Jack would be delicious additions.
Frequently Asked Questions:
Can I make this ahead of time?
You can prepare the bread by cutting it and mixing the butter spread a day in advance. Store them separately in airtight containers in the refrigerator. Assemble and bake just before serving for the freshest taste and best texture.
What kind of bread is best for pull-apart bread?
A crusty rustic bread like a boule, sourdough, or French baguette works wonderfully. The key is a good, sturdy crust that can hold its shape and an interior that’s soft enough to soak up the garlic butter.
How do I reheat leftover garlic bread?
Leftovers are rare, but if you have any, you can reheat individual pieces or the whole loaf in a moderate oven (around 350°F or 175°C) for about 5-10 minutes, or until warmed through and the cheese is re-melted.
Cheesy Pull-Apart Garlic Bread
A delicious and addictive cheesy pull-apart garlic bread, perfect as an appetizer or side dish.
Ingredients
-
1 Boule / Loaf Crusty Rustic Bread
-
1 Stick Salted Butter (melted)
-
6 Cloves Garlic (minced)
-
2 Tablespoons Parsley (chopped)
-
1 Cup Mozzarella Cheese (shredded)
-
1 1/2 Cups Cheddar Cheese (shredded)
-
1/4 Cup Parmesan Cheese (grated)
-
1 Bunch Chives (finely chopped)
Instructions
-
Step 1
Preheat your oven to 375°F (190°C). Line a baking sheet with parchment paper. -
Step 2
In a small bowl, combine the melted butter, minced garlic, and chopped parsley. Mix well. -
Step 3
Cut the crusty bread into 1-inch cubes, but do not cut all the way through the bottom. This creates pockets for the cheese and butter mixture. -
Step 4
Drizzle the butter and garlic mixture evenly over the bread, getting it into the cuts. Make sure to coat all sides. -
Step 5
In a separate bowl, combine the shredded mozzarella, shredded cheddar, and grated Parmesan cheese. Mix them together. -
Step 6
Stuff the cheese mixture into the cuts of the bread, ensuring each pocket is filled generously. -
Step 7
Place the bread on the prepared baking sheet. Bake for 15-20 minutes, or until the bread is golden brown and the cheese is melted and bubbly. -
Step 8
Remove from oven, sprinkle with finely chopped chives, and let it cool slightly before pulling apart and serving.
Important Information
Nutrition Facts (Per Serving)
It is important to consider this information as approximate and not to use it as definitive health advice.
Allergy Information
Please check ingredients for potential allergens and consult a health professional if in doubt.


Leave a Comment