
Coquito Recipe This creamy, coconut-based drink is a holiday staple for many families, especially in Puerto Rico. It has a rich, dessert-like quality that makes it perfect for sipping during festive gatherings or enjoying as a special treat. The magic of coquito lies in its simplicity and the wonderful combination of tropical flavors that come together beautifully. It’s a drink that truly captures the spirit of celebration and warmth, and it’s surprisingly easy to make at home, allowing you to tailor it perfectly to your taste.
Ingredients:
- 1 can (13.5 ounces) evaporated milk
- 1 can (12 ounces) cream of coconut (sweetened)
- 1 can (12 ounces) sweetened condensed milk
- 1 can (13.5 ounces) full-fat coconut milk
- 1 teaspoon ground cinnamon, plus more for garnish
- 1/2 teaspoon ground nutmeg
- 1 teaspoon vanilla extract
- 1/4 teaspoon ground cloves (optional, but adds depth)
Making the Coquito
The process of making coquito is straightforward and mostly involves combining ingredients and chilling. There’s no cooking involved in the traditional sense, which makes it even more appealing, especially when you might already be busy with other holiday preparations. The key is to ensure all your ingredients are well combined for a smooth and luscious texture. I usually like to make this a day in advance to give the flavors a chance to meld together perfectly, resulting in an even richer taste.
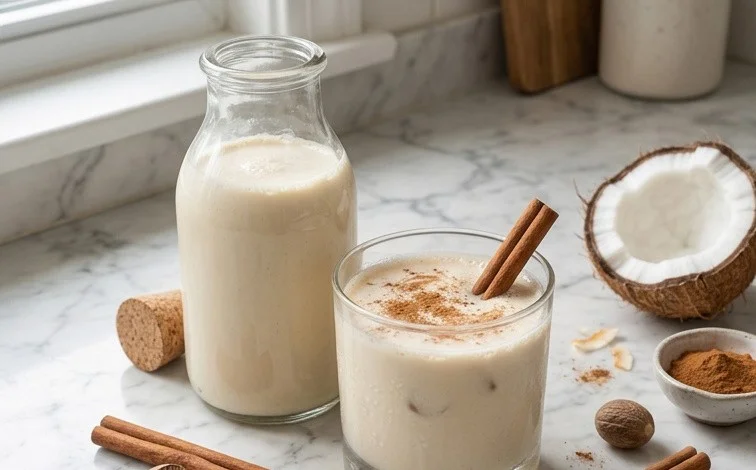
Combine the Liquids In a large bowl or directly in a blender, combine the evaporated milk, cream of coconut (sweetened), sweetened condensed milk, and full-fat coconut milk. Blend or whisk until everything is thoroughly mixed and smooth. This step ensures the base of your Coquito is creamy and well-emulsified. If using a blender, pulse a few times until fully incorporated. The mixture will be thick and opaque at this stage.
Coquito Recipe
This creamy, coconut-based drink is a holiday staple for many families, especially in Puerto Rico. It has a rich, dessert-like quality that makes it perfect for sipping during festive gatherings or enjoying as a special treat. The magic of coquito lies in its simplicity and the wonderful combination of tropical flavors that come together beautifully. It’s a drink that truly captures the spirit of celebration and warmth, and it’s surprisingly easy to make at home, allowing you to tailor it perfectly to your taste.
Ingredients:
- 1 can (13.5 ounces) evaporated milk
- 1 can (12 ounces) cream of coconut (sweetened)
- 1 can (12 ounces) sweetened condensed milk
- 1 can (13.5 ounces) full-fat coconut milk
- 1 teaspoon ground cinnamon, plus more for garnish
- 1/2 teaspoon ground nutmeg
- 1 teaspoon vanilla extract
- 1/4 teaspoon ground cloves (optional, but adds depth)
Making the Coquito
The process of making coquito is straightforward and mostly involves combining ingredients and chilling. There’s no cooking involved in the traditional sense, which makes it even more appealing, especially when you might already be busy with other holiday preparations. The key is to ensure all your ingredients are well combined for a smooth and luscious texture. I usually like to make this a day in advance to give the flavors a chance to meld together perfectly, resulting in an even richer taste.
-
Combine the Liquids
In a large bowl or directly in a blender, combine the evaporated milk, cream of coconut, sweetened condensed milk, and full-fat coconut milk. If you’re using a blender, this is the easiest way to get everything super smooth. Start by adding the condensed milk and evaporated milk first, then add the cream of coconut and full-fat coconut milk. Using a blender helps to break down any potential lumps and ensures a uniformly creamy consistency, which is essential for a good coquito. If you don’t have a blender, a whisk will work, but you’ll need to put in a bit more effort to achieve that silky texture.
-
Add the Spices and Flavoring
Next, add the ground cinnamon, ground nutmeg, and vanilla extract to the liquid mixture. If you like a little extra warmth and complexity, now is the time to add the ground cloves. Be careful with the cloves; they have a strong flavor, so a little goes a long way. Start with the recommended amount and you can always add a tiny bit more if you prefer a more pronounced spicy note. Whisk or blend these spices into the mixture until they are evenly distributed. You want to make sure there are no clumps of spice remaining. The aroma at this stage is already quite inviting!
-
Blend Until Smooth
If you are using a blender, secure the lid and blend the mixture for about 30 to 60 seconds, or until it is completely smooth and well combined. You should see a uniform creamy liquid with no streaks of spice or coconut milk. If you’re whisking by hand, continue to whisk vigorously until you achieve a smooth consistency. The goal is a thick, luscious drink that is consistent throughout. Some people prefer to add ice directly to the blender at this stage for an instantly chilled drink, but I find that chilling it in the refrigerator allows the flavors to deepen more effectively.
-
Chill Thoroughly
Once blended, pour the coquito into airtight bottles or jars. I typically use glass bottles because they look nice on display, especially during the holidays, and they keep the coquito fresh. Fill the bottles, leaving a little bit of headspace at the top. Seal them tightly and place them in the refrigerator. It’s best to let the coquito chill for at least 4 to 6 hours, but ideally, chill it overnight. This chilling period is crucial for the flavors to meld and for the drink to reach its optimal temperature and consistency. A well-chilled coquito is far more enjoyable than one that is lukewarm.
-
Serve and Garnish
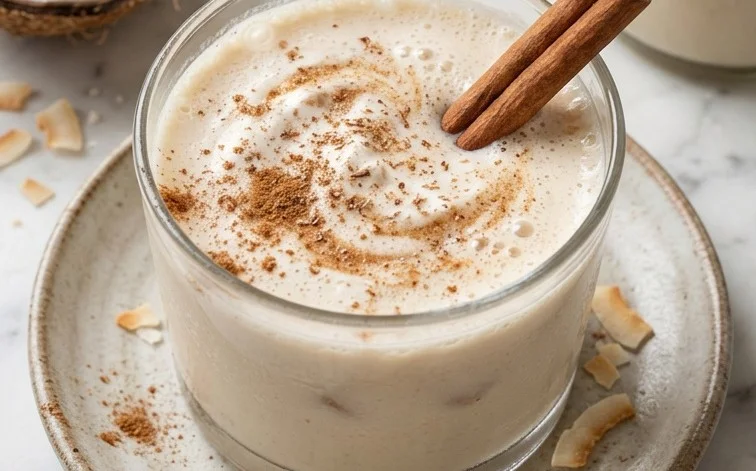
When you’re ready to serve, give the bottles a good shake or stir the coquito if it has been sitting for a while, as the ingredients can sometimes separate slightly. Pour the coquito into small glasses or festive mugs. Before serving, sprinkle a pinch of ground cinnamon on top of each serving. This not only adds a beautiful visual appeal but also enhances the aroma and flavor. The warmth of the cinnamon complements the creamy coconut beautifully. You can also add a cinnamon stick as a garnish for an extra touch.
Tips for the Best Coquito
For an even richer flavor, consider using both full-fat coconut milk and coconut cream. Some recipes also call for using vanilla bean paste instead of extract for a more intense vanilla flavor. Always taste your coquito after chilling and adjust spices as needed. If it’s too thick for your liking, you can add a splash more evaporated milk or a bit of water when serving. Storing coquito in the refrigerator ensures its freshness. Properly sealed, it can last for up to two weeks, making it a great make-ahead option for parties. If you’re preparing this for a large gathering, doubling or tripling the recipe is quite simple.
Conclusion:
This Coquito Recipe is a delightful, dairy-free (if you choose to use coconut milk as your primary milk base, which this recipe does) beverage that brings a taste of the tropics to any celebration. Its rich, creamy texture and warming spices make it a comforting drink for special occasions, especially during the holidays. The preparation is simple, mostly requiring a good shake or blend and then time to chill, allowing the flavors to deepen. You can easily adjust the spices to your preference; some people like a little more nutmeg or cinnamon.
For serving, pour the chilled coquito into small glasses or bottles. A sprinkle of cinnamon on top adds a lovely aroma and visual appeal. This drink is wonderful on its own, but it also pairs well with simple holiday cookies or desserts. If you enjoy this, you might also like to try other creamy, spiced drinks, but coquito holds a special place for its unique coconut flavor.
Frequently Asked Questions
What is coquito made of?
Coquito is traditionally made with coconut milk, sweetened condensed milk, evaporated milk, cinnamon, nutmeg, and vanilla. This recipe sticks to those core ingredients for an authentic flavor.
How long does coquito last?
When stored properly in an airtight container in the refrigerator, homemade coquito can last for up to 1 to 2 weeks. The flavors tend to meld and improve over the first few days.
Can I make coquito without non-alcoholic alternative?
Yes, absolutely. This recipe is designed to be non-alcoholic alternative-free, making it suitable for everyone to enjoy. The richness comes from the coconut milk and dairy, not from non-alcoholic spirits.
Coquito Recipe
A creamy, non-alcoholic version of the traditional Puerto Rican holiday drink, Coquito. Perfect for everyone to enjoy!
Ingredients
-
1 (15 ounce) can cream of coconut
-
1 (12 ounce) can evaporated milk
-
1 (12 ounce) can condensed milk
-
1 teaspoon vanilla extract
-
1/2 teaspoon ground cinnamon
-
1/4 teaspoon ground nutmeg
-
1/4 teaspoon ground cloves
-
1/2 cup water (or milk for a richer taste)
Instructions
-
Step 1
In a blender, combine the cream of coconut, evaporated milk, and condensed milk. -
Step 2
Add the vanilla extract, cinnamon, nutmeg, and cloves to the blender. -
Step 3
Pour in the water (or milk). -
Step 4
Blend on high speed until smooth and well combined. -
Step 5
Pour the mixture into a bottle or airtight container. -
Step 6
Refrigerate for at least 2 hours, or until thoroughly chilled. The longer it chills, the better the flavors meld. -
Step 7
Shake or stir well before serving. Serve chilled, neat or over ice. Garnish with a sprinkle of cinnamon.
Important Information
Nutrition Facts (Per Serving)
It is important to consider this information as approximate and not to use it as definitive health advice.
Allergy Information
Please check ingredients for potential allergens and consult a health professional if in doubt.

Leave a Comment