
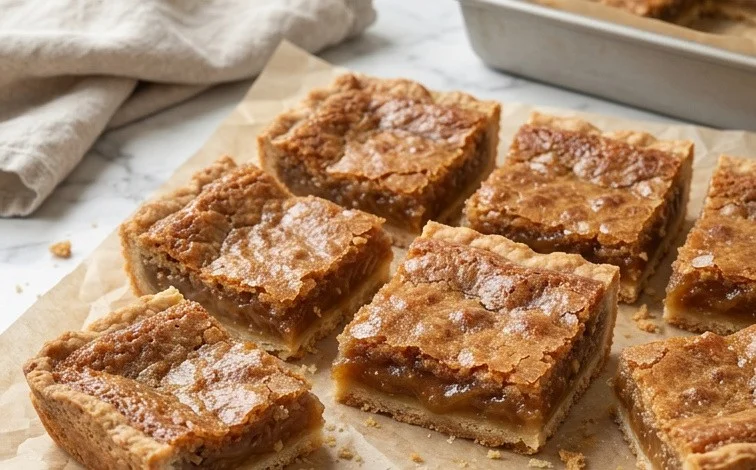
Gooey Classic Butter Tart Squares are what I think of when someone mentions classic Canadian baking. The crust of these butter tart squares is buttery and crumbly, a perfect foundation for the intensely sweet, gooey filling. They’re the kind of treat that brings a smile to your face with the very first bite, reminiscent of childhood bake sales and cozy afternoons. Making them is straightforward, and the results are always crowd-pleasing. I find myself reaching for this recipe whenever I need a reliable dessert that feels both comforting and a little bit special. The magic is in that rich, flowing centre that just melts in your mouth. This recipe delivers that authentic butter tart experience in a convenient bar form.
Ingredients:
- 1 and ⅓ cup all-purpose flour
- ¼ cup granulated sugar
- ¼ teaspoon salt
- ½ cup cold unsalted butter, cut into small cubes
- ½ cup unsalted butter, melted
- 2 cups packed brown sugar
- 4 large eggs
- 1 tablespoon all-purpose flour
- 1 tablespoon vanilla extract
- 1 tablespoon white vinegar
- ½ teaspoon salt
- Optional: ½ cup of raisins, walnuts, and or pecans
Instructions:
Preparing the Crust
First, we’ll make the simple shortbread-like crust. In a medium bowl, whisk together the 1 and ⅓ cups of flour, ¼ cup of granulated sugar, and ¼ teaspoon of salt. This dry mixture forms the base of our crust. Next, add the ½ cup of cold, cubed butter to the flour mixture. Using your fingertips, a pastry blender, or even a food processor on pulse mode, work the butter into the dry ingredients until the mixture resembles coarse crumbs. You want to see some pea-sized pieces of butter remaining; this is what will give the crust its lovely crumbly texture. Don’t overwork it, as that can make the crust tough. Once you have the crumbly texture, press this mixture evenly into the bottom of an 8×8 inch baking pan. Don’t bake it yet. We’ll be pouring the filling directly onto this unbaked crust.
Making the Gooey Filling
Now for the star of the show – the gooey filling. In a large bowl, combine the ½ cup of melted butter with the 2 cups of packed brown sugar. Stir them together until well combined. Next, whisk in the 4 large eggs, one at a time, ensuring each egg is fully incorporated before adding the next. This helps create a smooth, emulsified filling. Stir in the 1 tablespoon of all-purpose flour, the 1 tablespoon of vanilla extract, the 1 tablespoon of white vinegar, and the remaining ½ teaspoon of salt. The vinegar might sound odd, but it actually helps the filling set up properly while keeping it tender, and you won’t taste it. If you’re using raisins, walnuts, or pecans, stir them in now. Pour this rich, caramel-like mixture evenly over the unbaked crust in the pan. Make sure the filling covers the entire crust.
Baking the Squares
Time to bake these beauties. Preheat your oven to 350°F (175°C). Place the pan with the unbaked crust and filling into the preheated oven. Bake for 35 to 45 minutes. You’re looking for the filling to be set around the edges and slightly jiggly in the very centre. It will continue to set as it cools. The top should be a beautiful golden brown. Be careful not to overbake, as this can make the filling stiff instead of gooey. Once baked, remove the pan from the oven and let it cool completely on a wire rack. This cooling step is crucial for the filling to firm up properly. Trying to cut them while warm will result in a messy situation. Allow at least 2-3 hours for cooling, or even pop them in the fridge for a bit to speed things up.
Cutting and Serving
Once your Gooey Classic Butter Tart Squares have cooled completely, you can cut them into squares. Using a sharp knife, cut the entire slab into 16 or 20 squares, depending on how large you like your treats. A gentle sawing motion might be helpful if the filling is particularly firm. These are best enjoyed at room temperature. They are wonderful on their own, but I also love serving them with a cup of tea or coffee. They make a fantastic addition to any dessert spread or bake sale. The contrast between the crumbly crust and the sweet, gooey filling is simply irresistible.
Storage:
Store any leftover Gooey Classic Butter Tart Squares in an airtight container at room temperature for up to 3 days. If your kitchen is very warm, you might prefer to store them in the refrigerator, though they can become a bit firmer when chilled. They also freeze well; wrap them tightly and freeze for up to 3 months. Thaw at room temperature before enjoying.
Gooey Classic Butter Tart Squares
The crust of these butter tart squares is buttery and crumbly, a perfect foundation for the intensely sweet, gooey filling. They’re the kind of treat that brings a smile to your face with the very first bite, reminiscent of childhood bake sales and cozy afternoons. Making them is straightforward, and the results are always crowd-pleasing. I find myself reaching for this recipe whenever I need a reliable dessert that feels both comforting and a little bit special.
Ingredients:
- 1 and ⅓ cup all-purpose flour
- ¼ cup granulated sugar
- ¼ teaspoon salt
- ½ cup cold unsalted butter, cut into small cubes
- ½ cup unsalted butter, melted
- 2 cups packed brown sugar
- 4 large eggs
- 1 tablespoon all-purpose flour
- 1 tablespoon vanilla extract
- 1 tablespoon white vinegar
- ½ teaspoon salt
- Optional: ½ cup of raisins, walnuts, and or pecans
Instructions:
Preparing the Crust
First, we’ll make the simple shortbread-like crust. In a medium bowl, whisk together the 1 and ⅓ cups of flour, ¼ cup of granulated sugar, and ¼ teaspoon of salt. This dry mixture forms the base of our crust. Next, add the ½ cup of cold, cubed butter to the flour mixture. Using your fingertips, a pastry blender, or even a food processor on pulse mode, work the butter into the dry ingredients until the mixture resembles coarse crumbs. You want to see some pea-sized pieces of butter remaining; this is what will give the crust its lovely crumbly texture. Don’t overwork it, as that can make the crust tough.
Now, it’s time to press this crumbly mixture into the baking pan. I like to use an 8×8 inch baking pan for these squares. Lightly grease your pan or line it with parchment paper, leaving some overhang on the sides to make lifting the finished squares out easier. Evenly press the crumb mixture into the bottom of the pan, forming a compact layer. You can use the bottom of a measuring cup or a flat-bottomed glass to help you get an even surface. We’re not pre-baking this crust, which is part of what makes the filling so wonderfully gooey.
Making the Gooey Filling
In a separate large bowl, combine the ½ cup of melted butter with the 2 cups of packed brown sugar. Whisk them together until they are well combined and smooth. This mixture will be the sweet, rich base of our filling. Don’t worry if it looks a little liquidy at this stage; it will come together.
Next, add the 4 large eggs to the brown sugar and butter mixture, one at a time, whisking thoroughly after each addition. This gradual incorporation of the eggs helps to create a smooth and emulsified filling. After all the eggs are mixed in, stir in the 1 tablespoon of flour, 1 tablespoon of vanilla extract, 1 tablespoon of white vinegar, and ½ teaspoon of salt. The vinegar might seem unusual, but it actually helps to enhance the flavor and texture of the filling, giving it a subtle tang that balances the sweetness. Whisk everything until it’s just combined. Over-whisking can incorporate too much air, which we don’t want for a dense, gooey filling.
Assembling and Baking the Squares
Once your crust is pressed into the pan and your filling is mixed, it’s time to bring them together. Pour the gooey filling evenly over the prepared crust. If you’re using any optional additions like raisins, walnuts, or pecans, sprinkle them over the filling at this stage. They’ll sink slightly into the gooey mixture as it bakes, becoming little pockets of flavor and texture.
Bake these squares in a preheated oven at 350 degrees Fahrenheit (175 degrees Celsius) for approximately 30 to 40 minutes. The baking time can vary depending on your oven, so keep an eye on them. You’re looking for the edges of the filling to be set and lightly golden brown, while the center will still be a bit soft and jiggly. This is key to achieving that classic gooey texture. If the edges start to brown too quickly, you can loosely tent the pan with aluminum foil.
Cooling and Serving
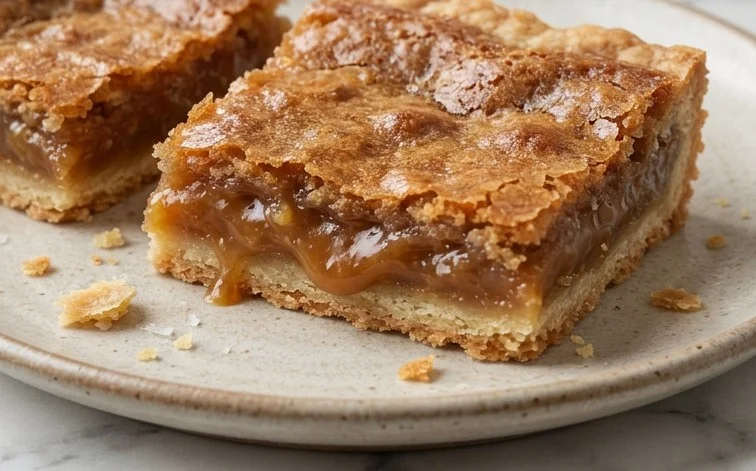
This is perhaps the most important step for achieving the perfect gooeyness: cooling. Once removed from the oven, let the butter tart squares cool completely in the pan on a wire rack. This cooling process is essential. As they cool, the filling will continue to set, but it will remain wonderfully soft and gooey in the center. Trying to cut them while they are still warm will result in a messy, runny situation. I usually let them cool for at least 2-3 hours, and sometimes even longer, before attempting to cut them.
Once fully cooled, use the parchment paper overhang to lift the entire slab out of the pan onto a cutting board. Use a sharp knife to cut them into squares. For clean cuts, wipe your knife between each cut, especially if the filling is very soft. These Gooey Classic Butter Tart Squares are best enjoyed at room temperature. They store well in an airtight container at room temperature for a few days, though they are so delicious, they rarely last that long!
Conclusion:
These Gooey Classic Butter Tart Squares truly capture the essence of a beloved classic treat. The combination of a buttery, crumbly crust with that signature sweet, rich, and gooey filling is simply divine. They’re a dependable dessert that always impresses, whether you’re baking for a family gathering, a potluck, or just a quiet afternoon treat. You can feel confident serving these squares, knowing they’ll bring smiles and second helpings. The straightforward process means you get maximum reward for your effort, making them a perfect recipe to have in your repertoire.
Serving Suggestions:
Enjoy these squares at room temperature for the best gooey texture. They are fantastic on their own, but also pair wonderfully with a hot cup of coffee or tea. For a bit of elegance, a small dollop of whipped cream or a scoop of vanilla ice cream can be a delightful addition, though they really don’t need anything extra.
Variations:
While the classic recipe is perfect, feel free to stir in ½ cup of chopped pecans, walnuts, or raisins into the filling before baking. These additions bring a lovely textural contrast and extra flavor dimension. For those who love a bit more coconut, a small sprinkle of shredded coconut on top before baking could also be interesting, though it will alter the classic profile slightly.
Encouragement:
I encourage you to try making these Gooey Classic Butter Tart Squares. They are a testament to simple ingredients creating something truly special. Don’t be intimidated by the gooey filling; it comes together beautifully in the oven and sets up perfectly as it cools. You’ll be so pleased with the result and proud to share them. Get ready for rave reviews!
Frequently Asked Questions:
Why is my butter tart filling not gooey?
This can happen if the squares are overbaked, which causes the filling to become too firm. It can also happen if they are cut while still too warm. Ensure you are baking just until the edges are set and the centre has a slight jiggle, and always allow them to cool completely before cutting. The vinegar in the recipe also helps maintain that perfect texture.
Can I make these ahead of time?
Yes, absolutely! Gooey Classic Butter Tart Squares can be made a day or two in advance. Store them in an airtight container at room temperature. They are often even better the next day as the flavours meld together. For longer storage, they freeze well.
Gooey Classic Butter Tart Squares
Indulge in these irresistible, gooey classic butter tart squares, a delightful twist on a beloved Canadian treat. Perfect for sharing and guaranteed to satisfy your sweet cravings.
Ingredients
-
1 and ⅓ cup Flour
-
¼ cup Granulated Sugar
-
¼ teaspoon Salt
-
½ cup Cold Butter
-
½ cup Melted Butter
-
2 cups Brown Sugar, packed
-
4 Eggs
-
1 tablespoon Flour
-
1 tablespoon Vanilla Extract
-
1 tablespoon White Vinegar
-
½ teaspoon Salt
-
½ cup raisins
-
½ cup walnuts
-
½ cup pecans
Instructions
-
Step 1
Preheat oven to 350°F (175°C). Lightly grease a 9×13 inch baking pan. -
Step 2
For the crust: In a medium bowl, combine 1 and ⅓ cups flour, ¼ cup granulated sugar, and ¼ teaspoon salt. Cut in ½ cup cold butter until the mixture resembles coarse crumbs. -
Step 3
Press the crust mixture evenly into the bottom of the prepared baking pan. -
Step 4
For the filling: In a large bowl, whisk together ½ cup melted butter, 2 cups packed brown sugar, 4 eggs, 1 tablespoon flour, 1 tablespoon vanilla extract, 1 tablespoon white vinegar, and ½ teaspoon salt until well combined and smooth. -
Step 5
Pour the filling evenly over the crust. If using, sprinkle raisins, walnuts, and/or pecans over the filling. -
Step 6
Bake for 35-45 minutes, or until the edges are golden brown and the center is set but still slightly jiggly. -
Step 7
Let cool completely in the pan on a wire rack before cutting into squares.
Important Information
Nutrition Facts (Per Serving)
It is important to consider this information as approximate and not to use it as definitive health advice.
Allergy Information
Please check ingredients for potential allergens and consult a health professional if in doubt.

Leave a Comment