
Chocolate Orange Yule Log It might sound fancy, but this Chocolate Orange Yule Log is absolutely achievable for a home baker, and it truly feels like a special occasion dessert. The combination of rich chocolate and bright, zesty orange is a classic for a reason, and when you see it rolled up and dusted with powdered sugar like snow, it’s a real showstopper. This stunning Christmas dessert recipe uses simple ingredients you likely have or can easily find. The magic happens in creating a sponge that’s light enough to roll without breaking and a creamy filling that complements the chocolate perfectly. It’s the kind of dessert that brings everyone to the table, eager to see the festive creation. Making it yourself adds an extra layer of thoughtfulness to your holiday celebrations, turning a simple meal into a memorable event.
Chocolate Orange Yule Log
Stunning Christmas Dessert Recipes
This year, I wanted to make Christmas dessert something truly special, something that feels both traditional and a little bit dazzling. I’ve put together a recipe that’s a wonderful centerpiece for any holiday table, and it’s surprisingly approachable to make. We’ll be creating a show-stopping Chocolate Orange Yule Log. The rich chocolate sponge, infused with the bright zest of fresh oranges, is rolled around a creamy, dreamy filling. It looks like a fallen log from a winter forest, dusted with powdered sugar snow.
Ingredients:
- 200g caster sugar
- 200g self-raising flour
- 6 large eggs
- 2 tablespoons cocoa powder
- 1 teaspoon orange zest (from about 1 orange)
- 500ml double cream
- 100g icing sugar
- 1 teaspoon vanilla extract
- 1 tablespoon fresh orange juice
- A few drops of orange food coloring (optional, for a deeper color)
- Dark chocolate, for shaving or making decorations
- Fresh cranberries and sprigs of rosemary, for decoration
Chocolate Orange Yule Log
Preparing the Chocolate Sponge
The base of our Yule Log is a light and airy chocolate sponge. It’s important that this sponge is cooked just right so it’s flexible enough to roll without cracking. First, preheat your oven to 180°C (160°C fan/Gas Mark 4). Grease and line a 30x40cm Swiss roll tin with baking parchment. Make sure the parchment goes up the sides a little; this helps with removal. In a large bowl, whisk together the caster sugar and the eggs. You want to whisk these vigorously for about 5-8 minutes until the mixture is pale, thick, and has tripled in volume. It should leave a trail when you lift the whisk. This aeration is key to a light sponge.
Next, sift the self-raising flour and cocoa powder over the egg mixture. Gently fold these dry ingredients in, taking care not to knock out too much of the air you’ve just incorporated. Use a large metal spoon or a spatula and fold from the bottom of the bowl upwards. Sprinkle in the orange zest and gently fold that through as well. Pour the batter evenly into the prepared tin. You can gently tap the tin on the counter a couple of times to level the batter, but don’t overdo it. Bake for 12-15 minutes, or until the sponge springs back when lightly touched. It should be golden brown and pull away slightly from the sides of the tin.
Cooling and Rolling the Sponge
While the sponge is still warm, it’s much more pliable and less likely to crack when rolled. As soon as it comes out of the oven, tip the sponge out onto a large piece of baking parchment that has been lightly dusted with icing sugar. Carefully peel off the lining paper from the sponge. Starting from one of the shorter ends, gently roll up the sponge with the parchment inside, using the parchment to help guide it. Let it cool completely in this rolled-up shape. This process sets the sponge’s structure, making it easier to fill and roll again later without it breaking apart. Once it’s completely cool, unroll it carefully.
Making the Orange Cream Filling
This filling is so simple and wonderfully creamy. In a clean bowl, whip the double cream with the icing sugar until it forms soft peaks. Be careful not to over-whip, or you’ll end up with butter! Stir in the vanilla extract and the fresh orange juice. If you’re using the orange food coloring for a more intense color, add just a drop or two now and gently mix it in. You want a lovely creamy consistency that will hold its shape but is still easy to spread. Taste it to make sure the orange flavor is just right – you can add a tiny bit more juice if you like it zesty.
Assembling and Decorating the Yule Log
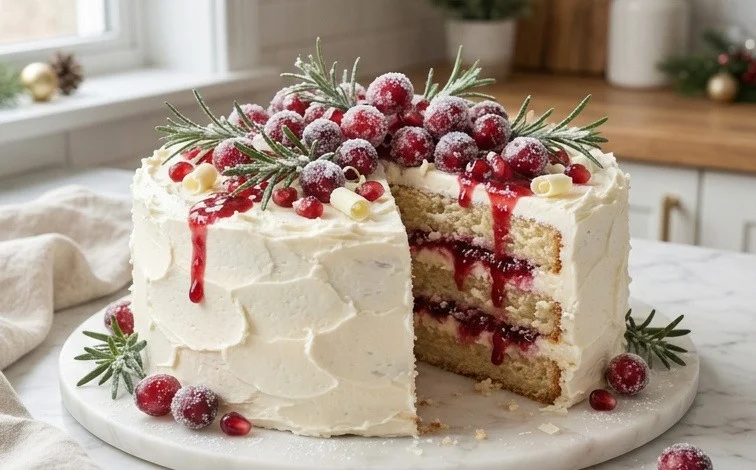
Unroll your cooled sponge. Spread the orange cream filling evenly over the surface of the sponge, leaving a small border (about 1cm) clear around the edges. This border helps prevent the filling from squeezing out when you roll it up. Now, re-roll the sponge, this time without the parchment, tucking in the ends as you go. Place the rolled log onto your serving plate, seam-side down. To give it that authentic log appearance, you can use a fork to gently score lines into the surface, mimicking tree bark. Then, dust it generously with icing sugar to look like a dusting of snow. For extra festive flair, you can shave some dark chocolate over the top, or use melted chocolate to pipe some bark-like decorations. Arrange fresh cranberries and small sprigs of rosemary around the base to create a woodland scene. These add a lovely pop of color and a hint of festive aroma.
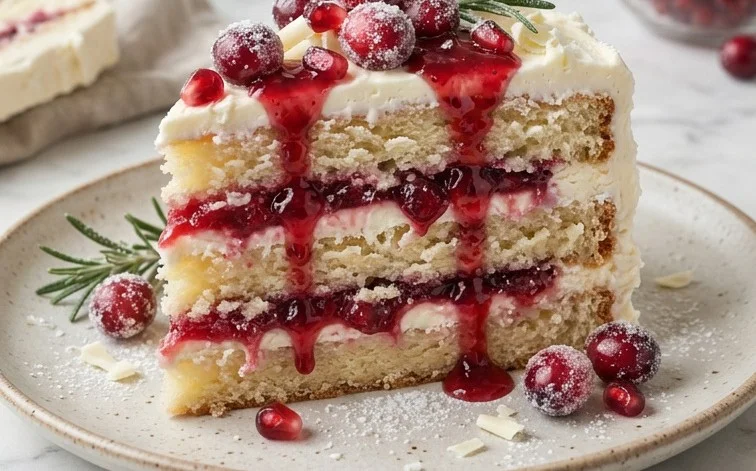
This Chocolate Orange Yule Log is best made a few hours ahead of serving, or even the day before. This allows the flavors to meld together and the sponge to soften slightly, making it even more delicious. Keep it chilled in the refrigerator until you’re ready to present it. When serving, I like to cut thick slices, revealing the beautiful swirl of orange cream inside the chocolate sponge. It’s a dessert that always impresses and tastes as good as it looks.
Conclusion:
This Chocolate Orange Yule Log is a fantastic centerpiece for any Christmas gathering, proving that stunning desserts don’t have to be overly complicated. The moist chocolate sponge paired with the smooth cream filling, all tied together with that lovely orange zest, makes for a truly satisfying treat. It looks impressive dusted with powdered sugar and perhaps a few fresh cranberries or rosemary sprigs, making it a beautiful addition to your holiday table. Don’t be intimidated by the rolling process; a slightly warm sponge is key to success. Consider adding a little extra orange zest to the cream filling for an even bolder citrus note, or even a hint of orange extract if you like a stronger flavor. This recipe is a wonderful way to create a memorable Christmas dessert that tastes as good as it looks.
Frequently Asked Questions
Can I make the Chocolate Orange Yule Log ahead of time?
Yes, you can assemble the Yule Log a day in advance. Keep it refrigerated, covered with foil or plastic wrap to prevent it from drying out. For best texture, let it sit at room temperature for about 20-30 minutes before serving.
How do I prevent the sponge from cracking when rolling?
Ensure your sponge is not overbaked; it should be firm but still slightly springy to the touch. Rolling it while it’s still warm but not hot is essential. You can also carefully trim off any crispy edges before rolling. If it does crack a little, don’t worry; the filling and dusting of powdered sugar will hide most imperfections.
What can I use for decoration besides chocolate shavings?
Fresh cranberries and rosemary sprigs, as mentioned, are lovely. You could also use meringue mushrooms, candied orange slices, or even small marzipan figures to enhance the festive woodland theme.
Stunning Christmas Dessert Recipes
A collection of visually appealing and delicious desserts perfect for your Christmas celebrations.
Ingredients
-
2 cups all-purpose flour
-
1 cup granulated sugar
-
1/2 cup unsalted butter, softened
-
2 large eggs
-
1 teaspoon vanilla extract
-
1/4 cup milk
-
1 teaspoon baking powder
-
1/2 teaspoon salt
-
1 cup heavy cream
-
1/2 cup powdered sugar
Instructions
-
Step 1
Preheat your oven to 350°F (175°C). Grease and flour a 9-inch cake pan. -
Step 2
In a large bowl, cream together the softened butter and granulated sugar until light and fluffy. -
Step 3
Beat in the eggs one at a time, then stir in the vanilla extract. -
Step 4
In a separate bowl, whisk together the flour, baking powder, and salt. Gradually add the dry ingredients to the wet ingredients, alternating with the milk, beginning and ending with the dry ingredients. Mix until just combined. -
Step 5
Pour the batter into the prepared cake pan and spread evenly. -
Step 6
Bake for 30-35 minutes, or until a wooden skewer inserted into the center comes out clean. -
Step 7
Let the cake cool in the pan for 10 minutes before inverting it onto a wire rack to cool completely. -
Step 8
While the cake cools, whip the heavy cream with the powdered sugar until stiff peaks form. -
Step 9
Frost the cooled cake with the whipped cream. Decorate with festive sprinkles or edible glitter for a stunning Christmas look.
Important Information
Nutrition Facts (Per Serving)
It is important to consider this information as approximate and not to use it as definitive health advice.
Allergy Information
Please check ingredients for potential allergens and consult a health professional if in doubt.


Leave a Comment