Honey BBQ Baked Chicken Wings are my go-to when I’m craving something seriously satisfying. They’re sticky, sweet, a little smoky, and perfectly tender, all without the fuss of frying. Baking them makes for easy cleanup, and the sauce gets wonderfully caramelized in the oven. I usually make a big batch because they disappear fast. The simplicity of the ingredients is part of their charm – you likely have most of them in your pantry already. These wings aren’t just a weeknight dinner; they’re a crowd-pleaser for game days or casual get-togethers. The combination of the savory chicken and the sweet, tangy barbecue glaze is irresistible. You get that delicious, sticky texture that usually requires deep-frying, but with all the benefits of baking. It’s a method that truly lets the flavors meld and intensify as they cook. The aroma filling your kitchen as they bake is incredible, promising a treat that’s worth the wait, even though it’s relatively quick to make.
Ingredients:
- 18 chicken wings (raw, thawed)
- 1 teaspoon salt
- 1 teaspoon garlic powder
- 1/2 teaspoon paprika
- 1/2 teaspoon cayenne pepper
- 1 cup barbecue sauce, preferably Hickory Smoke Flavor
- 1/2 cup honey
- 2 tablespoons ketchup
- 1 tablespoon hot sauce (I love Sriracha sauce!)
- 1/2 teaspoon garlic powder
Instructions:
- Prep the Chicken Wings First things first, you need to get your chicken wings ready. Make sure they are fully thawed if you bought them frozen. Patting the wings completely dry with paper towels is a really important step. Moisture is the enemy of crispy skin, so the drier they are, the better they’ll crisp up in the oven. Once they’re dry, place the wings in a large bowl.
- Season the Wings Now it’s time for the initial seasoning. Sprinkle the 1 teaspoon of salt, 1 teaspoon of garlic powder, 1/2 teaspoon of paprika, and 1/2 teaspoon of cayenne pepper over the chicken wings. Toss them around really well to make sure each wing is evenly coated. The salt helps to draw out some moisture and seasons the meat from the outside in.
- Make the Honey BBQ Sauce While the wings are waiting, prepare your glaze. In a medium bowl, whisk together the 1 cup of barbecue sauce, 1/2 cup of honey, 2 tablespoons of ketchup, 1 tablespoon of hot sauce, and the remaining 1/2 teaspoon of garlic powder. Whisk until everything is smooth and well combined. This sauce is the heart of the flavor, balancing sweetness with a hint of spice.
- Coat the Wings Add about half of the Honey BBQ sauce to the bowl with the seasoned chicken wings. Toss the wings thoroughly to ensure every piece is generously coated. Reserve the remaining sauce for brushing later.
- Bake the Wings (First Stage) Preheat your oven to 400°F (200°C). Arrange the coated chicken wings in a single layer on a baking sheet lined with parchment paper or aluminum foil for easier cleanup. Make sure the wings aren’t overcrowded, as this will steam them instead of baking them crispy. Bake for 25 minutes.
- Flip and Glaze After 25 minutes, carefully flip each chicken wing. Brush them generously with the reserved Honey BBQ sauce. This second coating of sauce is what will create that wonderfully sticky, caramelized finish.
- Bake the Wings (Second Stage) Return the baking sheet to the oven and continue baking for another 20-25 minutes, or until the wings are cooked through, the skin is a little crispy, and the sauce is bubbly and caramelized. The internal temperature of the chicken should reach 165°F (74°C). Keep an eye on them in the last few minutes to prevent the sugars from burning.
- Rest and Serve Once done, remove the wings from the oven. Let them rest on the baking sheet for about 5 minutes before serving. This allows the juices to redistribute. Serve your delicious Honey BBQ Baked Chicken Wings hot and watch them disappear!
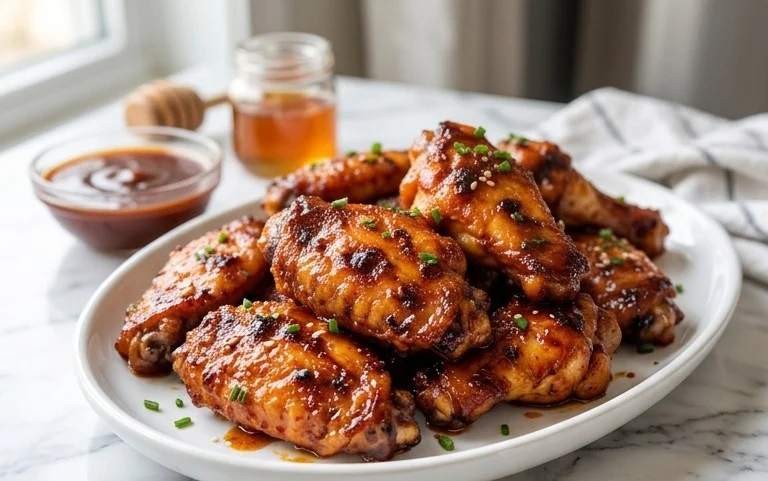
Honey BBQ Baked Chicken Wings
These Honey BBQ Baked Chicken Wings are my go-to when I’m craving something seriously satisfying. They’re sticky, sweet, a little smoky, and perfectly tender, all without the fuss of frying. Baking them makes for easy cleanup, and the sauce gets wonderfully caramelized in the oven. I usually make a big batch because they disappear fast. The simplicity of the ingredients is part of their charm – you likely have most of them in your pantry already.
Ingredients:
- 18 chicken wings (raw, thawed)
- 1 teaspoon salt
- 1 teaspoon garlic powder
- 1/2 teaspoon paprika
- 1/2 teaspoon cayenne pepper
- 1 cup barbecue sauce, preferably Hickory Smoke Flavor
- 1/2 cup honey
- 2 tablespoons ketchup
- 1 tablespoon hot sauce (I love Sriracha sauce!)
- 1/2 teaspoon garlic powder
Instructions:
1. Prep the Chicken Wings
First things first, you need to get your chicken wings ready. Make sure they are fully thawed if you bought them frozen. Patting the wings completely dry with paper towels is a really important step. Moisture is the enemy of crispy skin, so the drier they are, the better they’ll crisp up in the oven. Once they’re dry, place the wings in a large bowl.
2. Season the Wings
Now it’s time for the initial seasoning. Sprinkle the 1 teaspoon of salt, 1 teaspoon of garlic powder, 1/2 teaspoon of paprika, and 1/2 teaspoon of cayenne pepper over the chicken wings. Toss them around really well to make sure each wing is evenly coated. The salt helps to draw out some moisture and season the meat. Paprika adds a lovely color and a mild, earthy flavor. The cayenne pepper gives a subtle warmth that balances the sweetness of the sauce later on. If you like things spicier, you can always add a little more cayenne here, but remember, the hot sauce in the glaze will add more heat too.
3. Bake the Wings (Initial Bake)
Preheat your oven to 400 degrees Fahrenheit (200 degrees Celsius). Line a large baking sheet with parchment paper or aluminum foil for easier cleanup. Arrange the seasoned chicken wings on the prepared baking sheet in a single layer. Try not to overcrowd the pan; if the wings are too close together, they will steam instead of bake, and you won’t get that nice texture. You might need to use two baking sheets if your wings are very large or if you’re making a lot. Bake the wings for 25 to 30 minutes. We’re not looking for them to be fully cooked at this stage, just to start rendering some of the fat and getting a head start on cooking through.
4. Prepare the Honey BBQ Glaze
While the wings are in their first bake, let’s get that amazing glaze ready. In a medium saucepan over medium heat, combine the 1 cup of barbecue sauce, 1/2 cup of honey, 2 tablespoons of ketchup, 1 tablespoon of hot sauce (Sriracha is fantastic for this!), and the remaining 1/2 teaspoon of garlic powder. Stir everything together well. Bring the mixture to a gentle simmer, and let it cook for about 5 to 7 minutes, stirring occasionally. You want it to thicken slightly and for the flavors to meld together. Taste it as it simmers and adjust the hot sauce or honey if you prefer it sweeter or spicier. This sauce is the star of the show, so make sure it tastes perfect to you!
5. Glaze and Bake Again
After the initial 25-30 minutes of baking, carefully remove the chicken wings from the oven. They should be starting to look golden. Now, using a brush or a spoon, generously coat each wing with the prepared Honey BBQ glaze. Make sure to get both sides if possible. Once all the wings are coated, return the baking sheet to the oven. Bake for another 20 to 25 minutes. During this second bake, the sauce will bubble, caramelize, and get wonderfully sticky. Keep an eye on them during the last 10 minutes to make sure the glaze doesn’t burn. If you see it getting too dark too quickly, you can loosely tent the baking sheet with foil. The wings are done when they are cooked through, the juices run clear when pierced with a fork, and the glaze is thick and bubbly.
6. Rest and Serve
Once your Honey BBQ Baked Chicken Wings are perfectly glazed and cooked, remove them from the oven. Let them rest on the baking sheet for about 5 to 10 minutes before serving. This resting period allows the juices to redistribute within the meat, making the wings more tender and flavorful. It also gives the sticky glaze a moment to set up just a bit, so it clings to the wings without being overly drippy. Serve them hot, perhaps with some celery sticks and a side of ranch dressing or blue cheese for dipping. They are perfect as an appetizer, a game-day snack, or even as a main course with a side salad and some potato wedges.
Conclusion:
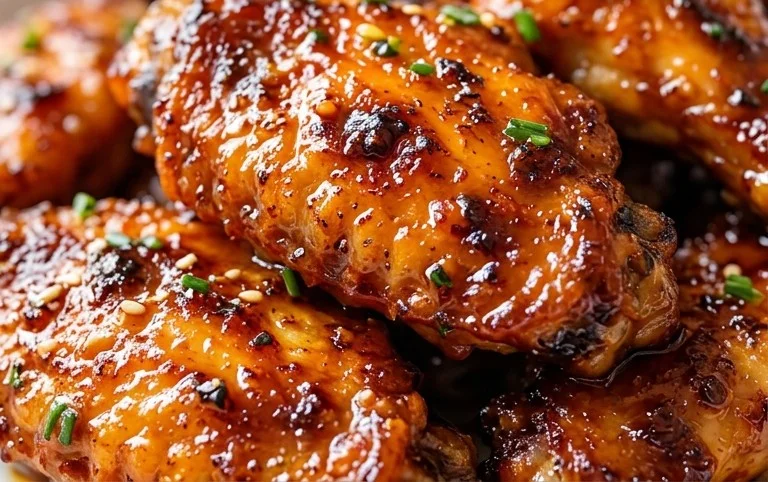
These Honey BBQ Baked Chicken Wings truly deliver on flavor and texture without the mess of frying. They’re a testament to how simple ingredients and straightforward baking can create something incredibly satisfying. The sticky, sweet glaze that caramelizes beautifully in the oven makes each bite a delight. They are perfect for any occasion, from a casual weeknight dinner to a party centerpiece. Don’t be afraid to make a double batch, because they really do go fast. The balance of smoky barbecue sauce, sweet honey, and a touch of heat from the hot sauce is a winning combination that everyone will enjoy. These wings are proof that you don’t need a complicated process to achieve amazing results right in your own kitchen.
Serving Suggestions:
Serve these Honey BBQ Baked Chicken Wings with classic sides like coleslaw, potato salad, or french fries. A simple green salad or some roasted vegetables also make great accompaniments to balance the richness of the wings. They are also fantastic served on their own as a snack or appetizer.
Variations:
For a spicier kick, you can increase the amount of hot sauce or add a pinch of red pepper flakes to the sauce mixture. If you prefer a smokier flavor, try using a mesquite-flavored barbecue sauce. You can also add a teaspoon of liquid smoke to the sauce for an extra smoky depth.
Frequently Asked Questions:
How can I make the wings crispier?
Ensure the wings are patted completely dry before seasoning. Baking them on a wire rack set inside the baking sheet allows air to circulate around them, promoting crispier skin. You can also bake them at a slightly higher temperature for the last 5-10 minutes, keeping a close eye to prevent burning.
Can I make the Honey BBQ sauce ahead of time?
Yes, the sauce can be made up to 3 days in advance and stored in an airtight container in the refrigerator. Gently warm it before tossing with the wings, or use it cold if preferred.
What kind of barbecue sauce is best?
While any good quality barbecue sauce will work, a thicker sauce with a pronounced smoky flavor, like a hickory smoke variety, tends to yield the best results for caramelization and taste. Experiment with your favorite brand to find what you like best.
Honey BBQ Baked Chicken Wings
Crispy, sticky, and flavorful baked chicken wings coated in a sweet and tangy honey barbecue sauce.
Ingredients
-
18 chicken wings (raw, thawed)
-
1 teaspoon salt
-
1 teaspoon garlic powder
-
1/2 teaspoon paprika
-
1/2 teaspoon cayenne pepper
-
1 cup barbecue sauce, preferably Hickory Smoke Flavor
-
1/2 cup honey
-
2 tablespoons ketchup
-
1 tablespoon hot sauce (Sriracha sauce)
-
1/2 teaspoon garlic powder
Instructions
-
Step 1
Preheat oven to 400°F (200°C). Line a baking sheet with parchment paper or aluminum foil for easy cleanup. -
Step 2
Pat the chicken wings completely dry with paper towels. This is crucial for achieving crispy skin. -
Step 3
In a bowl, toss the chicken wings with salt, 1 teaspoon garlic powder, paprika, and cayenne pepper until evenly coated. -
Step 4
Arrange the seasoned wings in a single layer on the prepared baking sheet. -
Step 5
Bake for 40-45 minutes, flipping the wings halfway through, until golden brown and cooked through. The internal temperature should reach 165°F (74°C). -
Step 6
While the wings are baking, prepare the sauce. In a small saucepan over medium heat, combine the barbecue sauce, honey, ketchup, Sriracha sauce, and the remaining 1/2 teaspoon garlic powder. Stir until well combined and heated through. -
Step 7
Once the wings are done, remove them from the oven and place them in a large bowl. Pour the warm honey BBQ sauce over the wings and toss to coat evenly. -
Step 8
Return the sauced wings to the baking sheet and bake for an additional 5-7 minutes, or until the sauce is caramelized and sticky. -
Step 9
Serve hot, optionally garnished with sesame seeds or chopped green onions.
Important Information
Nutrition Facts (Per Serving)
It is important to consider this information as approximate and not to use it as definitive health advice.
Allergy Information
Please check ingredients for potential allergens and consult a health professional if in doubt.

Leave a Comment