Strawberry Jam Recipe is one of those preserves that just screams summer. My kitchen always smells amazing in the summer when I’m making strawberry jam. The sweet, unmistakable aroma of ripe strawberries bubbling away is a sure sign of good things to come. This recipe is straightforward, and once you get the hang of it, you’ll be preserving that summer sweetness all year round. It’s surprisingly simple to transform fresh berries into a delicious spread that’s perfect on toast, scones, or even stirred into yogurt. What makes homemade strawberry jam so special is its pure, intense fruit flavor, free from the preservatives and artificial tastes you find in many store-bought versions. You control the sweetness and the texture, making it exactly to your liking. Plus, the process itself is incredibly rewarding, turning a seasonal bounty into something you can enjoy for months.
Ingredients:
- Strawberries
- Granulated sugar
- Lemon juice
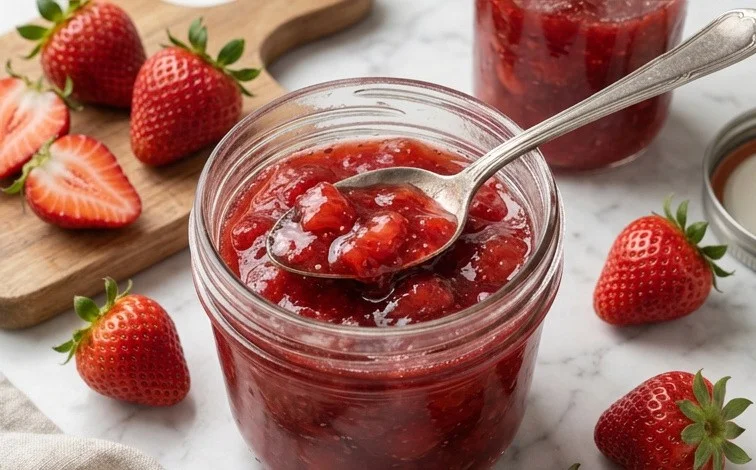
Strawberry Jam Recipe
My kitchen always smells amazing in the summer when I’m making strawberry jam. The sweet, unmistakable aroma of ripe strawberries bubbling away is a sure sign of good things to come. This recipe is straightforward, and once you get the hang of it, you’ll be preserving that summer sweetness all year round. It’s surprisingly simple to transform fresh berries into a delicious spread that’s perfect on toast, scones, or even stirred into yogurt.
Ingredients:
- Strawberries
- Granulated sugar
- Lemon juice
Cooking Instructions
Preparing the Strawberries
The first step is to get your strawberries ready. You’ll need about 1 kilogram (roughly 2.2 pounds) of fresh strawberries for this recipe. Choose berries that are ripe, firm, and smell fragrant. Avoid any that are mushy, bruised, or moldy. Gently wash the strawberries under cool running water and then hull them, which means removing the green leafy tops. You can do this with a small knife or a strawberry huller. Once hulled, you can leave them whole if they are small, or chop them into smaller pieces. For a smoother jam, I like to roughly chop them. If you prefer a chunkier jam, just cut them into quarters. Place the prepared strawberries in a large, non-reactive bowl.
Macerating for Flavor and Juice
Now, we’re going to let the strawberries sit with the sugar. This process is called macerating, and it helps to draw out the natural juices from the fruit and dissolve some of the sugar. Add the granulated sugar to the bowl of strawberries. The general ratio I use is about 750 grams (about 1.5 pounds) of sugar for every 1 kilogram of strawberries, but you can adjust this slightly based on how sweet your berries are and your personal preference. For a touch of brightness and to help the jam set, add about 2 tablespoons of fresh lemon juice. The pectin naturally found in strawberries needs an acidic environment to gel properly, and lemon juice provides that. Stir everything together gently, making sure all the strawberries are coated in sugar. Cover the bowl with plastic wrap and let it sit at room temperature for at least 4 hours, or preferably overnight in the refrigerator. You’ll notice that the strawberries will release a lot of liquid and become softer.
Cooking the Jam
After macerating, transfer the strawberry and sugar mixture into a large, heavy-bottomed pot or a wide, non-reactive saucepan. A wide pot helps the jam evaporate more quickly and cook evenly. Place the pot over medium-high heat and stir constantly until the sugar has completely dissolved. Be patient with this step; you don’t want any undissolved sugar granules at the bottom of the pot. Once the sugar is dissolved and the mixture starts to simmer, reduce the heat to medium and continue to cook, stirring frequently. As the jam cooks, a foam will likely form on the surface. You can skim this off with a spoon if you prefer a clearer jam, but it’s not strictly necessary for taste or texture. The jam needs to reach a temperature of 105 degrees Celsius (220 degrees Fahrenheit) to set properly. This can take anywhere from 20 to 45 minutes, depending on the moisture content of your berries and the width of your pot. Keep a close eye on it.
Testing for Set
Knowing when your jam is ready is the most important part. There are a few ways to test for the setting point. The most common method is the “wrinkle test.” To do this, place a few small plates in your freezer before you start cooking the jam. When you think the jam might be ready, spoon a small amount of hot jam onto one of the cold plates. Let it sit for about 30 seconds, then gently push the edge of the jam with your finger. If the surface wrinkles, the jam has reached its setting point and is ready. If it doesn’t wrinkle, continue cooking the jam for another 5-10 minutes and test again. Another way is to use a sugar thermometer; when the jam reaches 105 degrees Celsius (220 degrees Fahrenheit), it’s ready. You can also look for the jam to thicken and coat the back of a spoon; when you drag your finger through the jam on the spoon, the line should hold for a few seconds.
Sterilizing Jars and Filling
While the jam is cooking, it’s a good idea to sterilize your jars and lids. You can do this by washing them thoroughly in hot, soapy water and then rinsing them. Place the clean jars and lids upright in a preheated oven at 140 degrees Celsius (275 degrees Fahrenheit) for at least 15 minutes, or boil them in water for about 10 minutes. Be very careful when handling hot jars. Once the jam has reached its setting point, remove the pot from the heat. Let it sit for a few minutes to allow the foam to subside. Carefully ladle the hot jam into the sterilized jars, filling them almost to the brim, leaving about a 1-centimeter (1/2 inch) headspace. Wipe any drips from the rim of the jars with a clean, damp cloth. Place the lids on the jars and screw them on tightly. For long-term storage, you can process the filled jars in a boiling water bath. Place the filled and lidded jars in a large pot, ensuring they are covered by at least an inch of water. Bring the water to a rolling boil and process for 10 minutes. Carefully remove the jars from the water bath and let them cool completely on a wire rack. You’ll hear a satisfying pop as the lids seal. Jam that is properly sealed can be stored in a cool, dark pantry for up to a year. Once opened, store it in the refrigerator.
Conclusion:
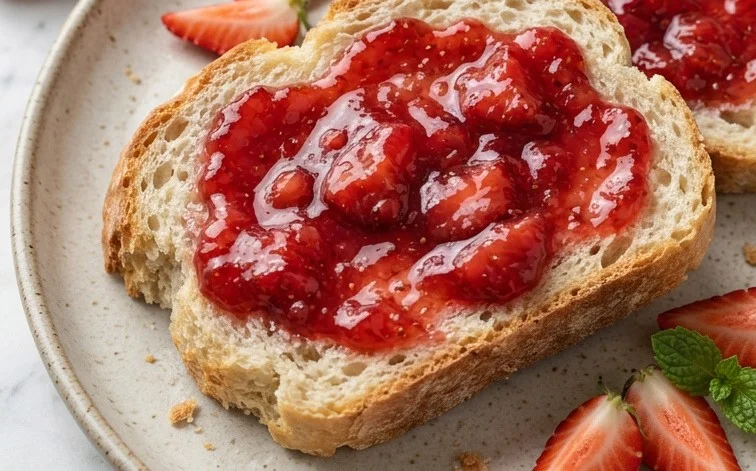
Making your own strawberry jam is a wonderfully rewarding experience that fills your home with a delightful aroma and leaves you with a delicious, versatile spread. This recipe delivers a pure, intense strawberry flavor that’s hard to beat. It’s perfect for spreading on warm toast in the morning, topping your favorite scones, or adding a sweet swirl to plain yogurt. You can also use it as a filling for cakes or tarts, or even as a glaze for roasted meats. The simplicity of the ingredients means the natural sweetness of the strawberries shines through. Don’t be afraid to experiment with different strawberry varieties for subtle flavor nuances. Once you taste homemade strawberry jam, you’ll understand why it’s worth the little bit of effort.
Frequently Asked Questions
Can I use frozen strawberries?
Yes, you can use frozen strawberries. Thaw them completely and drain off any excess liquid before proceeding with the recipe. The texture might be slightly softer than fresh, but the flavor will still be excellent.
How long does homemade strawberry jam last?
Properly sealed homemade strawberry jam can last for up to a year in a cool, dark place. Once opened, it should be stored in the refrigerator and consumed within 3-4 weeks.
What if my jam is too thin?
If your jam hasn’t set to your liking, you can often fix it by returning it to the pot and boiling it for a few more minutes. Be careful not to overcook it, as this can make it too thick or cause it to burn.
Strawberry Jam Recipe
A simple and delicious homemade strawberry jam recipe, perfect for toast, scones, and more. This recipe focuses on bringing out the natural sweetness and flavor of fresh strawberries.
Ingredients
-
2 pounds fresh strawberries, hulled and sliced
-
1.5 cups granulated sugar
-
2 tablespoons fresh lemon juice
-
1/4 teaspoon ground cinnamon
-
1/2 teaspoon pure vanilla extract
Instructions
-
Step 1
In a large saucepan, combine the sliced strawberries and granulated sugar. Stir gently to coat the strawberries. -
Step 2
Let the mixture sit for about 10-15 minutes, allowing the strawberries to release their juices. -
Step 3
Add the fresh lemon juice and ground cinnamon to the saucepan. Stir to combine. -
Step 4
Place the saucepan over medium-high heat and bring the mixture to a rolling boil, stirring constantly. -
Step 5
Reduce the heat to medium and continue to simmer, stirring occasionally, for about 20 minutes, or until the jam has thickened. Skim off any foam that rises to the surface. -
Step 6
Remove from heat and stir in the pure vanilla extract. Let cool slightly before transferring to sterilized jars.
Important Information
Nutrition Facts (Per Serving)
It is important to consider this information as approximate and not to use it as definitive health advice.
Allergy Information
Please check ingredients for potential allergens and consult a health professional if in doubt.


Leave a Comment