This chia seed jam is one of those simple, satisfying things to make that feels like a little bit of magic. Unlike traditional jam, it doesn’t require pectin or hours of simmering. The chia seeds do all the work, swelling up to create a thick, gel-like consistency that perfectly holds the fruit. It’s incredibly versatile and far healthier than store-bought varieties, as you control exactly what goes in. I often make a batch on a Sunday afternoon to have on hand for the week. The texture is wonderfully unique – it’s not as smooth as cooked jam, but has a pleasant, slightly seedy bite that I find really appealing. Fruit Preparation The first step is to get your fruit ready. If you’re using fresh berries, give them a good rinse and pat them dry. For larger berries like strawberries, you’ll want to chop them into smaller pieces. This helps them break down more easily and distribute their flavor throughout the jam. You can leave smaller berries like blueberries whole if you prefer. If you’re opting for frozen berries, there’s no need to thaw them beforehand; they will soften and release their juices as they warm up. This is a great way to use up berries that might be past their prime for eating fresh.
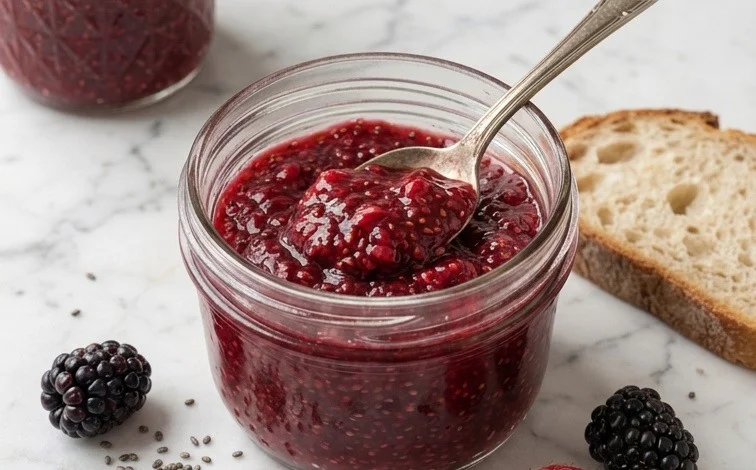
Ingredients:
- 1 cup fresh or frozen berries (such as strawberries, blueberries, raspberries, or a mix)
- 2 tablespoons chia seeds
- 1 to 2 tablespoons sweetener of choice (e.g., maple syrup, honey, agave nectar, or a sugar substitute)
- 1 tablespoon fresh lemon juice (optional, but brightens the flavor)
Making Chia Seed Jam
This chia seed jam is one of those simple, satisfying things to make that feels like a little bit of magic. Unlike traditional jam, it doesn’t require pectin or hours of simmering. The chia seeds do all the work, swelling up to create a thick, gel-like consistency that perfectly holds the fruit. It’s incredibly versatile and far healthier than store-bought varieties, as you control exactly what goes in. I often make a batch on a Sunday afternoon to have on hand for the week. The texture is wonderfully unique – it’s not as smooth as cooked jam, but has a pleasant, slightly seedy bite that I find really appealing.
Fruit Preparation
The first step is to get your fruit ready. If you’re using fresh berries, give them a good rinse and pat them dry. For larger berries like strawberries, you’ll want to chop them into smaller pieces. This helps them break down more easily and distribute their flavor throughout the jam. You can leave smaller berries like blueberries whole if you prefer. If you’re opting for frozen berries, there’s no need to thaw them beforehand; they will soften and release their juices as they warm up. This is a great way to use up berries that might be getting a bit past their prime in the freezer.
Combining the Ingredients
In a medium bowl, combine your prepared berries, chia seeds, sweetener, and lemon juice (if using). The amount of sweetener is entirely up to your preference and the sweetness of your fruit. Start with one tablespoon and you can always add more later if you feel it needs it. The lemon juice isn’t strictly necessary, but it adds a lovely brightness that cuts through the sweetness and enhances the fruit’s natural flavor, much like a tiny squeeze of lemon does for many dishes. Give everything a good stir with a spoon or a fork to ensure the chia seeds are evenly distributed throughout the fruit. This is important because you want them to hydrate evenly and create a consistent texture.
Allowing the Jam to Thicken
This is where the real “cooking” part happens, but it’s more like a waiting game. Once everything is mixed together, cover the bowl and let it sit at room temperature for about 15-20 minutes. During this time, the chia seeds will start to absorb the liquid from the fruit, swelling and thickening the mixture. You’ll notice the jam starting to thicken up nicely. After this initial resting period, give it another good stir. This second stir is important to break up any clumps of chia seeds that might have started to gel together. Then, cover the bowl again and transfer it to the refrigerator.
Chilling and Final Thickening
The jam needs to chill in the refrigerator for at least an hour, but ideally for 2-3 hours, to reach its final, jam-like consistency. As it chills, the chia seeds will continue to absorb moisture and form a gel, which will set the jam. The longer it chills, the thicker it will become. If you find that after chilling for a few hours it’s not as thick as you’d like, you can simply stir in another teaspoon or two of chia seeds and let it chill for another hour. Don’t worry if it seems a little loose when you first take it out of the fridge; it will continue to thicken as it cools. Sometimes, depending on the moisture content of the fruit, it might take a bit longer to achieve the desired thickness.
Serving and Storage
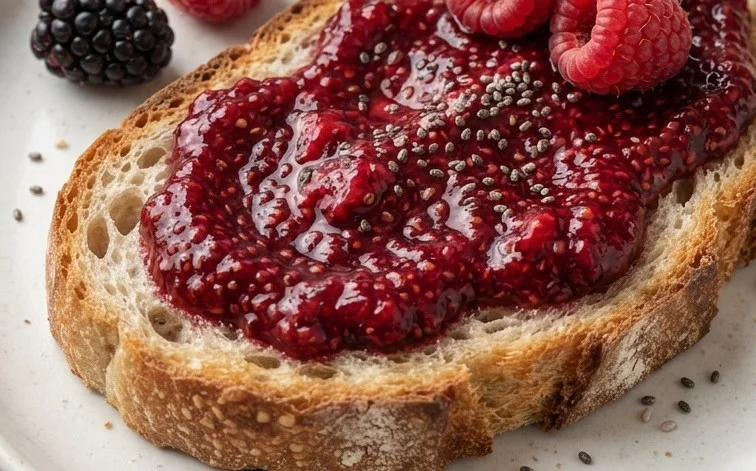
Once your chia seed jam has thickened to your liking, it’s ready to be enjoyed! Spoon it over your morning toast, swirl it into yogurt, top pancakes or waffles, or even use it as a filling for pastries. It’s a wonderfully adaptable condiment. Store the jam in an airtight container in the refrigerator. It typically lasts for about 1 to 2 weeks. Because it’s made with fresh fruit and doesn’t contain the preservatives found in commercial jams, it’s best to consume it within that timeframe. If you notice any mold or an off smell, discard it immediately. You can also freeze portions of the jam for longer storage, though the texture might change slightly upon thawing.
This recipe is so forgiving and easy to adapt. Feel free to experiment with different combinations of fruits, or add a pinch of cinnamon or a dash of vanilla extract for extra flavor. It’s a fantastic way to get more fiber and healthy fats into your diet, all while enjoying a delicious homemade spread.
Conclusion:
Making chia seed jam is a rewarding way to preserve fruit and have a healthy spread ready for any occasion. It’s incredibly simple, requiring minimal effort for a delicious outcome. The natural thickening power of chia seeds means you get a jam-like consistency without any complicated cooking. Enjoy it on toast, yogurt, oatmeal, or even as a topping for pancakes and waffles. The slight chew from the seeds adds a lovely texture that’s quite satisfying. Don’t be afraid to experiment with different fruit combinations or sweeteners to find your perfect batch. This quick chia seed jam really is a versatile staple to keep in your fridge.
What is the best fruit to use for chia seed jam?
Berries are fantastic because they break down well and have natural sweetness. However, you can also use other fruits like peaches, mangoes, or cherries. Just ensure they are ripe and soft for the best flavor and texture. For fruits that are less juicy, you might need to add a tablespoon or two of water to help them break down.
How long does chia seed jam last?
Stored in an airtight container in the refrigerator, this chia seed jam typically lasts for about 1 to 2 weeks. Always check for any signs of spoilage before consuming. Freezing is also an option for longer storage, though the texture might change slightly upon thawing.
Can I make this jam sugar-free?
Absolutely. You can omit the sweetener entirely if your fruit is sweet enough, or use a sugar substitute like stevia or erythritol to your taste. Start with a small amount and adjust as needed, as some sweeteners are much more potent than others.
Easy Chia Seed Jam
A simple and healthy way to make jam using chia seeds as a thickener, requiring minimal cooking time.
Ingredients
-
1 cup fresh or frozen berries (such as strawberries, raspberries, or blueberries)
-
2 tablespoons chia seeds
-
1-2 tablespoons maple syrup or other liquid sweetener (adjust to taste)
-
1 tablespoon fresh lemon juice
-
Pinch of salt
Instructions
-
Step 1
If using frozen berries, thaw them first. Mash the berries in a bowl with a fork or potato masher until they reach your desired consistency. -
Step 2
Add the chia seeds, maple syrup (or sweetener), and lemon juice to the mashed berries. -
Step 3
Stir everything together very well, ensuring the chia seeds are evenly distributed. -
Step 4
Let the mixture sit at room temperature for about 5 minutes to allow the chia seeds to start absorbing liquid and swelling. -
Step 5
Stir again, then transfer the jam to an airtight container. -
Step 6
Refrigerate for at least 30 minutes to allow the jam to thicken completely. The jam will continue to thicken as it chills.
Important Information
Nutrition Facts (Per Serving)
It is important to consider this information as approximate and not to use it as definitive health advice.
Allergy Information
Please check ingredients for potential allergens and consult a health professional if in doubt.


Leave a Comment