Rustic No-Knead Cranberry Orange Bread has the most wonderful aroma, especially when it’s baking. The combination of bright orange zest and tart dried cranberries makes it feel like a special occasion, even on a Tuesday. The best part is how incredibly simple it is to make. No fancy equipment or endless kneading required. It relies on a long, slow fermentation to develop its flavor and texture, which means you can mix it up the night before and have beautiful bread ready for slicing the next day. This is the kind of bread that makes your kitchen feel cozy and inviting. This recipe focuses on developing deep flavor through time, not effort. The zest adds a bright, citrusy note that cuts through the richness of the bread, while the cranberries provide delightful bursts of tartness. It’s a loaf that looks impressive but is surprisingly straightforward to achieve, making it a favorite for weekend baking or even a weeknight treat.
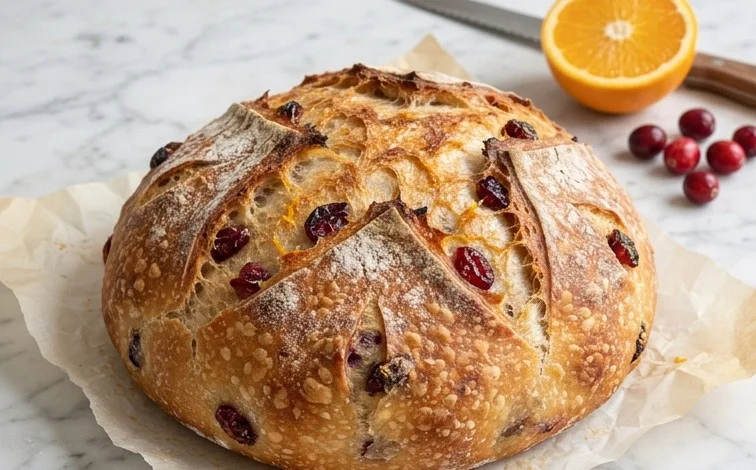
Rustic No-Knead Cranberry Orange Bread
This bread has the most wonderful aroma, especially when it’s baking. The combination of bright orange zest and tart dried cranberries makes it feel like a special occasion, even on a Tuesday. The best part is how incredibly simple it is to make. No fancy equipment or endless kneading required. It relies on a long, slow fermentation to develop its flavor and texture, which means you can mix it up the night before and have beautiful bread ready for slicing the next day. This is the kind of bread that makes your kitchen feel cozy and inviting.
Ingredients:
- 3 cups all purpose flour
- ½ tsp. active dry yeast
- 2 tsp. salt
- 1½ cups water
- zest of 2 oranges
- ¾ cup “plumped” dried cranberries
Making the Dough
The magic of this no-knead bread starts with its simplicity. You combine all the dry ingredients in a large bowl. This includes the flour, which is the foundation of our bread, the active dry yeast, and the salt. It’s important to make sure your yeast is fresh; if it’s old, it might not activate properly, and your bread won’t rise. Give these dry ingredients a quick whisk together to distribute the yeast and salt evenly throughout the flour. Next, you’ll add the wet ingredients. Pour in the 1½ cups of lukewarm water. The temperature of the water is important for activating the yeast; it should feel comfortably warm, not hot, which could kill the yeast, and not cold, which would slow down its activity too much. Aim for around 105-115°F (40-46°C).
Now for the flavor. Zest the two oranges directly into the bowl. The zest releases the fragrant oils from the orange peel, infusing the dough with that wonderful citrusy aroma and taste. Make sure you only zest the colored part of the peel, as the white pith underneath can be bitter. Finally, add your plumped dried cranberries. To plump them, I usually soak them in a little warm water or orange juice for about 15-20 minutes while I’m getting the other ingredients ready. This makes them softer and more evenly distributed throughout the bread. Drain them well before adding.
Mixing and Fermenting
Using a sturdy spoon or a spatula, mix everything together until just combined. It will look shaggy and quite sticky, and that’s perfectly fine. You’re not trying to develop gluten here like you would with traditional bread making. The long fermentation process will do all the hard work for us. Scrape down the sides of the bowl to get all the dough into one mass. Cover the bowl tightly with plastic wrap or a damp kitchen towel. Let it sit at room temperature for at least 12 hours, or up to 18 hours. This long, slow rise is what gives the bread its amazing flavor and open crumb structure. The yeast will slowly work, creating pockets of air and developing complex flavors.
Shaping and Second Rise
After the long fermentation, the dough will have doubled in size and will be quite bubbly and airy. Lightly flour a clean work surface. Gently scrape the dough out of the bowl onto the floured surface. Try not to punch down all the air. You want to preserve as much of that bubbly texture as possible. Lightly flour the top of the dough, and then gently shape it into a rough ball or an oval. Don’t overwork it. The goal is just to create a cohesive shape.
Once you have your shaped loaf, you need to let it rest and rise again. You can do this in a couple of ways. One popular method is to place the dough onto a piece of parchment paper. This makes it easy to transfer the dough into your baking vessel later. Then, you can either cover it loosely with plastic wrap or place it inside a lightly oiled bowl and cover that. Let the dough rest and rise at room temperature for about 1 to 2 hours, or until it looks noticeably puffier and has increased in size by about 50%. This second rise is shorter, allowing the dough to relax and get ready for baking.
Baking the Bread
This bread is best baked in a preheated Dutch oven or a heavy-lidded pot. This creates a steamy environment, which is essential for a good crust. About 30 minutes before you’re ready to bake, place your Dutch oven (with its lid) into your oven and preheat the oven to 450°F (230°C). The oven and the pot need to be screaming hot.
Carefully remove the preheated Dutch oven from the oven. If you shaped your dough on parchment paper, carefully lift the dough by the parchment paper and lower it into the hot Dutch oven. If you didn’t use parchment, you can carefully dust the bottom of the hot pot with cornmeal or flour, and then gently place the dough into the pot. Put the lid back on, and carefully place the Dutch oven back into the hot oven.
Bake covered for 30 minutes. This trapped steam will help the bread rise beautifully and develop a lovely crust. After 30 minutes, carefully remove the lid. The bread should have risen significantly and started to turn a pale golden brown. Continue baking, uncovered, for another 15-20 minutes, or until the crust is a deep golden brown and the internal temperature of the bread reaches 200-210°F (93-99°C) when measured with an instant-read thermometer.
Cooling and Enjoying
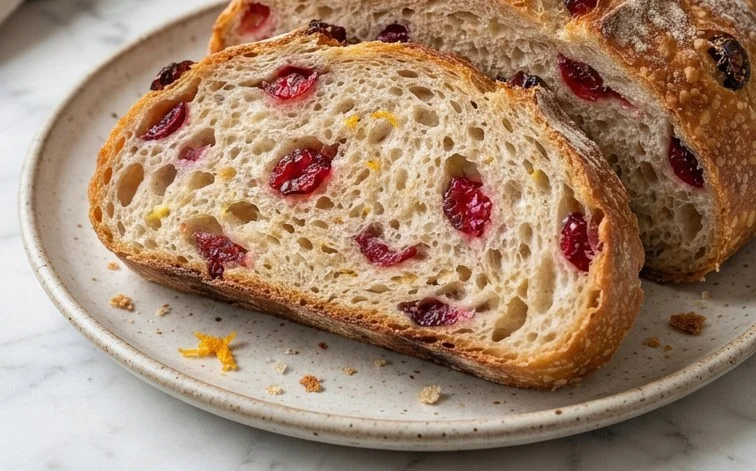
Once baked, carefully remove the bread from the Dutch oven and place it on a wire rack to cool completely. This is probably the hardest part—resisting the urge to slice into it immediately! Allowing it to cool completely ensures that the interior finishes setting and the crust develops its full texture. If you cut into it too soon, the inside can be gummy. Once it’s cooled, you’ll have a wonderfully rustic loaf with a crackly crust and a soft, airy interior, perfumed with orange and studded with chewy cranberries. It’s perfect for toasting, serving with butter or cream cheese, or just enjoying on its own. Store any leftovers in a paper bag at room temperature for a couple of days.
Conclusion:
This Rustic No-Knead Cranberry Orange Bread is a testament to the beauty of simple ingredients and patient fermentation. The resulting loaf is wonderfully tender with a slightly chewy crust, packed with the bright flavors of orange and the satisfying tartness of cranberries. It truly transforms your kitchen into a warm, inviting space. It’s a bread that feels special enough for guests but is simple enough for a comforting slice with your morning coffee. Don’t be afraid to experiment with the add-ins; the base recipe is incredibly forgiving and adaptable.
Serving Suggestions: This bread is fantastic served simply with butter. It also pairs beautifully with cream cheese, a dollop of Greek yogurt, or even a light drizzle of honey. For a more decadent treat, try it toasted and topped with a bit of orange marmalade.
Variations: Feel free to swap the dried cranberries for other dried fruits like chopped apricots or cherries. You could also add a handful of chopped walnuts or pecans for extra crunch. A pinch of cinnamon or nutmeg in the dry ingredients adds another layer of warmth.
Can I use fresh cranberries?
Yes, you can use fresh cranberries. You’ll need about 1 to 1.5 cups. They will burst and soften during baking, releasing their juice and creating beautiful pockets of tartness throughout the bread. You might want to toss them with a tablespoon of flour to help them distribute evenly.
What if I don’t have orange zest?
If you don’t have fresh oranges for zest, you can substitute with 1 to 1.5 teaspoons of dried orange zest. Alternatively, you can omit it, but the orange flavor will be less pronounced. A little bit of lemon zest would also work as a substitute, offering a different citrus note.
Rustic No-Knead Cranberry Orange Bread
A simple, no-knead bread bursting with the festive flavors of cranberry and orange, perfect for any occasion.
Ingredients
-
3 cups all purpose flour
-
½ tsp. active dry yeast
-
2 tsp. salt
-
1½ cups water
-
zest of 2 oranges
-
¾ cup dried cranberries, plumped
Instructions
-
Step 1
In a large bowl, whisk together the flour, yeast, and salt. -
Step 2
Add the water and orange zest. Stir with a wooden spoon or spatula until just combined and a shaggy dough forms. Do not overmix. -
Step 3
Cover the bowl tightly with plastic wrap and let it rest at room temperature for 12-18 hours. The dough will become bubbly and rise. -
Step 4
Gently turn the dough out onto a floured surface. Fold the edges into the center a few times to form a rough ball. Incorporate the plumped cranberries by gently folding them into the dough. -
Step 5
Place the dough, seam-side down, on a piece of parchment paper. Cover loosely and let it rest for another 30 minutes. -
Step 6
Preheat your oven to 450°F (230°C) with a Dutch oven inside for at least 30 minutes. Carefully remove the hot Dutch oven from the oven. Lift the dough by the parchment paper and carefully place it into the hot Dutch oven. Score the top of the dough with a sharp knife or razor if desired. -
Step 7
Cover the Dutch oven and bake for 30 minutes. Remove the lid and bake for another 15-20 minutes, or until the crust is deeply golden brown and the internal temperature reaches 200-210°F (93-99°C). -
Step 8
Carefully remove the bread from the Dutch oven and place it on a wire rack to cool completely before slicing and serving.
Important Information
Nutrition Facts (Per Serving)
It is important to consider this information as approximate and not to use it as definitive health advice.
Allergy Information
Please check ingredients for potential allergens and consult a health professional if in doubt.

Leave a Comment