
Browned Butter Toffee Chocolate Chip Cookies start with the magical step of browning the butter. It’s a simple technique, but it transforms the familiar flavor of a chocolate chip cookie into something deep, nutty, and utterly irresistible. This process unlocks a new dimension of richness that pairs perfectly with the chewy texture and sweet crunch of toffee. These aren’t just any chocolate chip cookies; they are a decadent upgrade, perfect for a special occasion or just to treat yourself. The aroma alone will draw everyone into the kitchen. The depth of flavor from the browned butter, combined with the satisfying chew and pockets of melted chocolate and crunchy toffee bits, makes these cookies a true standout. Making them is straightforward, but the result feels incredibly gourmet, a little bit of everyday luxury that’s worth the extra few minutes for the browning butter step.
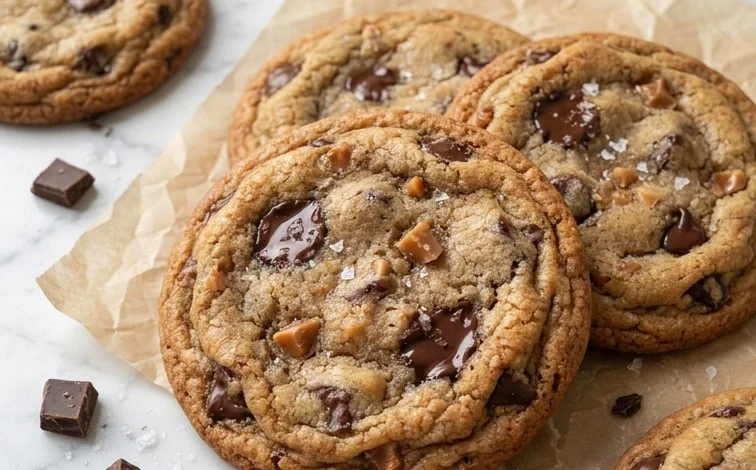
Browned Butter Toffee Chocolate Chip Cookies
The magic starts with browning the butter. It’s a simple step, but it transforms the familiar flavor of a chocolate chip cookie into something deep, nutty, and utterly irresistible. This process unlocks a new dimension of richness that pairs perfectly with the chewy texture and sweet crunch of toffee. These aren’t just any chocolate chip cookies; they are a decadent upgrade, perfect for a special occasion or just to treat yourself.
Ingredients:
- 2 sticks (227 grams) unsalted butter
- 1/2 (100 grams) cup granulated sugar
- 1 cup (200 grams) lightly packed dark brown sugar
- 1 1/2 cups (190 grams) all-purpose flour
- 1 cup (127 grams) bread flour
- 1 teaspoon baking soda
- 1/2 teaspoon baking powder
- 1 teaspoon fine sea salt
- 1 teaspoon instant espresso powder, (optional)
- 2 large eggs plus 1 egg yolk, (at room temperature)
- 2 teaspoons vanilla
- 10 ounces (283 grams) semisweet chocolate, (chopped)
- 1 cup homemade toffee bits, (or Heath brand)
- Flaky sea salt, (for finishing)
Instructions:
1. Brown the Butter:
Place the 2 sticks of unsalted butter in a light-colored, heavy-bottomed saucepan over medium heat. You’ll see it melt, then start to foam. Keep an eye on it. As the foam subsides, you’ll notice little brown bits appearing at the bottom of the pan, and the butter will take on a warm, nutty aroma. This usually takes about 5-8 minutes. Once you see these golden-brown specks and smell that toasty scent, immediately remove the pan from the heat. Pour the browned butter, including all those delicious brown bits, into a heatproof bowl to stop the cooking process. Let it cool for about 10-15 minutes, stirring occasionally. It should still be warm but not piping hot when you move on to the next step. This browning is what gives these cookies their signature depth of flavor.
2. Cream Sugars and Butter:
In a large mixing bowl, combine the cooled browned butter with the granulated sugar and the dark brown sugar. Using an electric mixer (stand or hand mixer), beat these together until the mixture is light and fluffy. This usually takes about 3-5 minutes. Scrape down the sides of the bowl as needed to ensure everything is well incorporated. The brown sugar adds moisture and chewiness, while the granulated sugar contributes to crisp edges.
3. Incorporate Wet Ingredients:
Add the 2 large eggs and 1 egg yolk to the sugar and butter mixture, one at a time, beating well after each addition until fully combined. It’s important that your eggs and egg yolk are at room temperature for them to emulsify properly into the butter mixture, creating a smoother, more stable dough. Next, stir in the 2 teaspoons of vanilla extract until just combined. If you are using the optional instant espresso powder, whisk it into the wet ingredients at this stage. The espresso powder doesn’t make the cookies taste like coffee, but it enhances the chocolate flavor significantly.
4. Combine Dry Ingredients:
In a separate medium bowl, whisk together the all-purpose flour, bread flour, baking soda, baking powder, and fine sea salt. Using both all-purpose and bread flour helps create a wonderfully chewy texture; the bread flour has a higher protein content, which contributes to better gluten development. Make sure the baking soda and baking powder are evenly distributed to ensure consistent leavening.
5. Mix Wet and Dry Ingredients:
Gradually add the dry ingredients to the wet ingredients in three additions, mixing on low speed until just combined after each addition. Be careful not to overmix; overmixing can lead to tough cookies. Stop mixing as soon as you no longer see streaks of dry flour. The dough will be thick and cohesive.
6. Add Chocolate and Toffee:
Gently fold in the chopped semisweet chocolate and the toffee bits using a spatula or wooden spoon. Ensure they are evenly distributed throughout the dough. Using chopped chocolate bars rather than chips often results in more melty puddles of chocolate. The toffee bits will add a delightful crunch and caramel-like sweetness.
7. Chill the Dough:
This is a critical step for flavor development and preventing excessive spreading. Cover the bowl with plastic wrap and refrigerate the dough for at least 2 hours, or preferably overnight. Chilling allows the flavors to meld and the fats to solidify, which helps the cookies hold their shape and achieve a better texture when baked.
8. Bake the Cookies:
Preheat your oven to 375 degrees Fahrenheit (190 degrees Celsius). Line baking sheets with parchment paper or silicone baking mats. Scoop rounded tablespoons of the chilled dough onto the prepared baking sheets, leaving about 2 inches between cookies. For a slightly flatter, chewier cookie, you can gently flatten the tops of the dough balls with your palm. Bake for 10-12 minutes, or until the edges are golden brown and the centers still look slightly soft. They will continue to cook slightly as they cool on the baking sheet.
9. Finish and Cool:
Immediately after removing the cookies from the oven, sprinkle the tops with flaky sea salt. This step is highly recommended as the salt crystals provide a wonderful contrast to the sweetness of the cookie. Let the cookies cool on the baking sheets for 5-10 minutes before transferring them to a wire rack to cool completely. This resting period on the baking sheet allows them to set up properly.
Store any leftover cookies in an airtight container at room temperature for up to 3-4 days. They are best enjoyed warm or at room temperature.
Conclusion:
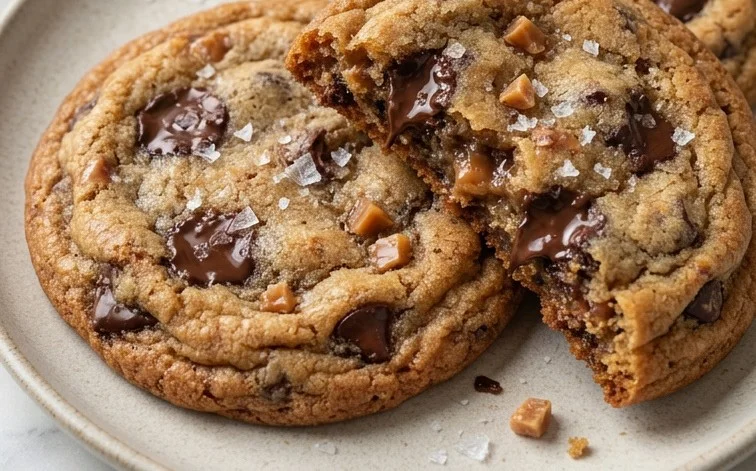
These Browned Butter Toffee Chocolate Chip Cookies offer a noticeable step up from your average chocolate chip cookie. The depth from the browned butter, combined with the sweet crunch of toffee and melty chocolate, creates a truly memorable treat. They have a wonderful chewy texture with crisp edges, making each bite incredibly satisfying. When these come out of the oven, the nutty, caramelized aroma fills the house, signaling that something special is about to be enjoyed. They are fantastic served warm with a glass of milk, or at room temperature with a cup of coffee.
Serving Suggestions: Enjoy them fresh from the oven for the ultimate gooey experience, or let them cool completely for a chewier texture. They pair wonderfully with coffee, tea, or a cold glass of milk. For an extra special treat, serve them alongside a scoop of vanilla ice cream.
Variations: While this recipe is fantastic as is, feel free to experiment. You could swap the semisweet chocolate for dark or milk chocolate chips. Adding a sprinkle of flaky sea salt on top just before baking enhances all the flavors. For those who love nuts, a handful of chopped pecans or walnuts could be added along with the toffee bits.
Frequently Asked Questions:
Can I skip browning the butter?
You can, but you’ll miss out on the signature deep, nutty flavor that makes these cookies so special. Browning the butter is the key to their unique taste profile.
How should I store these cookies?
Store cooled cookies in an airtight container at room temperature for up to 3-4 days. They stay wonderfully chewy.
Can I make the dough ahead of time?
Yes, the dough can be refrigerated for up to 3 days or frozen for up to 3 months. When ready to bake, thaw overnight in the refrigerator or bake directly from frozen, adding a few extra minutes to the baking time.
Browned Butter Toffee Chocolate Chip Cookies
Decadent chocolate chip cookies featuring the rich flavor of browned butter, combined with crunchy toffee bits and melted chocolate.
Ingredients
-
2 sticks (227 grams) unsalted butter
-
1/2 (100 grams) cup granulated sugar
-
1 cup (200 grams) lightly packed dark brown sugar
-
1 1/2 cups (190 grams) all-purpose flour
-
1 cup (127 grams) bread flour
-
1 teaspoon baking soda
-
1/2 teaspoon baking powder
-
1 teaspoon fine sea salt
-
1 teaspoon instant espresso powder, (optional)
-
2 large eggs plus 1 egg yolk, (at room temperature)
-
2 teaspoons vanilla
-
10 ounces (283 grams) semisweet chocolate, (chopped)
-
1 cup homemade toffee bits, (or Heath brand)
-
Flaky sea salt, (for finishing)
Instructions
-
Step 1
In a medium saucepan, melt the butter over medium heat. Continue cooking, swirling occasionally, until the butter turns a deep amber color and smells nutty. This is browned butter. Immediately pour the browned butter into a heatproof bowl and let it cool slightly. Whisk in the granulated sugar and brown sugar until well combined. -
Step 2
In a separate medium bowl, whisk together the all-purpose flour, bread flour, baking soda, baking powder, fine sea salt, and espresso powder (if using). -
Step 3
To the browned butter and sugar mixture, add the eggs and egg yolk one at a time, whisking well after each addition. Stir in the vanilla extract. -
Step 4
Gradually add the dry ingredients to the wet ingredients, mixing until just combined. Do not overmix. Fold in the chopped semisweet chocolate and toffee bits. -
Step 5
Cover the dough and refrigerate for at least 30 minutes, or up to 2 days, to allow the flavors to meld and the dough to firm up. -
Step 6
Preheat oven to 375°F (190°C). Line baking sheets with parchment paper. Scoop rounded tablespoons of dough onto the prepared baking sheets, leaving about 2 inches between cookies. -
Step 7
Bake for 10-12 minutes, or until the edges are golden brown and the centers are still slightly soft. Sprinkle with flaky sea salt immediately after removing from the oven. -
Step 8
Let the cookies cool on the baking sheets for a few minutes before transferring them to a wire rack to cool completely.
Important Information
Nutrition Facts (Per Serving)
It is important to consider this information as approximate and not to use it as definitive health advice.
Allergy Information
Please check ingredients for potential allergens and consult a health professional if in doubt.



Leave a Comment