
No-Bake Chocolate Peppermint Squares are a festive treat that tastes like the holidays in every bite. The combination of rich chocolate pudding and the cool crunch of candy canes is a classic for a reason. These squares are wonderfully simple to make, perfect for when you want a delicious dessert without turning on the oven. They have a rich chocolate pudding base, a creamy layer studded with crushed candy canes, and a fluffy whipped topping finished with a sprinkle of more peppermint for that extra festive flair. They set up beautifully in the refrigerator, making them an ideal make-ahead dessert for parties or just a special weeknight indulgence. My family loves these, especially during the colder months when warm cookies are plentiful but something cool and minty is a welcome change.
Ingredients:
- 1 1/2 cups vanilla wafer crumbs
- 1/4 cup 1/2 stick unsalted butter
- 2 tbs sugar
- 8 oz cream cheese (softened)
- 1/2 cup finely crushed peppermint candy cane -OR- starlight mints
- 2 tbs milk
- 1/3 cup sugar
- 1 pkg 4-serving size instant chocolate pudding
- 1 3/4 cups milk
- 8 oz 1 tub whipped topping
- 1/4 cup coarsely chopped peppermint candy cane
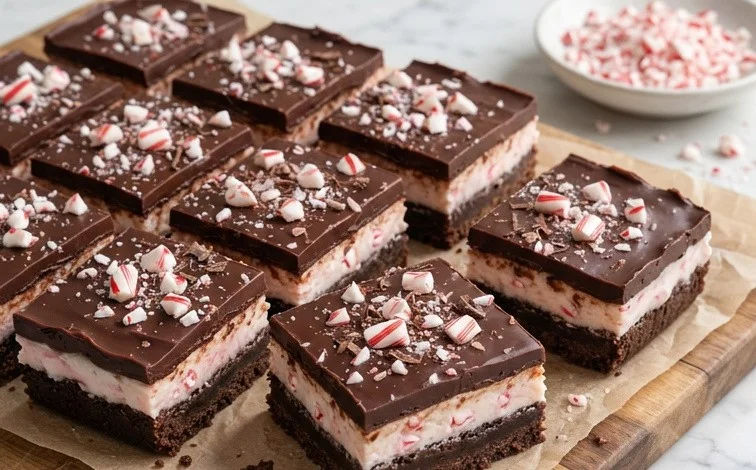
No-Bake Chocolate Peppermint Squares
The scent of peppermint and chocolate together always brings to mind cozy winter days and festive gatherings. These No-Bake Chocolate Peppermint Squares are wonderfully simple to make, perfect for when you want a delicious treat without the fuss of baking. They have a rich chocolate pudding base, a creamy layer studded with crushed candy canes, and a fluffy whipped topping finished with a sprinkle of more peppermint for that extra festive flair. They set up beautifully in the refrigerator, making them an ideal make-ahead dessert.
Ingredients:
- 1 1/2 cups vanilla wafer crumbs
- 1/4 cup 1/2 stick unsalted butter
- 2 tbs sugar
- 8 oz cream cheese (softened)
- 1/2 cup finely crushed peppermint candy cane -OR- starlight mints
- 2 tbs milk
- 1/3 cup sugar
- 1 1/4 cup whipped topping
- 1 pkg 4-serving size instant chocolate pudding
- 1 3/4 cups milk
- 8 oz 1 tub whipped topping
- 1/4 cup coarsely chopped peppermint candy cane
Preparing the Crust
The first step to creating these delightful squares is to get the crust ready. You’ll need your vanilla wafer crumbs. If you don’t have pre-made crumbs, you can easily make them yourself. Just take about 45-50 vanilla wafers and pulse them in a food processor until they are fine crumbs. Alternatively, you can place them in a sturdy zip-top bag and crush them with a rolling pin. In a medium bowl, combine the 1 1/2 cups of vanilla wafer crumbs with the 1/4 cup of unsalted butter, which should be melted to make it easier to incorporate. Add the 2 tablespoons of sugar to this mixture. Stir everything together until the crumbs are evenly moistened by the butter and sugar. This mixture will look a bit like wet sand. Press this crumb mixture firmly and evenly into the bottom of an 8×8 inch baking dish. Using the bottom of a glass or a flat-bottomed measuring cup helps to create a compact and sturdy base for your squares. Make sure to press it all the way into the corners. Once pressed, place this dish in the refrigerator to chill while you prepare the next layer. This chilling step helps the crust firm up and prevents it from mixing too much with the filling later.
Creating the Creamy Peppermint Layer
Next, we move on to the star of the filling: the creamy, minty layer. In a large bowl, combine the 8 ounces of softened cream cheese with the 2 tablespoons of milk and the 1/3 cup of sugar. Beat these ingredients together until the mixture is smooth and creamy, with no lumps of cream cheese remaining. A hand mixer or a stand mixer makes this process much easier and ensures a consistently smooth texture. Scrape down the sides of the bowl as needed. Now, gently fold in the 1 1/4 cups of whipped topping. Be careful not to overmix at this stage; you want to keep the mixture light and airy. Once the whipped topping is incorporated, it’s time to add the finely crushed peppermint candy cane or starlight mints. This is where the refreshing peppermint flavor really shines through. Stir these crushed mints into the cream cheese mixture until they are evenly distributed. This filling should look fluffy and be flecked with the vibrant color of the crushed candies.
Assembling the Pudding and Cream Layers
With the crust chilled and the peppermint cream ready, it’s time to assemble the layers. Retrieve your 8×8 inch baking dish from the refrigerator. Carefully spoon the peppermint cream mixture over the chilled vanilla wafer crust. Spread it out evenly using a spatula, making sure to cover the entire surface of the crust right to the edges. Try to get the top as smooth as possible for a neat presentation. Now, in a separate medium bowl, prepare the chocolate pudding. Add the contents of the 1 package of 4-serving size instant chocolate pudding to the bowl. Pour in the 1 3/4 cups of milk. Whisk this mixture vigorously for about 2 minutes, or until the pudding begins to thicken. It’s important to whisk well to ensure there are no dry pockets of pudding mix. Let the pudding sit for about 5 minutes to fully set. Once the pudding has thickened, gently spoon it over the peppermint cream layer in the baking dish. Spread the pudding evenly to create a smooth chocolate top layer. Again, be gentle so as not to disturb the layer beneath.
Adding the Whipped Topping and Finishing Touches
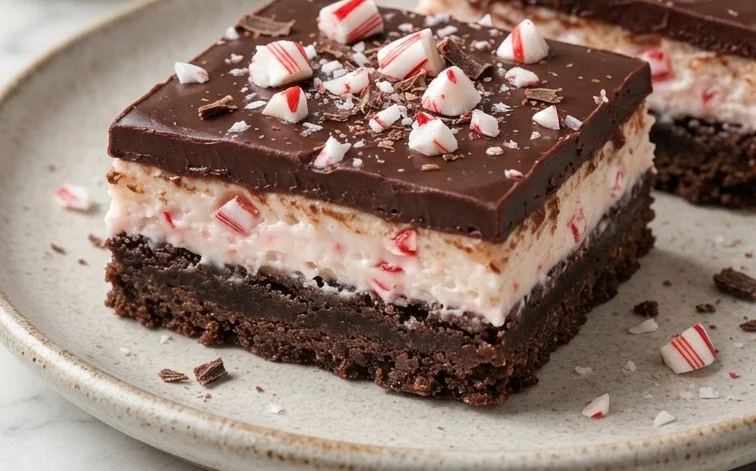
The final layer adds a light and airy finish to these rich squares. Take the 8 ounces of whipped topping from the tub and spread it evenly over the chocolate pudding layer. You can use a spatula to create smooth peaks and valleys, or simply spread it flat. This layer not only adds a delightful texture but also seals in the flavors. For the ultimate peppermint kick and a festive appearance, sprinkle the coarsely chopped peppermint candy cane evenly over the top of the whipped topping. The larger pieces of candy cane will provide a nice crunch and a burst of flavor when you bite into the squares. This is also a good time to ensure your edges are tidy. You can use a clean spatula to smooth them out. The contrast of the white whipped topping and the red and white candy cane pieces is visually appealing and perfect for any holiday or celebration.
Chilling and Serving Your Squares
These No-Bake Chocolate Peppermint Squares need time to set properly so they can be sliced cleanly. Cover the baking dish tightly with plastic wrap or aluminum foil. Place the dish in the refrigerator and allow it to chill for at least 4 hours, but overnight is even better. This allows all the layers to meld together and firm up. The chilling process is essential for achieving those neat, sliceable squares. When you are ready to serve, remove the dish from the refrigerator. You can cut the squares directly from the baking dish. For cleaner cuts, you can run a sharp knife under hot water and dry it before each slice. You should be able to get about 9 to 12 squares from an 8×8 inch dish, depending on how large you cut them. These squares are best served cold. They are wonderful on their own, or you could add a dollop of extra whipped cream or a tiny drizzle of chocolate syrup for an extra treat. Store any leftovers tightly covered in the refrigerator for up to 3 days. If you find you don’t have enough peppermint candy cane, you can always add a few drops of peppermint extract to the cream cheese mixture, but the crushed candy provides a lovely texture.
Conclusion:
These No-Bake Chocolate Peppermint Squares truly deliver on festive flavor and simplicity. The contrast between the smooth chocolate, the sweet peppermint crunch, and the airy whipped topping makes them a hit for any occasion. They are a fantastic option when you need a dessert that can be prepared ahead of time, freeing you up to enjoy your guests. You can easily adapt them by using different cookie crumbs for the base, like graham crackers or chocolate wafers, for a new twist. For an extra layer of indulgence, consider a drizzle of melted chocolate over the top before serving.
Frequently Asked Questions:
How do I store these squares?
Store your No-Bake Chocolate Peppermint Squares in an airtight container in the refrigerator. They will keep well for up to 3-4 days. Make sure they are completely set before covering.
Can I use store-bought chocolate pudding instead of instant?
While the instant pudding provides the perfect texture for this no-bake recipe, you could experiment with a chilled, pre-made chocolate pudding. However, you might need to adjust the liquid amounts to achieve the right consistency for layering.
What if I can’t find candy canes?
If candy canes are out of season or unavailable, starlight mints are an excellent substitute. Any hard peppermint-flavored candy can be crushed and used to achieve that signature minty flavor and festive sparkle.
No-Bake Chocolate Peppermint Squares
A festive and easy no-bake dessert featuring layers of chocolate pudding, peppermint cream cheese filling, and a crushed candy cane topping.
Ingredients
-
1 1/2 cups vanilla wafer crumbs
-
1/4 cup unsalted butter, melted
-
2 tbs sugar
-
8 oz cream cheese, softened
-
1/2 cup finely crushed peppermint candy cane
-
2 tbs milk
-
1/3 cup sugar
-
1 1/4 cup whipped topping
-
1 pkg 4-serving size instant chocolate pudding
-
1 3/4 cups milk
-
8 oz whipped topping
-
1/4 cup coarsely chopped peppermint candy cane
Instructions
-
Step 1
Combine vanilla wafer crumbs, melted butter, and 2 tbs sugar in a bowl. Press firmly into the bottom of an 8×8 inch pan. -
Step 2
In a separate bowl, beat softened cream cheese until smooth. Stir in 1/2 cup finely crushed peppermint candy cane, 2 tbs milk, and 1/3 cup sugar until well combined. -
Step 3
Gently fold in 1 1/4 cup whipped topping into the cream cheese mixture until no streaks remain. -
Step 4
Spread the cream cheese mixture evenly over the crumb base. -
Step 5
In a medium bowl, whisk together instant chocolate pudding mix and 1 3/4 cups milk until thickened, about 2 minutes. -
Step 6
Spread the prepared chocolate pudding over the cream cheese layer. -
Step 7
Top the pudding with the remaining 8 oz whipped topping, spreading it evenly. -
Step 8
Sprinkle the 1/4 cup coarsely chopped peppermint candy cane over the whipped topping. Chill for at least 4 hours or until firm.
Important Information
Nutrition Facts (Per Serving)
It is important to consider this information as approximate and not to use it as definitive health advice.
Allergy Information
Please check ingredients for potential allergens and consult a health professional if in doubt.



Leave a Comment