
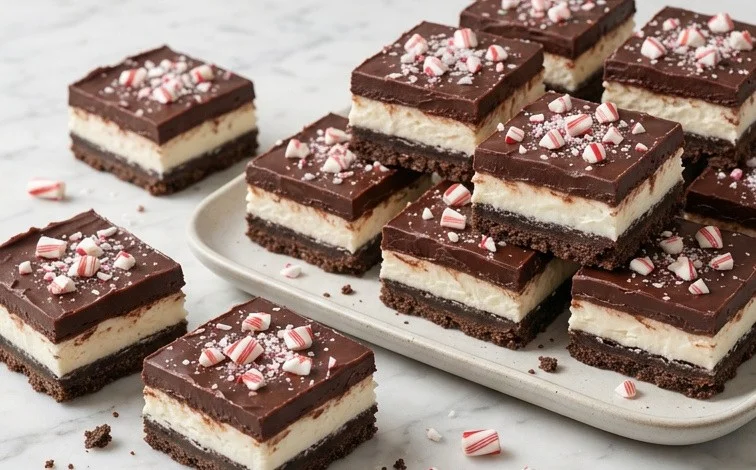
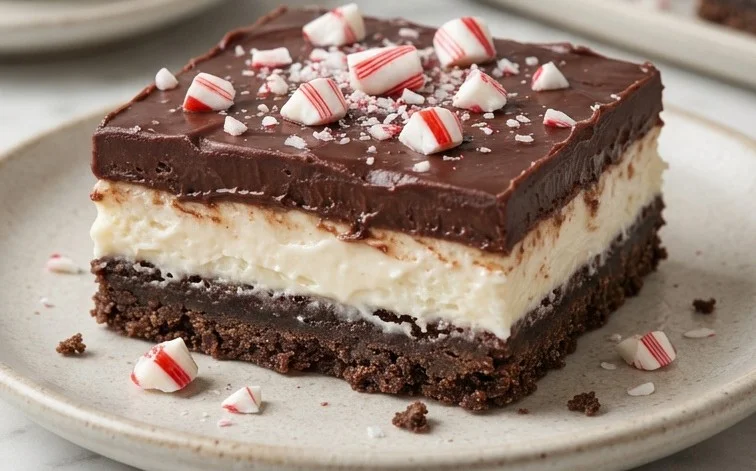
No-Bake Chocolate Peppermint Squares are a no-fuss delight that brings a festive sparkle to any occasion. I love making these during the holidays because they’re so quick, and the bright peppermint flavor cuts through the richness of the chocolate beautifully. They are a guaranteed hit, offering a delightful contrast of creamy, crunchy, and minty notes without ever needing to turn on the oven. The foundation is a buttery vanilla wafer crust, which is then layered with a smooth, intense chocolate pudding filling. Topped with a cloud of whipped cream infused with cool peppermint and a final scattering of crushed candy canes, these no-bake chocolate peppermint squares are as pretty as they are delicious. They’re the kind of treat that makes people ask for the recipe, even though it’s incredibly simple to assemble.
Ingredients:
Crust:
1 1/2 cups vanilla wafer crumbs
1/4 cup unsalted butter, melted
2 tablespoons sugar
Filling:
8 oz cream cheese, softened
1/2 cup finely crushed peppermint candy cane or starlight mints
2 tablespoons milk
1/3 cup sugar
1 1/4 cups whipped topping
1 pkg (4-serving size) instant chocolate pudding
1 3/4 cups milk
Topping:
8 oz whipped topping
1/4 cup coarsely chopped peppermint candy cane
Crust Preparation
The first step to making these delicious squares is preparing the base. In a medium bowl, combine the 1 1/2 cups of vanilla wafer crumbs with the 1/4 cup of melted unsalted butter and 2 tablespoons of sugar. Mix this thoroughly until the crumbs are evenly moistened. You want the mixture to hold together when you squeeze a bit of it between your fingers. This indicates there’s enough moisture from the butter to bind the crumbs. Press this mixture firmly and evenly into the bottom of an 8×8 inch baking pan. You can use the bottom of a glass or a flattish measuring cup to help press it down without getting your hands too messy.
No-Bake Chocolate Peppermint Squares
These no-bake chocolate peppermint squares are a wonderfully simple treat that hits all the right notes for holiday gatherings or any time you’re craving a festive, chocolatey, minty bite. They come together quickly with no oven required, making them perfect for busy cooks. The base is a simple vanilla wafer crust, followed by a creamy chocolate pudding layer, and topped with a light, whipped topping infused with peppermint. The finishing touch of crushed candy canes adds a lovely crunch and an extra pop of mint.
Ingredients:
- 1 1/2 cups vanilla wafer crumbs
- 1/4 cup 1/2 stick unsalted butter
- 2 tbs sugar
- 8 oz cream cheese (softened)
- 1/2 cup finely crushed peppermint candy cane -OR- starlight mints
- 2 tbs milk
- 1/3 cup sugar
- 1 1/4 cup whipped topping
- 1 pkg 4-serving size instant chocolate pudding
- 1 3/4 cups milk
- 8 oz 1 tub whipped topping
- 1/4 cup coarsely chopped peppermint candy cane
Crust Preparation
The first step to making these delicious squares is preparing the base. In a medium bowl, combine the 1 1/2 cups of vanilla wafer crumbs with the 1/4 cup of melted unsalted butter and 2 tablespoons of sugar. Mix this thoroughly until the crumbs are evenly moistened. You want the mixture to hold together when you squeeze a bit of it between your fingers. This indicates there’s enough moisture from the butter to bind the crumbs. Press this mixture firmly and evenly into the bottom of an 8×8 inch baking pan. You can use the bottom of a glass or a flat-bottomed measuring cup to get a nice, compact layer. Ensure the edges are also covered. This crust forms the foundation for our creamy layers, so taking a moment to press it well is worth it. Chill this crust in the refrigerator for at least 10 minutes while you prepare the next layer. This helps it set up and prevents it from crumbling too much when you add the filling.
Cream Cheese Layer
Next, we’ll prepare the creamy cheese layer that adds richness and a smooth texture. In a separate bowl, beat the 8 ounces of softened cream cheese until it is light and fluffy. Softened cream cheese is key here; if it’s too cold, it will be lumpy and difficult to mix smoothly. You can leave it on the counter for about an hour or so to soften. Gradually beat in the 2 tablespoons of milk and the 1/3 cup of sugar until well combined and smooth. Then, gently fold in 1 1/4 cups of the whipped topping. Be careful not to overmix at this stage; folding keeps the whipped topping airy. Finally, stir in the 1/2 cup of finely crushed peppermint candy cane or starlight mints. Make sure the pieces are small enough to distribute evenly throughout the mixture. Spread this cream cheese mixture evenly over the chilled vanilla wafer crust.
Chocolate Pudding Layer
Now for the decadent chocolate layer. In a medium bowl, whisk together the contents of the 1-package (4-serving size) instant chocolate pudding mix with 1 3/4 cups of cold milk. Whisk vigorously for about 2 minutes, or until the pudding begins to thicken. Instant pudding is designed to set up quickly, so don’t be alarmed if it looks quite thick after just a couple of minutes. Pour this thickened chocolate pudding evenly over the cream cheese layer. Use a spatula to spread it out, ensuring you cover the entire surface of the cream cheese layer without disturbing it too much. This pudding layer adds a familiar, beloved chocolate flavor that pairs perfectly with the mint and cream cheese.
Whipped Topping and Peppermint Finish
The final layer is a fluffy topping that brings the peppermint flavor to the forefront. Take the remaining 8 ounces of whipped topping and gently spread it over the chocolate pudding layer. Use a spatula to create a smooth, even surface. This acts as a light and airy contrast to the denser layers below. For the finishing touch, sprinkle the 1/4 cup of coarsely chopped peppermint candy cane over the top of the whipped topping. The larger pieces of candy cane will provide a delightful crunch and a more intense burst of peppermint with each bite. You can also use a few whole candy canes, broken into smaller pieces, if you prefer.
Chilling and Serving
Once all the layers are in place and the topping is sprinkled, cover the pan tightly with plastic wrap. Refrigerate the no-bake chocolate peppermint squares for at least 4 hours, or preferably overnight. This chilling time is essential for the layers to set properly and for the flavors to meld together. The longer it chills, the firmer the squares will become, making them easier to cut and serve. When you’re ready to serve, use a sharp knife to cut the squares into desired portions. A gentle wiping of the knife between cuts can help achieve cleaner edges. These squares are best served cold and are a wonderful addition to any dessert table, especially during the cooler months. They store well in the refrigerator for up to 3 days, covered tightly.
Conclusion:
These No-Bake Chocolate Peppermint Squares truly are a joy to make and eat. They offer a fantastic combination of rich chocolate, cooling peppermint, and a satisfying crunch, all without the need for an oven. They are perfect for making ahead for parties, holidays, or just as a special treat to brighten any day. The ease of preparation means anyone can make them, and the impressive results make them a favorite for gatherings. Feel free to adjust the amount of peppermint to your liking, or even try different flavors of crushed hard candy for a unique twist. These squares store well in the refrigerator, making them a convenient option when you need a dessert in a hurry. Enjoy sharing this simple yet delightful confection!
Frequently Asked Questions
Can I make these ahead of time?
Yes, absolutely! These No-Bake Chocolate Peppermint Squares are best made a few hours or even a day in advance. This allows the flavors to meld together and the layers to set up properly. Store them covered in the refrigerator.
What kind of peppermint candy works best?
Both finely crushed candy canes and starlight mints work well. For the filling, it’s important to crush them finely so they incorporate smoothly. For the topping, a coarser chop adds a nice texture and visual appeal. Any hard peppermint candy will generally do the trick.
How should I store leftovers?
Leftover squares should be stored in an airtight container in the refrigerator. They will keep well for up to 3-4 days. The whipped topping might soften slightly over time, but the overall texture and flavor will remain enjoyable.
No-Bake Chocolate Peppermint Squares
A festive and easy no-bake dessert featuring layers of chocolate pudding and a creamy peppermint cheesecake filling, topped with crushed candy canes.
Ingredients
-
1 1/2 cups vanilla wafer crumbs
-
1/4 cup unsalted butter, melted
-
2 tbs sugar
-
8 oz cream cheese, softened
-
1/2 cup finely crushed peppermint candy cane
-
2 tbs milk
-
1/3 cup sugar
-
1 1/4 cup whipped topping
-
1 pkg 4-serving size instant chocolate pudding
-
1 3/4 cups milk
-
8 oz whipped topping
-
1/4 cup coarsely chopped peppermint candy cane
Instructions
-
Step 1
In a medium bowl, combine vanilla wafer crumbs, melted butter, and 2 tablespoons sugar. Press mixture evenly into the bottom of an 8×8 inch baking dish. -
Step 2
In a separate bowl, beat softened cream cheese until smooth. Beat in finely crushed peppermint candy cane, 2 tablespoons milk, and 1/3 cup sugar until well combined. Fold in 1 1/4 cups whipped topping. -
Step 3
Spread the cream cheese mixture evenly over the crust. -
Step 4
In another bowl, whisk together instant chocolate pudding mix and 1 3/4 cups milk until thickened, about 2 minutes. Spread the chocolate pudding over the cream cheese layer. -
Step 5
Top the chocolate pudding layer with the remaining 8 oz whipped topping. -
Step 6
Sprinkle the coarsely chopped peppermint candy cane over the whipped topping. Refrigerate for at least 2 hours before serving.
Important Information
Nutrition Facts (Per Serving)
It is important to consider this information as approximate and not to use it as definitive health advice.
Allergy Information
Please check ingredients for potential allergens and consult a health professional if in doubt.



Leave a Comment